
Manchester Guitar Tech


Ozzy Lister – guitar and bass repair
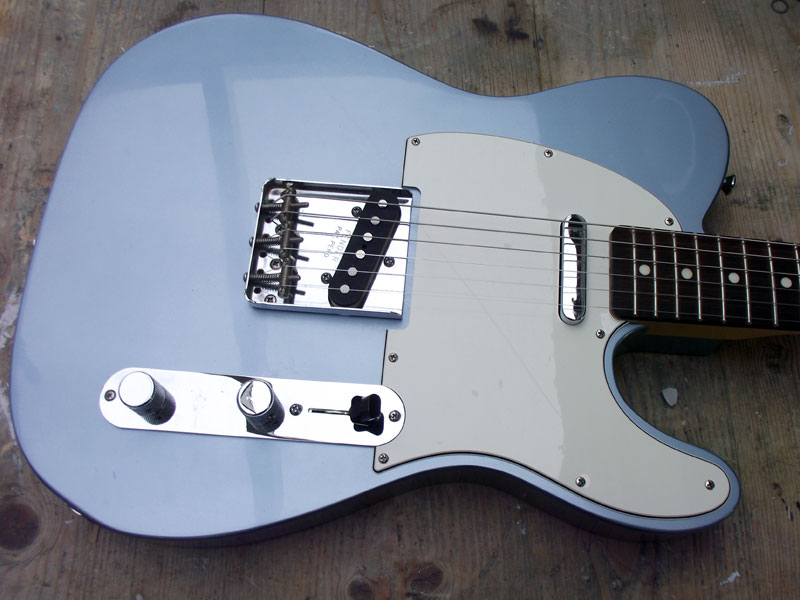

Finished Ice Blue Telecaster
Here is the Telecaster assembled.
I’ve used the bridge from a Fender USA 62 Reissue, Fender jack cup, AllParts parchment ‘guard and some great sounding hot AlNiCo V pickups from The Creamery.
I’m considering giving it the freezer treatment once the lacquer has hardened sufficiently.
Preparation
Finishing alder is much easier than painting an ash body as the wood is more tightly grained. The reduction in finishing costs is why Fender used alder bodies for their solid colours and sunbursts from the late fifties.
As with any wood however, preparation is absolutely fundamental to achieving a good result. If you skimp at any stage you will pay for it later so it’s worth while spending the time to do things right.
I’m going to be finishing this body in Ice Blue Metallic lacquer it was a toss-up between that and Charcoal Frost which I also love.
Sanding

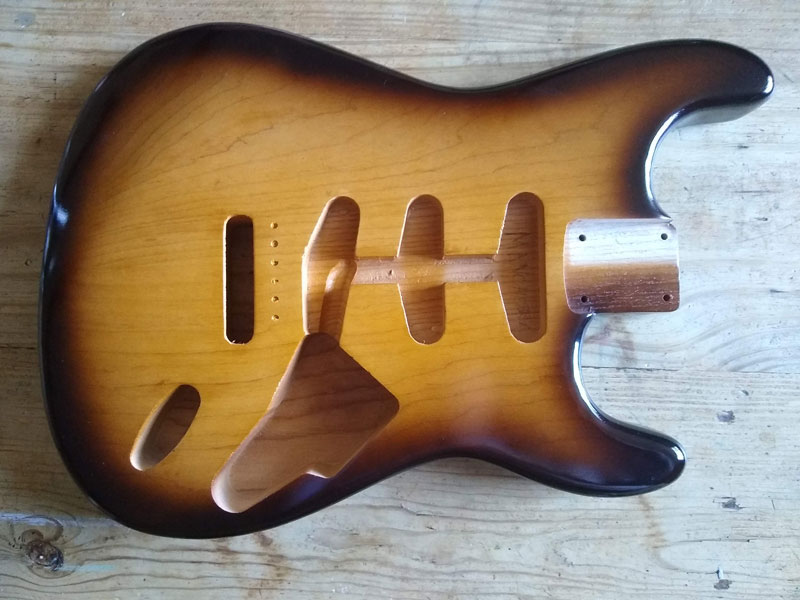
Body as received
Most bodies you buy will be straight out of the milling machine. This means that they may well have rough edges which you need to sand.
The body I am using came, like the ash Telecaster body, from Guitarbuild.co.uk and it’s well made from 3 pieces of alder. They can supply one-piece bodies but they do cost a bit more.
I sanded well to 240 grit using a flat block for the front and back and some sandpaper wrapped around my fingers to get into the routs to clean out the loose wood.
Sanding sealer

Sanding sealer has raised the grain
The next step is to spray a couple of heavy-ish coats of sanding sealer. The first coat soaked right in as alder is a very “thirsty” wood, especially on the end grain. I don’t worry too much about finesse at this stage as I’m going to sand back anyway.
You’ll notice that the colour deepened from light brown to pale orange with the sealer applied. This is normal and the reason Fender bleached all their alder bodies before sunbursting them. I’m aiming for a metallic finish so I don’t mind if my wood has a bit of colour.
You’ll notice that the sanding sealer raises the grain so I needed to sand back again with 240 grit to give a perfectly smooth surface.
There is more information on using sanding sealer and an index coat here.
I sprayed another couple of coats of sealer and after leaving it to dry overnight, flatted back again.
I used 3/8″ and 5/16″ drills to clean any dust and sealer out of the string ferrule holes on the back of the body before spraying the primer.
Primer coats
If the sanding sealer is to give a smooth surface, then the primer coat is intended to give a bright uniform colour to accept the lacquer.

Body ready for priming
You don’t really need primer but I think it helps give a good result. Alternatively, you could use primer instead of sanding sealer as it will do a similar job but it can be a bit soft if sprayed too thickly. The fact is that if you sand the wood flat, both layers are pretty thin and do the job each is supposed to do.
Anyway, in order to spray the guitar body I need to hold it somehow. I’m using a one metre length of one inch square section mild steel tubing which I have drilled and tapped at one end to accept M4 machine screws. I can clamp this to a work surface, with the body suspended so that I can spray all around it easily. The weight of the steel tube acts as a counterbalance to the body and helps avoid accidents where the body dives to the ground. The front of the bar is held away from the neck pocket by a washer around the screw between the bar and the wood so that it doesn’t touch the edge.

Body with first coat of primer
I sprayed one coat of three passes over the whole body. After the first pass of primer, the wood grain was still showing through but after 3 passes I had an even white surface.
Once the body was an even colour I noticed one small imperfection, a small ding on the edge probably caused by handling. It can be hard to see this kind of damage when you have the wood grain camouflaging it but with an even coloured surface any blemishes stand out and now is the time to address them. I filled the ding with a tiny amount of Ronseal white 2-pack wood filler and sanded smooth. I then sprayed the repair with another coat of primer to blend it in with the rest of the body.
It was just left to block sand lightly before moving on to the colour coat.
Metallic lacquer colour coat

First pass of metallic lacquer around the edge
As will all colours, the lacquer should be sprayed in several thin coats. This is especially true of metallic lacquers, which because they are reflective, will show or even highlight every imperfection.
Spray using the same technique as shown in the butterscotch demonstration.

After one coat of metallic, primer still showing through
The photo on the left shows the first pass of colour, around the edges. you can I hope see how fine the spray is.
The photo on the right shows the body after one full coat (three passes) of lacquer and you can clearly see the primer showing through.
When spraying be sure to cover the sides of the body well as they are easy to neglect. Pay extra attention to inside the cutaway which can be difficult to reach when using this method of supporting the body. Resist the temptation to spray heavily here as runs will need sanding out. Remember to use thin coats.
By the time the third coat of lacquer is on the primer coat is completely covered and it’s time for the final “misted” coat of metallic.
Final misting coat of metallic lacquer
The final metallic coat is dusted on so that the metallic particles lie at different angles enhancing the metallic effect. If the metallic is sprayed too wet, the particles lie flat and the reflectivity is less.
The video below shows the misting technique.
Don’t handle the body at the stage as the dusty finish is quite fragile and the metal flakes will come off on your fingers leaving a mark. I sprayed some clear coats straight away (see below) to stabilise the metallic.
Clear coats
The first few coats of clear should be misted similarly so as not to wet the metallic, so causing the flakes to flatten. When spraying this body I used half a can of Clear Gloss lacquer dusted very lightly all over the guitar body until I was sure that the metallic flakes were covered and locked in place.

Clear coats sprayed
I then sprayed another whole can of Clear Gloss lacquer but wetter this time to build to a reasonable thickness of lacquer.
You can see in this photo that the body is looking quite reflective in the sunlight.

Finish straight out of the can
Well it’s dried beautifully smooth with no orange peel and there won’t be any need to flat sand this body. Must be all my painstaking prep work!
I’ll wait a couple of weeks before buffing.
Bill of Materials
I used:
- ¾ can Cellulose Sanding Sealer
- ½ can White Nitrocellulose Primer
- 1 can (almost) Ice Blue Metallic lacquer
- 1½ cans Clear Gloss lacquer
- a tack cloth
I also used 180, 240 and 320 grit 3M “Sandblaster” abrasive
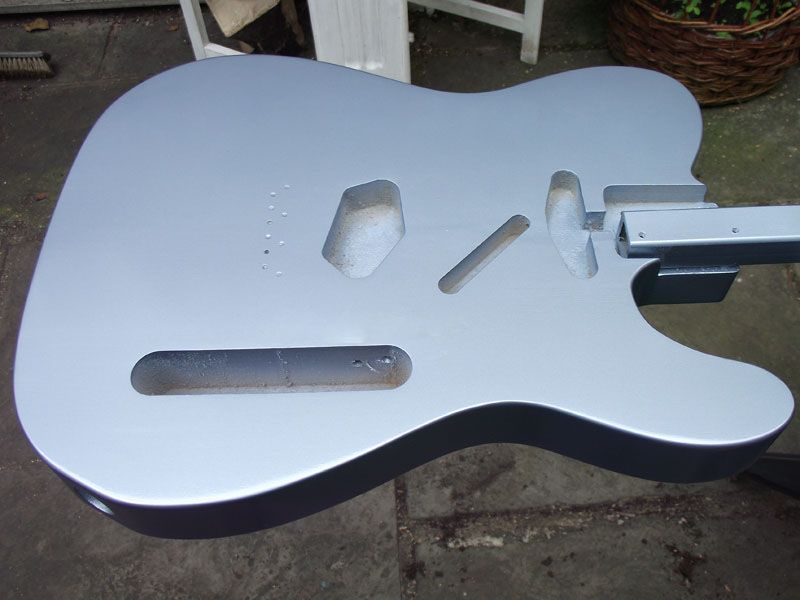
Will experiment with a relic treatment on the body instead.
Here is the distressed Telecaster body. Here’s how I distressed the lacquer.

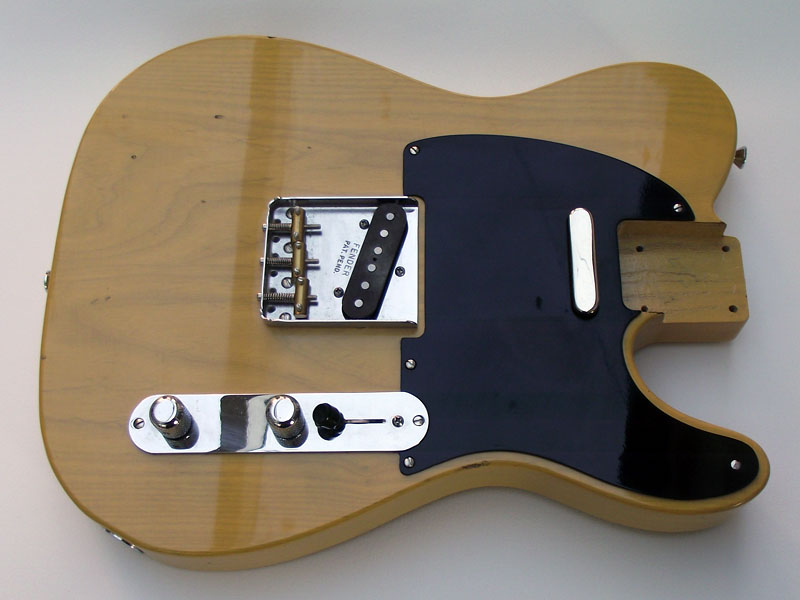
Butterscotch Telecaster body with hardware fitted
I’ll distress the ice blue metallic Telecaster next.
I gifted the butterscotch Tele to Pete (him with the freezer). Hoping he’ll let me freeze more guitar parts soon…