
Manchester Guitar Tech

Finishing an Ash Telecaster in Butterscotch nitrocellulose lacquer
I’m often asked how to spray a butterscotch guitar body so thought I’d put together a bit of a tutorial.
Please note that I do not offer a refinishing service.
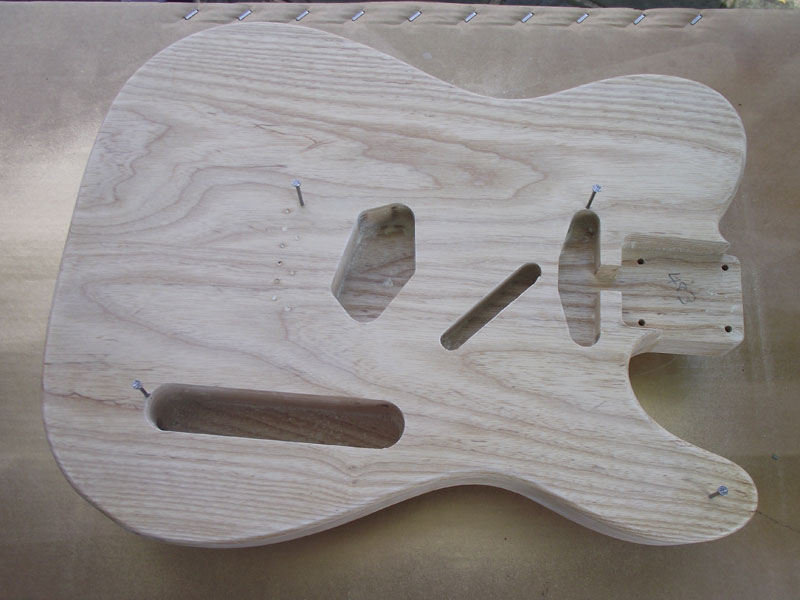
The body I’m using is by Guitar Build who offer a range of CNC machined guitar bodies. I’m very impressed with the accuracy of the shape, which even includes a “router’s hump” for vintage fans. It is two piece, centre joined and a reasonable weight. One piece bodies are available.
I can’t stress enough how preparation is key to a good result. Every stage in painting relies on the previous one being done right. It’s not difficult, it just takes care and patience, and the results are worth the effort.
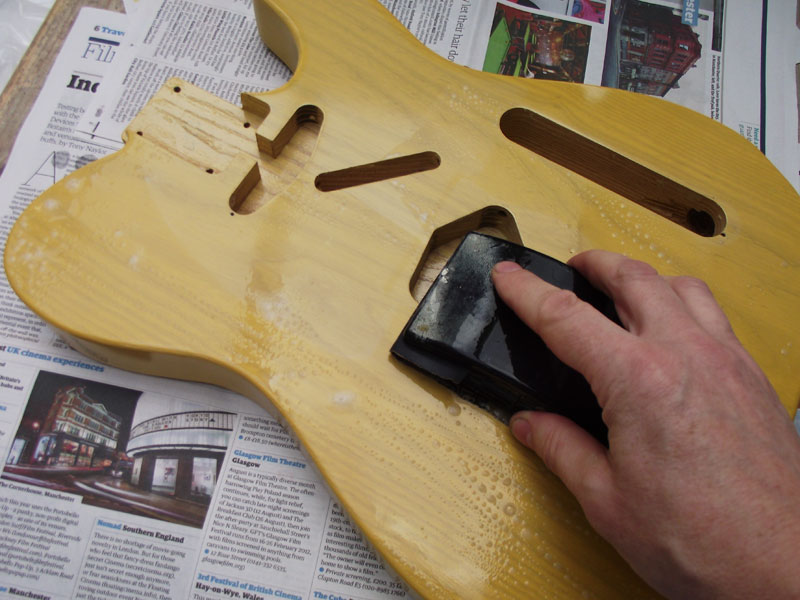
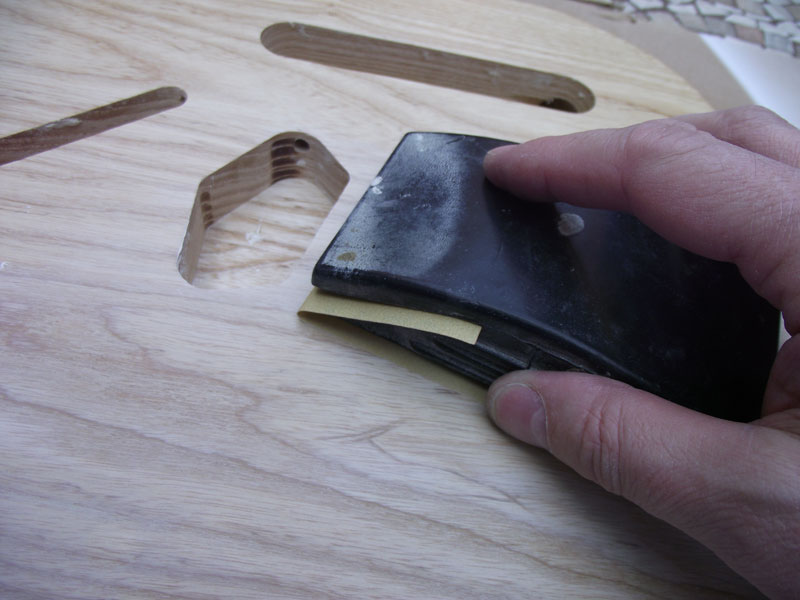
Initial sanding.
The first step to finishing a guitar is to sand the wood to make sure every surface is flat and free from ripples and imperfections. Remember that you can’t make a guitar body flat when finished if it doesn’t start out flat. Any holes must be filled before proceeding. Use P240 grit paper and a flat block, moving along the grain and sand thoroughly until you are satisfied your surfaces are smooth. Don’t forget to sand the edges of the routs smooth too as they often have a fuzzy edge straight out of the machine.
Grain filling
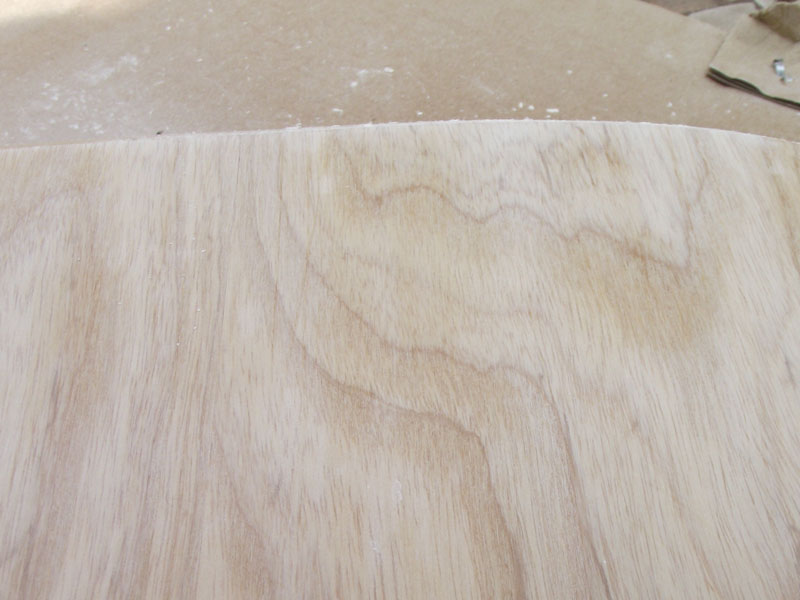
The next step is to fill the grain. I’ve already covered grain filling in a previous post, so won’t show the details again but I will say that if you don’t fill the pores in the wood, you will get pin-holes which will spoil your finish.
Once the filled body has been sanded with P320 grit sandpaper it should feel very smooth to the touch and it will be ready for the next step, sanding sealer.
Sanding Sealer
 You should spray 2 or 3 coats of sanding sealer. The purpose of sanding sealer is to give you a perfectly smooth, non-porous surface for the lacquer.
I just laid the body flat, sprayed the front and sides, let it dry, flipped the body over and sprayed the back and sides. The sealer only takes an hour or so to be hard enough to handle.
 Sand the sealer using a flat block and P320 sandpaper. You should end up with a matt appearance all over the body. If you have any shiny areas then they are low spots and you shouold spray another couple of coats of sealer, allow to dry and sand again.
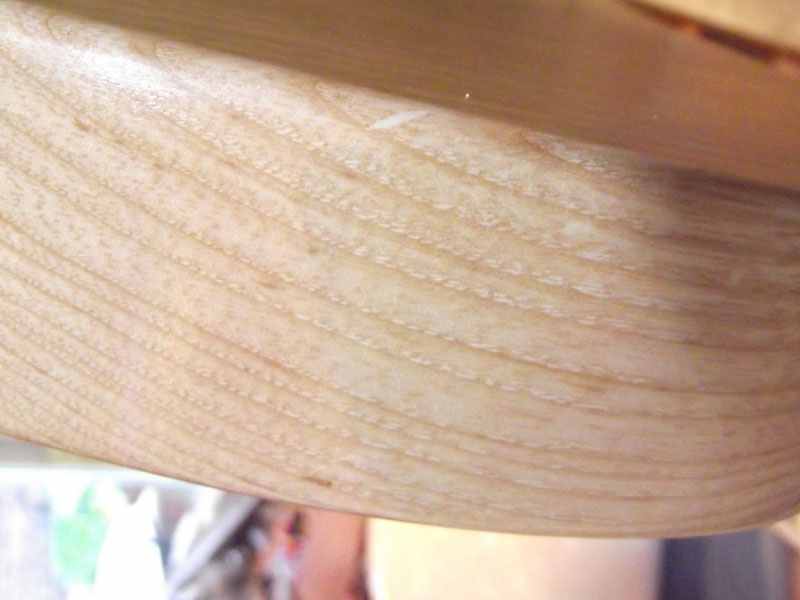
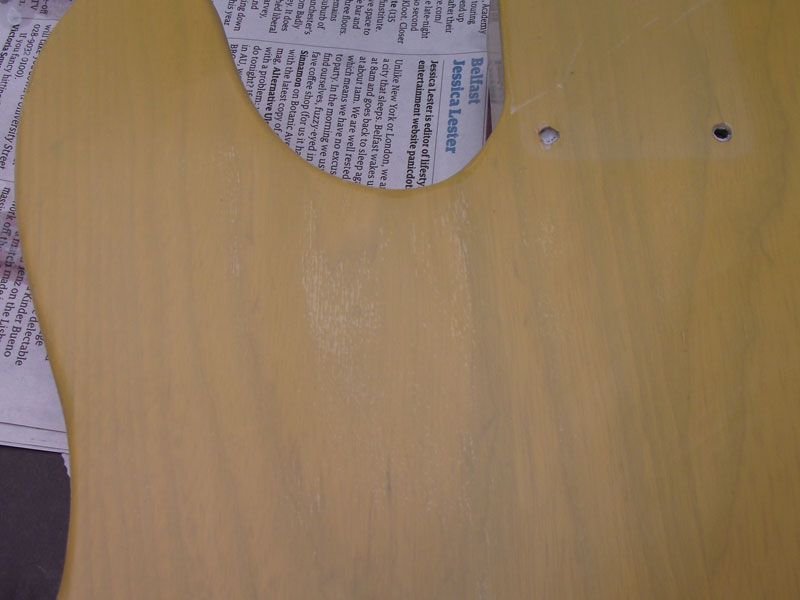
Low spots, which I’ve tried to show in the photo (the darker areas) generally appear in the more porous parts of the wood, which are softer and prone to sanding more easily than the denser, harder areas.
 Inspect the body carefully for any rough areas or pores that may have escaped the filling and sealing process, and if neccessary, use more sealer or even grain filler if necessary.
The picture shows how it should look. You can see the grain filler (the lighter spots) in the pores of the wood. You can see too that the grain filler has coped with a small imperfection on the edge of the body.
The sealing process took about half a can of my nitrocellulose sanding sealer.
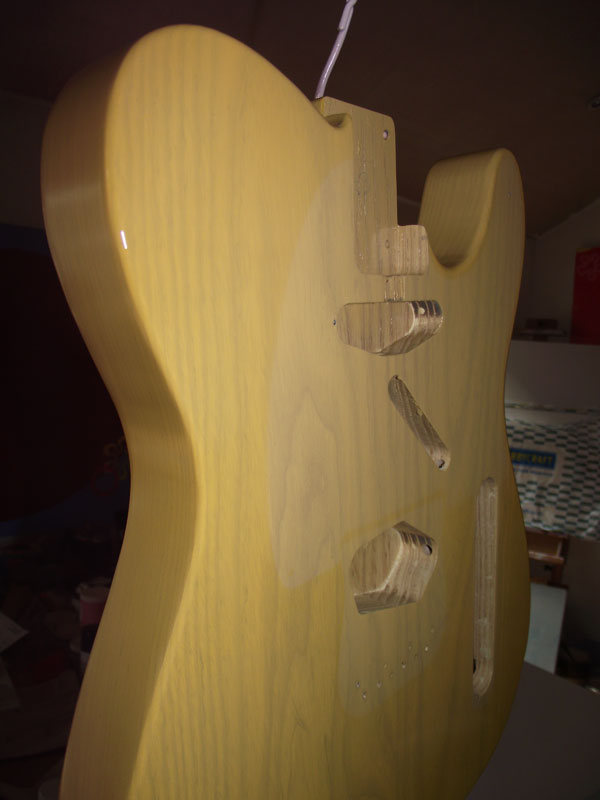
Once you are happy that the body is perfect it’s time to apply the lacquer.
Nitrocellulose colour coat
Inspect your sanded guitar body and make sure that it’s ready for the butterscotch lacquer. Give it a final sand if necessary and lightly wipe it down with a tack cloth. Now is also a good time to clean out the ferrule holes on the back of the body.
 There are a few different ways to support the guitar body whilst spraying. You can hang it from a hook through a neck mounting screw hole or you can fasten a length of wood or metal through the neck screw holes to act as a handle.
I used a third method, and the one that Fender used up until 1965 of using nails as legs. There is an account of this on the Vintage Fender website.
The front of the body is sprayed first, then once dry enough to handle, it is flipped over onto its legs to spray the back.
Spraying technique – the front
I have supported the body on a small box so that the sides are clear of the work surface.
Note how I spray in overlapping lines, starting and stopping the spray at the start and end of each pass. Each coat consists of two or three complete passes of the spray and dries in minutes.
Spraying the sides
See how my aerosol can follows the curves of the sides, especially in the cutaway. Also the way I start and end each pass so that there are no hard edges and each pass blends with the next.
Spraying the back
Once dry enough to handle, the body was flipped over onto its nail legs. Again, just like the front, the back was sprayed with overlapping straight lines, starting spraying before the lacquer hits the body, stopping one the spray is clear of the body. The sides were sprayed again with the body in this position, giving them a little more coverage, just like the old Fenders of the 50s.
You can see I hope the way that the colour is starting to build up. On the front and back of the body I sprayed three or four coats each consisting of two or three passes. I left a few minutes drying time between each coat.

Butterscotch coat hanging to dry overnight
I used almost the whole can of butterscotch lacquer on the body and the whole process, on a warm summer day, took no more than half an hour for the whole body.
Here’s the body hanging to dry before the next step.
Darkening the finish
Now I like a nice creamy butterscotch but as this is meant to be a tutorial I thought I’d yellow it slightly for a more aged look.
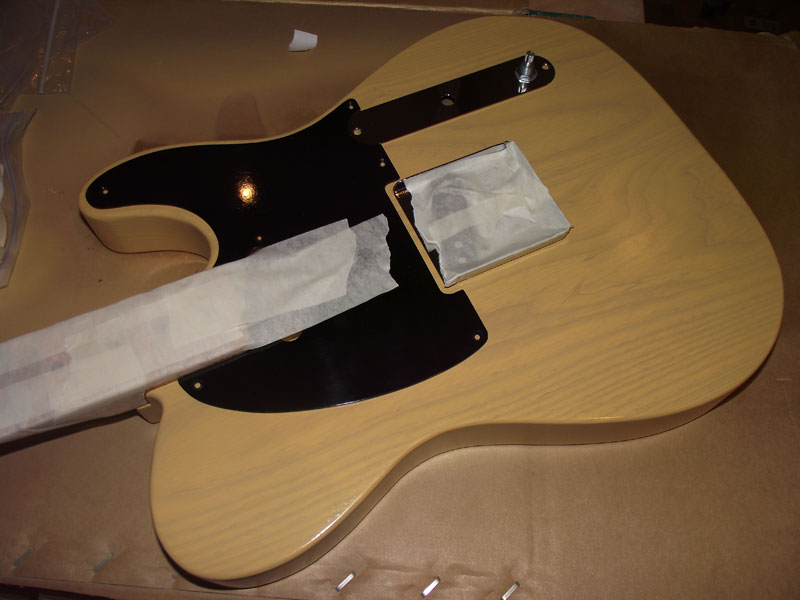 As an experiment I thought I’d mask off all the areas that wouldn’t see sunlight by attaching the hardware and spraying a tinted lacquer over the rest.
The bridge was held with nails in the string-holes and the pickguard and control plate with small pieces of double-sided tape.
I could have covered the hardware with masking tape but didn’t want to over-mask and it was easier to clean the chrome with cellulose thinners than to mask!
 I sprayed the body using the same technique as above with some amber tinted lacquer, front back and sides. Spraying took about 15 minutes with about three or fours passes of the spray.
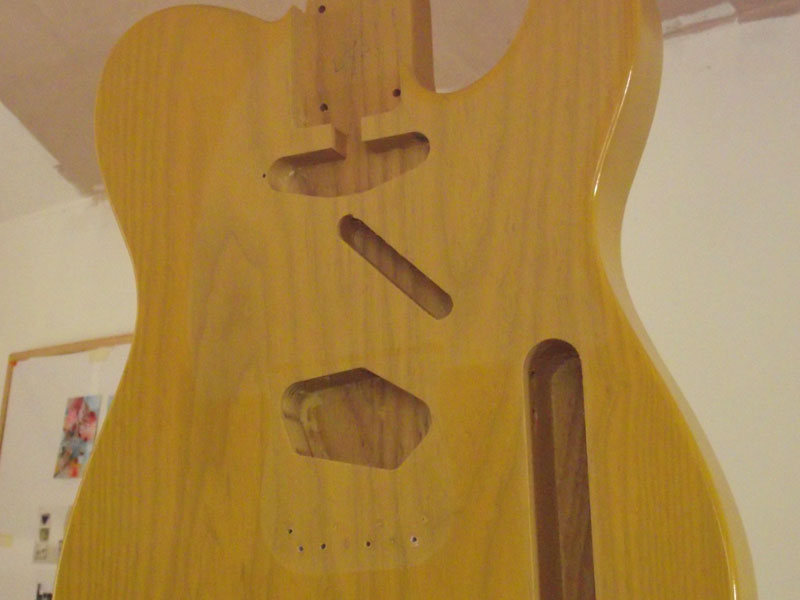
Here’s how it looks after the hardware was removed. I think it’s cool that it has tan-lines around where the “ashtray” bridge cover would be fitted.
It’s hanging to dry until tomorrow when, weather permitting, I’ll put the nail legs back in and spray the clear coats.
Nitrocellulose Clear Coats
Well it was a dry day today so I took the opportunity to spray the clear coats.
Spraying technique is the same as for the butterscotch but moving the can a bit more slowly so that the coats went on wetter and flowed to a gloss finish. Again, spraying front and back took no more than about half an hour and I used one and a half cans of Clear Gloss lacquer. You may need more if you are inexperienced!
You can see in the shots below that there is already a reasonable degree of shine.
Note that I have not sanded the lacquer since the last coat of sanding sealer. To do so would risk sanding through the colour and creating uneven patches.
Next job, after the lacquer has hardened for a couple of weeks is flat sanding.
Flat sanding the body
 If you want to get a perfect shine to your guitar body, flat sanding is essential. You’ll need a rubber sanding block and some water with a dash of washing up liquid. The detergent helps keep the abrasive clear of lacquer and lubricates the body so you get a finer finish.
I started with P800 grit paper as my body was pretty flat to start with. If you have an uneven finish (and you shouldn’t if you prepared well and sprayed correctly) then you may need to start with P400 paper. This will however increase the risk of a sand-through which is disastrous.
Also don’t get the body too wet as if water gets onto bare wood it will swell the wood and crack your new finish. You can plug holes with wax to help avoid this.
Wet your block and sand the body in a circular motion. Be very careful not to sand the corners as this risks rubbing through your lacquer.
You should be able to feel the suction between your sanding block and the flat surface of your guitar body.
 Once you think the surface is flat, wipe down with a paper towel and inspect for shiny spots as shown in the photo. These will generally be (as with the sanding sealer previously) in areas of more porous grain. Sand until these spots are gone, but do be careful not to sand through so take things slowly and use discretion. It’s better to have a bit of grain sinkage than patches of bare wood.
 Take extra care on the sides, using your fingers to follow the curves. I’d recommend that you don’t sand the edges at all, rather than risk a sand-through.
Once you have eliminated all low spots, you can follow with P1200 paper, which should leave you with a flat, matt guitar body as shown.
Buffing the shine
 The next step is to buff to a high gloss and an automotive scratch remover like T-Cut is fine for the job. Specialist products however such as Farécla will give a deeper shine.
 I never use a mechanical buffer as doing it by hand doesn’t take very long. A couple of minutes with T-Cut on a piece of mutton cloth brought the body to a high gloss.
Work your way across the whole guitar body, taking extra care inside the cutaways and on the edges. Check carefully for dull patches and buff again if required.
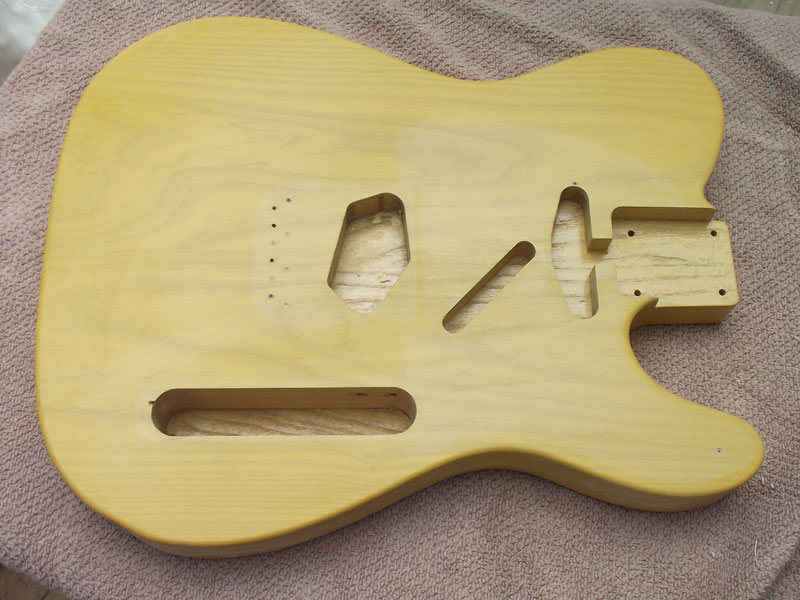
The finished guitar
Here is the guitar assembled, strung and set up.
I have since “reliced” the body.

The assembled guitar
What’s the best way to bring out the darker grain in Ash if you are concerned you won’t see enough of it once you finish it as you have done with the butterscotch finish.
Your 1 piece was a premium grain Ash body. Which looked like the soft grain was quite a bit darker than std. Swamp Ash. I’m looking at ordering a 1 piece Swanp Ash body from Guitarbuild.
Is it ok to use a water based stain and lightly sand the top? Would you do this before grain filling, which would be my guess?
The butterscotch finish and cream strat finish look fantastic and the style of finish I hope to achieve.
I’d recommend not trying to enhance the grain but spraying a thinner coat of lacquer so as not to obscure the natural wood patterns.
If you do want to highlight the grain though I would suggest using a darker grain filler which will do this.
Thanks Steve, Much appreciated.
Hi Steve
I have made a telecaster body and sprayed it butterscotch blond that was a couple of weeks ago when I eventually apply the clear lacquer do I need to rub down first with wet&dry sandpaper.
No, if you rub down you’ll risk making it thinner in places and therefore patchy.
Being lacquer, subsequent coats will always partially dissolve and bind to previous coats so you don’t need to key to get adhesion.
Just wipe down with a tack cloth to remove any dust that may have settled on it.
I have a 2006 butterscotch vintage reissue 1952 where the finish has formed three approx” 1” cracks along the bottom edge on the cut away curve section. Any suggestions on how to repair those?
There’s no reliable way I know sorry.
Hi Steve,
I have to ask. What spray product did you use? I used G. Reranch and the finish came out WAY too dark!!
I first used a lighter blonde spray with fake components on so as to create a ‘shadow’. Then I sprayed the G. Ranch and it was too dark, what do you suggest?
Well I used my own products of course :)
I’m sorry but I can’t ship these outside of GB due to restrictions on transport of hazardous materials.
Thank you very much for this tutorial. I am working on my first build, a Micawber replica, and will be ordering the my spray cans from here when I’m ready to start the finish work.
I have a question if that’s OK? Did you spray all your clear coats in one day, just leaving some time in between for them to dry or did you do them over multiple days?
I did them all on one sunny day, just leaving a few minutes between for them to dry.
Thank you Steve, and how many coats would you recommend. I don’t think I saw that in the article, apologies if I just missed it.
Also, would it be possible to darken and yellow the finish even more by using your Clear Amber rather than your tinted gloss over the butterscotch? I really want quite a yellow finish if possible.
Thank you.
The number of coats depends how heavily you spray them!
The Clear Amber is more yellow and can be used of course. Spray as much as you need to get the desired colour and no more. It’s very easy to spray “just one more coat” and totally overdo it.
Thanks again Steve for your reply. I’ve just placed my order on your site so looking forward to getting on with the job and seeing how it comes out. Thanks.
Hi Steve, Another question if that’s OK.
I’m thinking more about how yellow I want my spray to be, I’d really like to get something like this, which seems more yellow than a butterscotch/amber combo. I was wondering about putting in another order for some of your clear yellow and putting that on top of the butter scotch rather than the clear amber. Do you think that will get my closer to the one linked below.
https://atkinguitars.com/product/guitars/electric-guitars/the-fifty-two/the-fifty-two-002/
Ah yes the Clear Yellow lacquer is much closer to that colour.
Hi, can you tell me are there different “blonds” I notice some vintage blonde telecaster’s differ. Some are less transparent with less grain showing and lighter with more of a faded / aged white look, while some are darker with lots of grain, almost like a varnish over bare wood? Keith Richards Micawber vs Bruce Springsteens’s tele for example. How would I recreate the former vs the later?
Fender’s original “Blond” guitars used a semi-opaque white lacquer which showed the grain, like the examples here. Over time the early 50s guitars’ lacquer yellowed to give what is now known as “Butterscotch”, and this is what Mikawber is. I’ve an FAQ on creating Blond and Butterscotch here.
Springsteen’s guitar has been refinished, stripped of its blond lacquer and given a coat of lacquer (which was either amber or has subsequently yellowed) straight onto the wood with no opaque layer.
Hi Steve can you use a stain to obtain this colour and then lacquer rather than use a stained lacquer
No a stain won’t give the required opacity.
Alternative methods are here: How do I get a blond or butterscotch finish?
Okay cheers Steve, reason i`m asking is because I use stains a lot in my profession and always stain then lacquer. Stained Varnishes/lacquers are frowned upon. I`m starting a Tele project this week so just about to order a couple of cans, I already have a CIJ telecaster so i`m looking at obtaining the same finish as that.
What finish is the Telecaster you have? It won’t use a stain I’m sure!
Its a high gloss 1962 re issue two tone tobacco burst with white binding
I demo creating a two-tone sunburst here.
Used this back in 2015 to paint my first ever build and it went really well – now looking again at it because I want to see if I can do a better job second time round (and I regretted putting some stickers on..) Glad to have re-found the same guide so I can go for this again!
Hi Steve,
I’m trying to repair a tele butterscotch.
It has a dent near the bottom edge. It’s about 2” long not very deep but it did crack the finish on the edge. I sanded and filled with bondo sanded it to near perfect.
Then sprayed with Ohio Valley Nitro butterscotch lacguer.
1st problem, new paint is way to transparent. The grain shows through too much.
2nd problem after several coats to try and hide the grain, the repaired section is much darker than the rest of the guitar.
Like doing auto body work I thought I could blend it in. Is this an impossible repair job I’m trying to do without sanding the whole body down to bare wood?
Appreciate your help!
Thanks
Bob
The product page does say that “This has a high level of transparency and will reveal the grain of the wood.”
I think you need to drop fill the repair but it is very difficult to get a match of both colour and transparency.
Try spraying some of the lacquer into the lid and then adding some white to make it lighter and more opaque. Apply to the area using a small brush or a toothpick. You probably won’t be able to achieve a perfect match (I hardly ever can) but you may be able to get close.
Hey Steve, this is such a helpful tutorial. Thanks for doing it! Just wanted to ask, is there any specific way I should be hammering the nails in to the body for the legs? I’m just scared of splitting the wood. I’m using a 3 piece swamp ash body from guitar build (thanks for the tip!).
You only need quite small nails such as 20mm oval type and don’t tap them very far in.
Hello Sir,
Thanks for all the information. When spraying the clear coats, how long must I wait until the body can be flipped back on its back in order the spray the top again? Or do you apply all the clear coats to the top/sides before flipping the body so that it rests on the nails?
Thanks again,
Todd
I get as much on the front as I can, then flip it and do the same on the back.
Next day the lacquer is hard enough to repeat the process.
I see. I misunderstood your tutorial. I thought you meant you clear coated the guitar in about half an hour and were done.
Great work Steve! And great tutorial, very detailed.
I’m building by first tele kit (ash). I have two questions for you, if you don’t mind:
1- This will roughly be my order of actions: stain, grain filler, sand, sanding sealer, sand, clear lacquer/sand, final couple of clear lacquer coats – then final sanding and buffing. Is this correct?
2- You recommended Farcela as a brand for fine polishing. I was thinking of sanding to 2000-2500 grit. Should I use farcela G3 and G10 after that, for a good finish?
Thanks!
Tom
Hi Steve, I am looking into finishing a tele in butterscotch blonde. I’ve noticed some vintage fender blondes that are now butterscotch had a white primer underneath but could still see some of the grain, tho quite opaqued. What are your thoughts on this?
Also, I have a desire to have the finish sinking into the grain a bit like a vintage guitar, is there a way to achieve this?
Thanks!
Michael
Fender used a variety of techniques to create the blond colour. See my FAQs for details. You’ll want to use the White Blonde with Light Tint over the top.
To get grain sinkage just don’t go overboard on the sanding sealer and it will happen. It’s easier to get grain sinkage than not!
Thanks for your response Steve!
Have you heard of using white primer underneath a butterscotch finish before while still making the grain somewhat visible?
Yes you can use white primer although this is designed to obscure what is underneath and you need to have a light touch to keep the grain showing.
Hi Steve – I’ve been following your post fairly intently and have just applied the colour coat. Unfortunately I’ve ended up with with a couple of small “droplets” on my finish from an almost empty can spitting lacquer towards the end. They’re quite small but noticeable when light shines on the finish – I guess its the equivalent of the lacquer runnings but because I’m spraying with the body facing up as per your post the excess lacquer pools rather than runs.
I’m planning on spraying the clear coats tomorrow – I’m hoping that a fairly thick coat of clear nitro will blend into the colour coats and mask/neutralise these droplet marks. Will this work, or should I get the sanding block out?
Best,
Daniel.
Yes, if the drops are only small and the colour is consistent then they should disappear into the clear coat.
Great – thanks Steve.
Hello. Hello from Canada. First time I,veg ever seen this site. It’s spectacular. I’m just starting
To finish a raw ash tele.i,m trying to end up with translucent finish similar to the ones from the fifties but lots of grain showing. Do you have a lacquer spray or dye I could put on before I clear coat it with nitrocellulosty for now
It’s possible to control the opacity by using less of the Butterscotch colour (which contains white pigment) and more Tinted Gloss over the top.
I’m sorry to say though that due to transport regulations I’m unable to send lacquer to Canada.
Hi Steve – Thanks for the reply, As I said I prefer the solid colour look, perhaps its because I’m a child of the 50’s/60’s !!!
Thanks again. John
Hi Steve – I’m 3/4 the way through restoring a Telecaster, Sanded, grain filled and butterscotch lacquered, very pleased so far other
than losing the grain of the wood almost completely, like a solid butterscotch colour. Before I put on the 3 coats of gloss lacquer is there any way I can restoret some of the grain. I like the almost solid colour but unfortunately the guitar is my sons and when I showed him the pics so far he didn’t look to impressed – He shouldn’t be so fussy as he trashed the finish trying to RELIC it and its now left to me to sort it , Kids !!! Thanks John
Hi John,
I’m sorry to say that you can’t without removing some of the butterscotch which is practically impossible to do without destroying what you’ve done.
Some 50s guitars (and pretty much all those of the 60s) showed very little grain if that’s any consolation.
Regards, Steve
Hi,
Nice tutorial,
What do you do with all pre drilled holes? Especially ferrules so they fit later? Just ordered a body from guitarbuild and I will be following your tutorial to finish it.
Thanks,
It’s good if you get lacquer in the pre-drilled holes so that you don’t later soak the wood (as mentioned in the text)
As for the ferrules, see this post “Inserting Telecaster String Ferrules using a soldering iron“
ok thanks for that. Do I need to mask off neck pocket? All the bodies I have seen were not painted / sprayed in neck pockets but all videos on youtube have neck pockets not masked off?
Hi Steve just ordered paint from you. I’m using alder from guitarbuild. Do I need to seal the wood? I was thinking I’d use your primer, colour coats then clear finish
Yes you do, otherwise you’ll never get a smooth finish.
Alder just soaks up lacquer – see https://www.manchesterguitartech.co.uk/2012/03/27/more-on-preparation-sanding-sealer-and-using-an-index-coat/ for details.
If you have primer you can use that instead of sanding sealer, just use it the same way, spray generous coats until it stops soaking in, flat it back and spray another coat or two to give a level surface and even colour.
thank you so much!
hi steve! im planning on doing something similar to your finish on a mahogany body and a flame maple top with black binding. i plan on using watered down black ink to raise the flame before the process you have shown here. i would like the top and body to have a similar finished color, but it doesnt have to be a match. im going to use filler for the mahogany. my question is…although , will there be a problem mixing the black ink and the amber lacquer?
Hi Wade, Yes you will be quite safe spraying the Clear Amber lacquer over your ink-stained maple, once the ink is dry of course!
Hi! Thanks this is very helpful! What paint are you using and where did you get it? Thanks
Hi Blake, I’m using the same lacquer that I supply here https://www.manchesterguitartech.co.uk/shop/.
Hi Steve!
I must have lost my first message. Hope you got it.
It was about painting a Tele in “Italian” red and trying to keep the bright white binding clean.
How would I mask the binding? My current thinking is to carefully mask the binding for the first coats then carefully scrape the binding clear and finish with a clear coat…..or should I do all the lacquer coats and then scrape the bindings and THEN polish to get the bindings clear.
I would be grateful for any advice.
Thank you. Michael
Hi Michael, your thinking is correct – apply the colour coat then scrape the binding to a sharp edge. This is best done before the lacquer gets too hard to prevent chipping. You then spray clear coats over the colour coat and binding.
Doing a tele bass with an ASH body, although I don’t want the same finish, your post has been very helpful! I’ve just finished the sealing now. Thanks!
Hi Steve. Still working on prepping the wood for painting. However I like to think a step ahead. Would it be the same 3-4 of colour coats and same technique for solid colour finish? And no sanding between colour coats?
Thanks as always.
Hi Aldis, yes pretty much the same. Sanding between coats (unless you have a problem you need to fix) is just a waste of lacquer.
Hi Steve,
What a great job! I’ve tried something similar (with your products which are great, btw).
However, I’ve overdone the tinted lacquer (it looks too orange). Is there anything to be done? Or do I have to sand back to the wood and start again?
Scott
Hi Scott, sorry to hear you overdid the tint. Unfortunately it’s virtually impossible to go back a step without going too far.
If you do want to strip to the wood, it’s much easier to use cellulose thinners to remove the lacquer rather than sanding.
Hi,
Do you have any tips for creating the kind of finish you would find on a Bill Nash tele? (i.e. very thin finish with virtually no gloss for maximum resonance). I’m not too worried about the artificial aging that he does!
Cheers,
Tom H
You can get a very thin finish if you follow the steps above. The better you prepare, the less lacquer you need. I have no idea what techniques Bill Nash uses but you can de-gloss by rubbing the finish with wire wool. Or by using a top coat of Clear Satin lacquer.
Thank you for this, really helpful.
I have an ash body I want to spray white but like the idea of the grain almost bein ‘visible’ when caught in the right light. Will i not need to sand seal/grain fill before spraying.
Plus I’m thinking of a few light coats so the guitar relics faster – do I sound mental?
Cheers and great website!
Thanks Tom. If you want a smooth finish but the grain showing through, you could use my White Blond lacquer. What I think you want though, is the texture of the grain to show through? If that’s the case, you could just sand smooth and spray Olympic White lacquer. You might however get pin holes where the lacquer doesn’t go into the pores. Maybe use a white stain first, which would be wetter and flow into the pores without filling them completely? I think the thing to do would be to experiment with different techniques on some scrap to find the one that give you the finish you are aiming to achieve.
The Olympic white approach seems more like what i’m after, possibly with the white stain? As of Nitro to Poly sprays, do nitro finishes tend to chip easier and age quicker? Or is this people not being careful? Also, will I not need to apply a top coat?
I just want a thin skin, I know nitro is thin when applied, but a nice thin skin prone to gradual relicing will be ideal.
Cheers again!!!
A nitrocellulose finish is both thin and brittle so it is prone to chipping if knocked. A good thing of course if you want a worn finish!
Using the lacquer on bare (or just stained) wood will look similar to the Gibson “faded”(?) finishes.
If you want something that looks like it came out of the factory and aged then you should do the whole process – grain fill, seal, colour, clear coat – then distress it.
Hey! Nice tutorial!
I’m willing to make a tele with a sunburst finish… Do you think it’s possible to have a good result with spray cans?
Thank you for your help!
Yes of course it is! See my post here http://wp.me/p1xK3I-2P
RT @manguitartech: Updated: Finishing an Ash Telecaster in Butterscotch nitrocellulose lacquer http://t.co/pkv8gC4
@manguitartech ace, wish I had the skill to do that!