
Manchester Guitar Tech


Ozzy Lister – guitar and bass repair
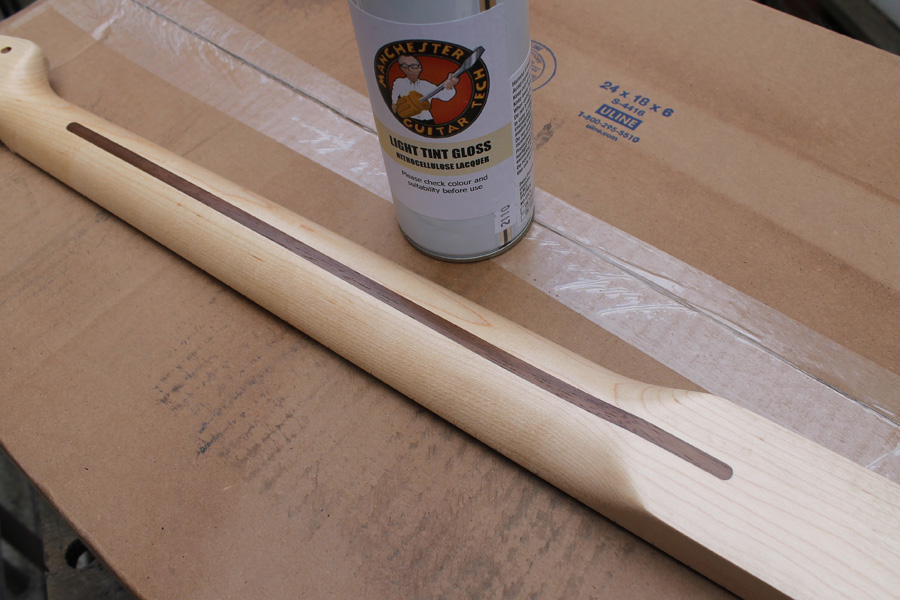
Before spraying I sanded the neck again, checking that everything was clean and wiped over with a tack cloth to remove any dust. I then sprayed another couple of coats of Clear Gloss lacquer to seal before moving on to the tinted coat.
 You can spray with the neck hanging vertically, but I like to spray with it in a horizontal position. I spray the headstock face, sides and fretboard then flip the neck over to spray the back. It rests on the nut and last few frets so, exercising care, this can be done while the lacquer is still wet.
I used my Light Tint Gloss lacquer as I am trying to replicate a ’69 neck which tends not to yellow very much. I’ll be spraying the headstock face a darker tint later.
The reason the for the colour difference is that in the late 60s Fender was moving towards a polyurethane finish which was cheaper to apply than nitrocellulose. Fender had also changed to using Meyercord Type C decals which were designed to be applied under the finish rather over the top as previously. Unfortunately for Fender, the decals were incompatible with the polyurethane so Fender had to retain a nitrocellulose finish on the headstock face over the decal. For this reason, although finish on the necks yellows very little, the headstock face does yellow to varying degrees as can be seen on vintage instruments from the late 60s and early 70s. Walter Trout‘s ’73 Stratocaster is an excellent example!See Vintage Guitars Collector and search for “1968 Stratocaster specs”
Once I was happy with the colour, I sprayed several coats of Clear Gloss lacquer to build up finish thickness. I didn’t sand at all between coats as it isn’t necessary unless you get sags, or dust in the lacquer. I’ll flat sand at the end before buffing.
Applying the decal
Because I’m trying to get as close to a ’69 neck as possible, I wanted my headstock logo to be spot on. Although I’m comfortable with “tribute” guitars, I don’t agree with unscrupulous people passing off replicas as the real deal. For this reason, although my logo is otherwise accurate, it contains a spoiler. On the ball end of the decal, where the Fender had the legend “Original Custom Body Patented” mine says “Obvious Custom Copy Pretend”.
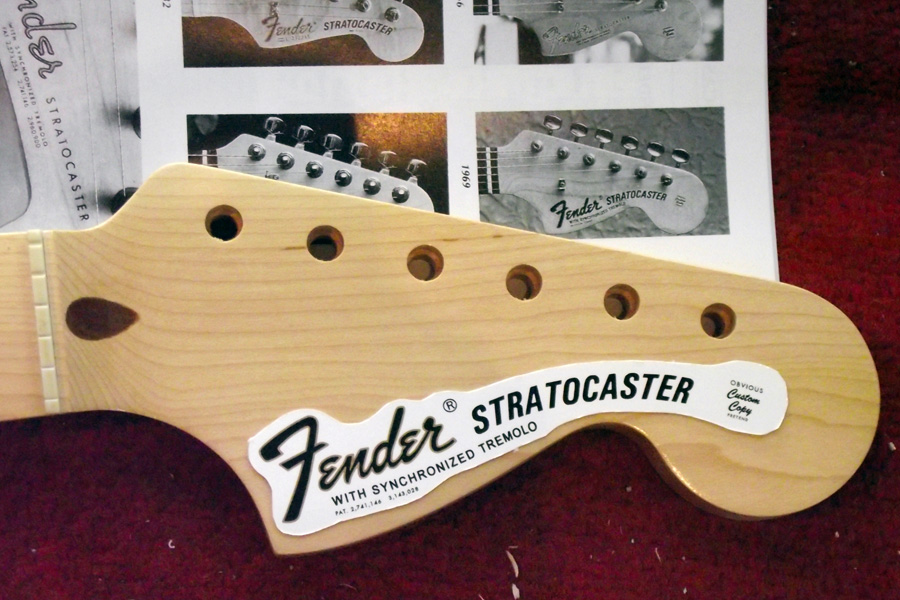 The decal was supplied (like all computer printed decals) on a rectangle of decal paper so the first job was to cut it to shape. In the picture you can see my copy of The Fender Stratocaster by A. R. Duchossoir which I used as a reference.
When applying decals I always smear some diluted (about 25% in water) white PVA glue onto the area where it’s going to be applied. I’ve found that waterslide transfers fixed like this will always stay put, even if not lacquered over.
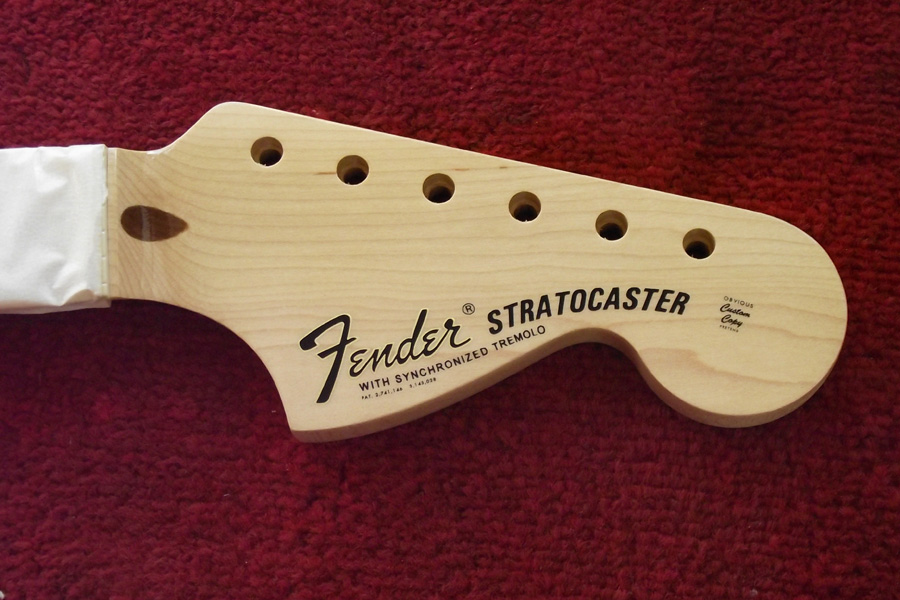
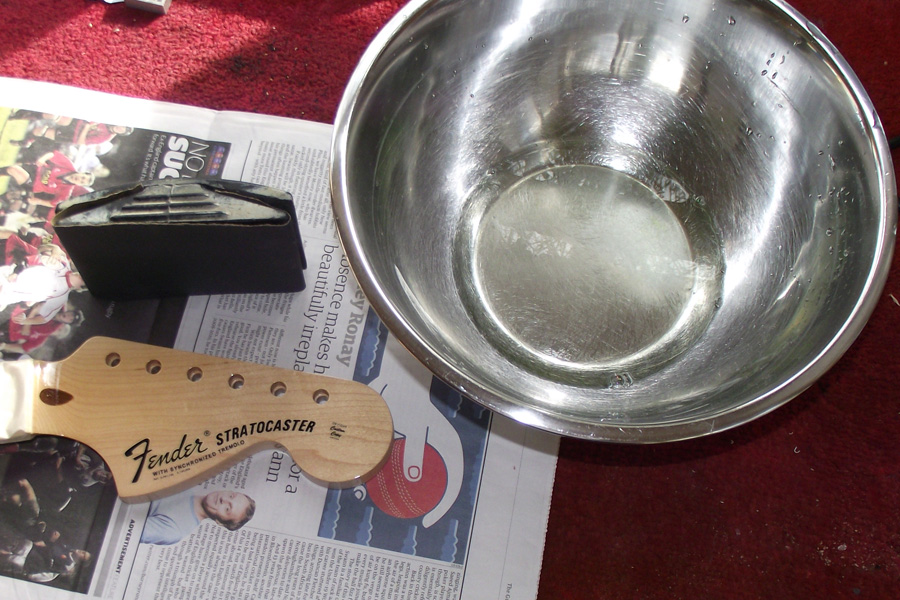
I floated the decal off the backing paper in a bowl of luke warm water and slid it into position. Although the decal was very thin, it seemed very tough and I was able to re-position it several times until I was happy without any fear that it would break apart or stretch.
Once I thought that the decal was in the right place (referring to Duchossoir) I dabbed it into position with kitchen roll, smoothing out any wrinkles and squeezing out air bubbles. I left it overnight before lacquering.
Lacquering over the decal
 Next day, I used a damp kitchen roll to remove any PVA glue residue from the headstock then the decal was ready to be oversprayed. I masked the fretboard to avoid heavy overspray on the first few frets.
Enough lacquer needs to be applied to ensure that the finish thickness is greater than that of the decal, so that it can be flatted back without sanding the printed surface.
It’s often a good idea to spray a few light coats first to avoid wetting the decal too much and after that, heavier coats are okay. When I’m doing this job I normally leave the neck outside and every half an hour or so spray another heavy-ish coat of clear lacquer. I check for dust between coats and wipe with a tack cloth if necessary to minimise any contamination. I think I applied about ten heavy (quite wet) coats in total until I was happy that the lacquer was thick enough.
I then left it for a week for the lacquer to harden and shrink back before the next step.
Yellowing the headstock face
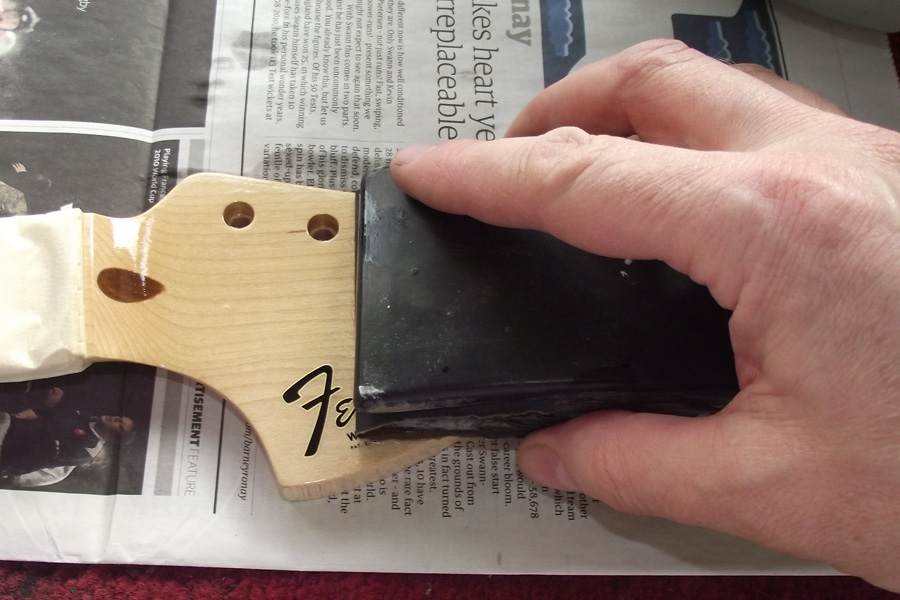
Before the tinted lacquer is sprayed, the headstock face should be levelled as there will be a raised area where the decal adds thickness.
I block sanded with P400 wet or dry paper, using some water as lubricant. The water has a little washing-up liquid added to help avoid clogging the paper.
I took care not to get water in the tuner holes as this can cause the wood to swell. Any water that did get in the holes was taken out quickly with kitchen roll.
Use a sanding block, P400 paper and water with a bit of washing up liquid in it
Flat sanding the headstock
I sanded carefully until no shiny spots were left, so I knew that the headstock was completely flat. You can see in the next picture the halfway point where the high spots have been flatted but the low spots as yet untouched.
Sand until no shiny low spots are left
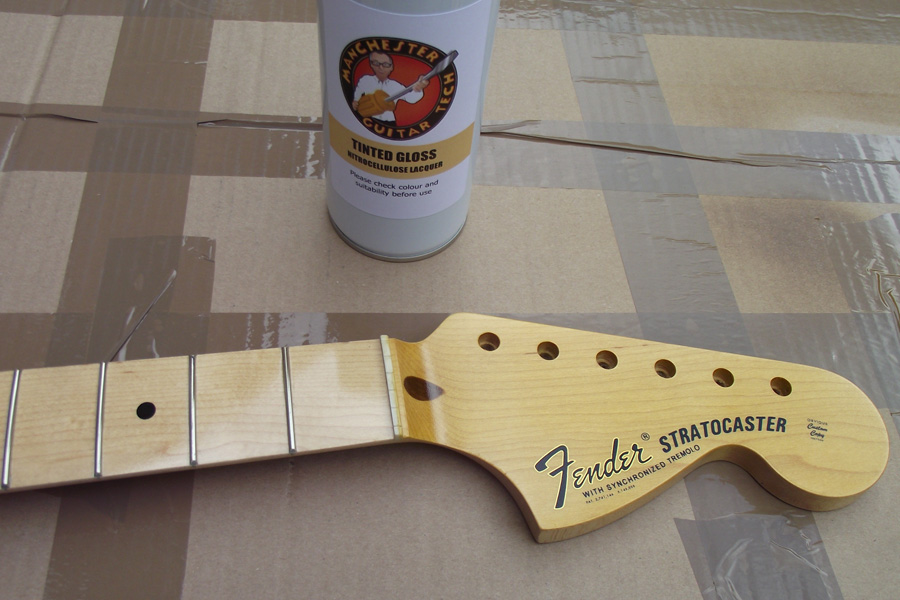
Once the headstock face is flat the tinted lacquer can be sprayed. I gave it a few light coats of my Tinted Gloss lacquer. You can see the contrast with the much lighter fretboard. I didn’t worry about getting overspray on the edges of the headstock as this is all historically accurate!
You can spray as much tint as you like (cf Walter Trout’s guitar) but I didn’t want to over do it so went for a medium yellowing.
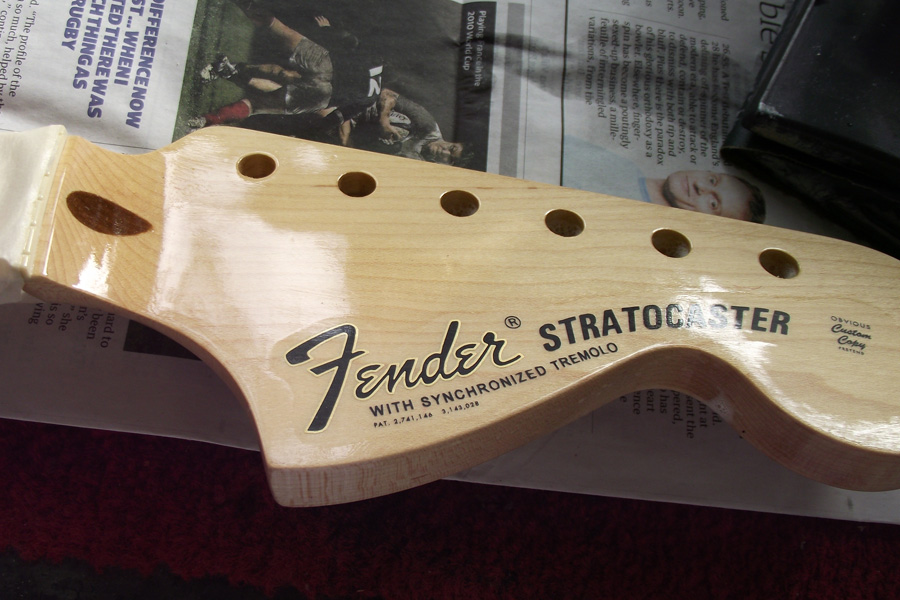
The yellowed headstock face
The next job is to give the headstock a few more coats of Clear Gloss lacquer, then leaving another week before final flat sand and buffing.
Before the final polish however it will be time to dress the frets. To be continued…!
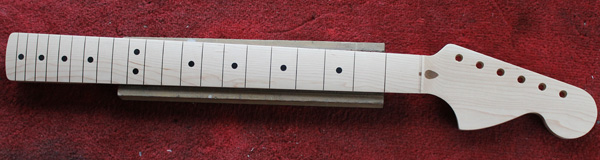
Stratocaster neck as received
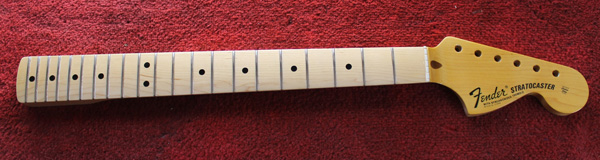
Stratocaster neck fretted and lacquered
I thought I’d demonstrate fretting a neck and finishing it with nitrocellulose lacquer.
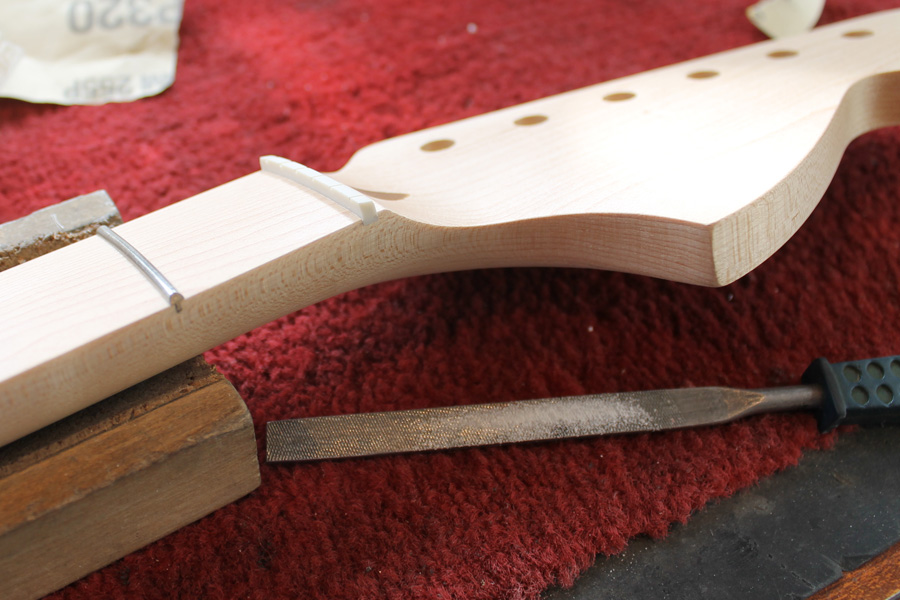
Soft V profile neck
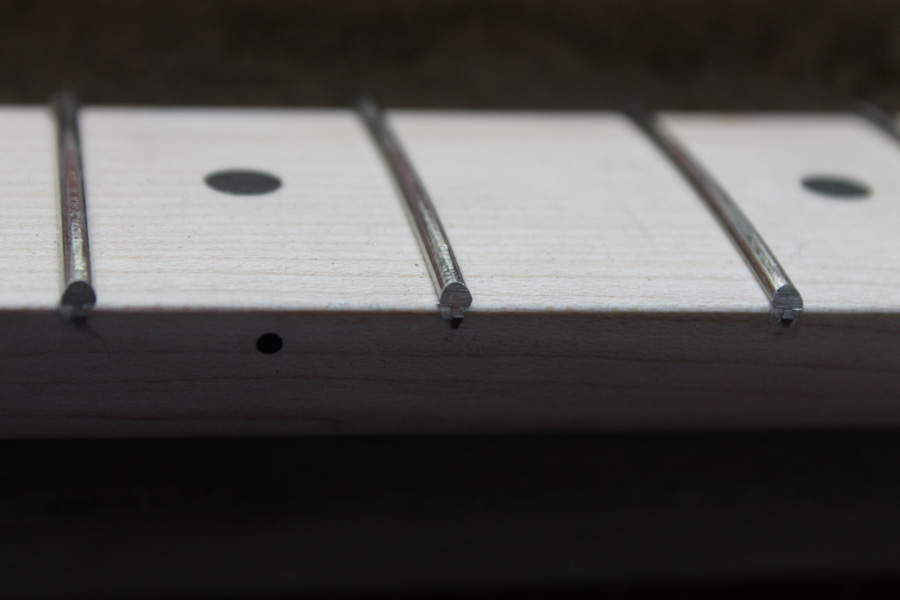
The neck I used was very nicely made, with a compound radius fretboard which progresses up the board from 7¼” to 10″ radius. The back is a nice soft V at the first fret, rounding out towards the heel. A compound radius isn’t authentic of course but it does help set the guitar up with lower choke-free action so is a welcome improvement on the original uniform 7¼” radius.
The fret slots measure 25 thousandths of an inch wide which is perfect for my chosen fretwire.
The tuner holes are stepped vintage holes, ideal for the original tuners. I have some early 70s Fender Mustang tuners in my parts drawer and although they have white buttons should look almost the part!
Preparing the neck
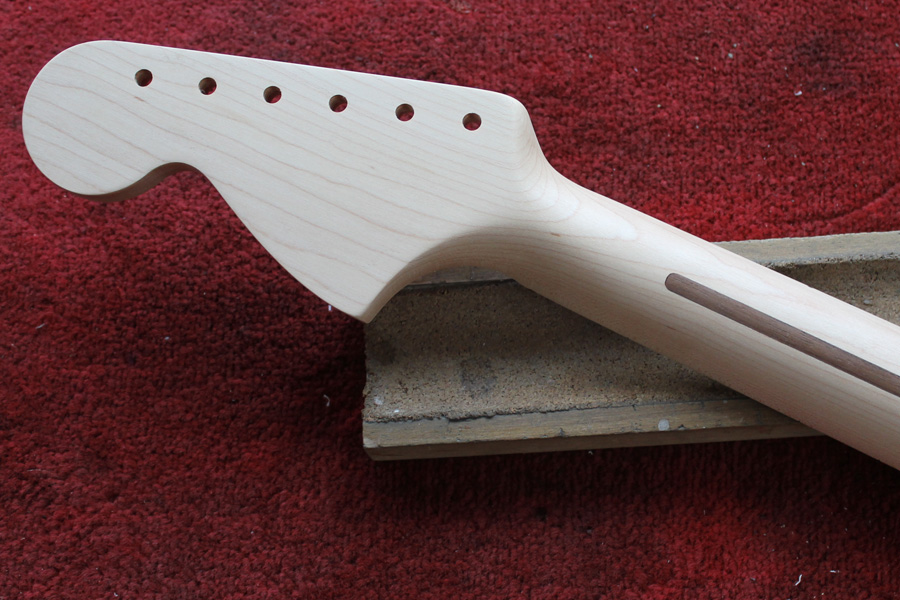
The first job is to sand with 320 grit paper. The neck was well sanded as received but had a few deep scratch marks that needed to be sanded out and I wanted to round (roll) the edges of the fretboard slightly to make it more comfortable to play. I took extra care on the fretboard so as not to accidentally reprofile it.

Preparing the neck
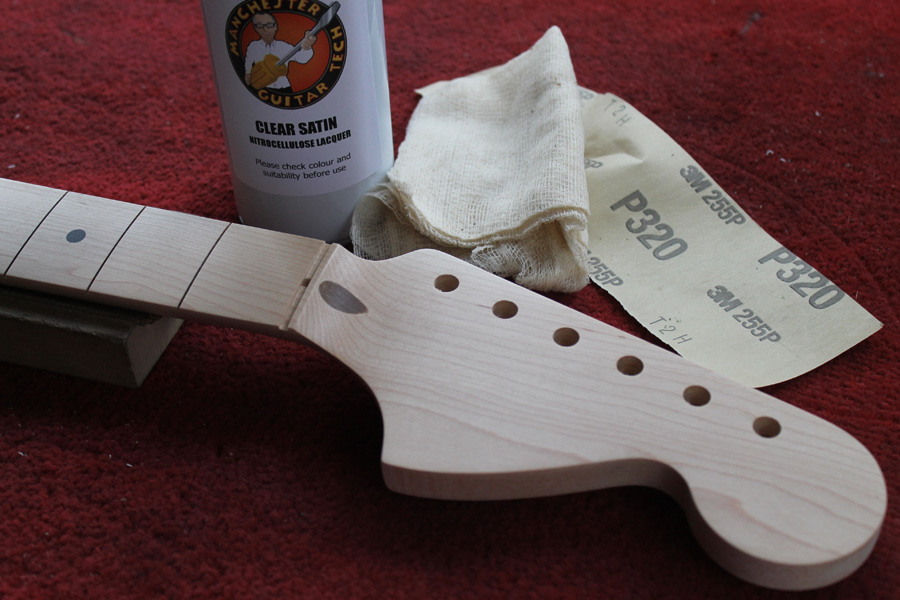
Next I sealed the neck with clear lacquer. The reason for this is to keep any metal dust from the fretting process out of the wood grain, I didn’t want the neck to get grubby. I used my Clear Satin nitrocellulose lacquer but you can use any clear lacquer or sanding sealer.
The first light coat of lacquer raised the grain slightly and showed up one or two sanding marks that I’d missed. I knocked back the grain with 320 grit paper again and sprayed another light coat. I don’t want to build up any finish thickness at this point, just to seal the grain.
It’s best to spray with the neck hanging vertically with a hook through a tuner hole but if that’s not possible, you can lie the neck down, spray one face and when dry flip it over and spray the other. Whichever you choose, be sure not to miss any areas such as the end of the headstock or the heel – it’s easy to do so!
Preparing the Fretwire
You can buy fretwire in cut lengths or longer pieces. I tend to buy fretwire by the pound in 2 foot lengths from Stewart Macdonald and hold most of their sizes in stock. Whether you buy ready cut or in lengths your fretwire needs to be bent slightly more curved than the radius of the fretboard. This is easy if you have longer lengths of wire and a fretwire bending jig, but it’s not such a problem to bend individual pieces using a pair of pliers.
I have selected Stewmac #154 fretwire which is close to a modern Fender profile, being 0.1″ wide and 0.05″ tall.
Cutting fretwire to length
When cutting to length, I used the fretboard as a guide and store the pieces in order in wooden block. You can see the curvature of the fretwire, this helps keep the ends of the frets well seated tight against the wood.
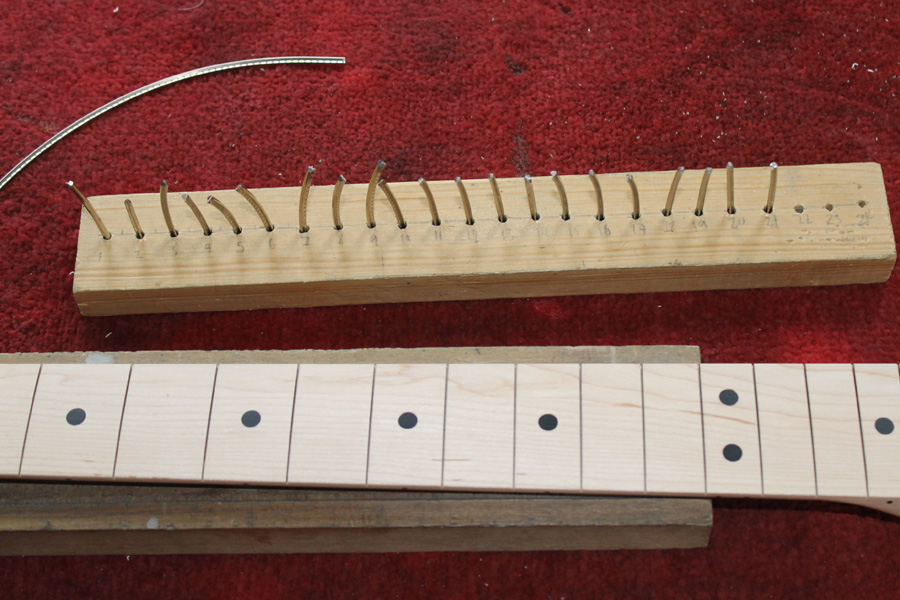
All fretwire cut to size
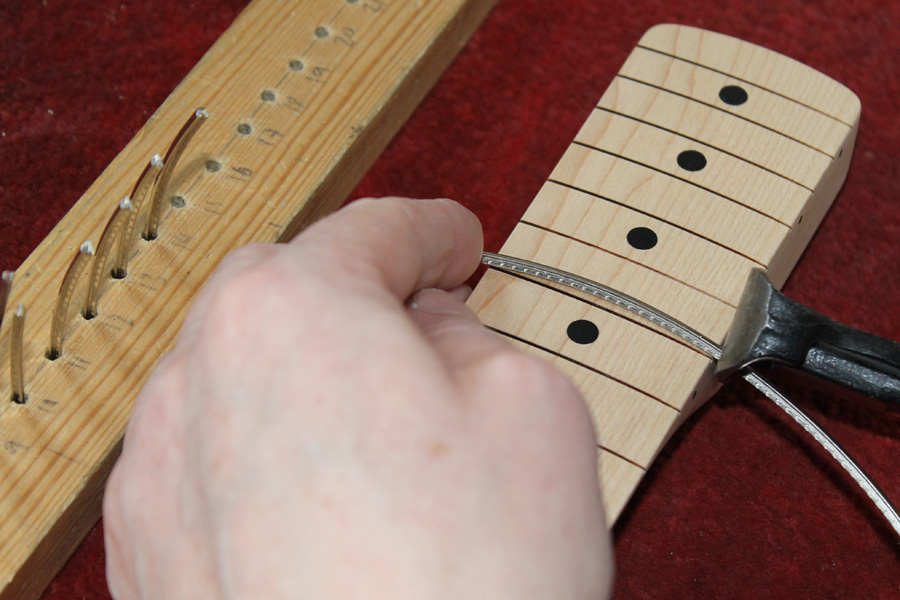
Inserting the frets
I’m using a soft-faced hammer to seat the frets. I bought the hammer very cheaply at a DIY superstore and it’s ideal for the job. I made a short video showing the fret insertion technique. The camera focus isn’t great but you get the idea!
Notice that I seat each end of the fret first before hammering the centre down. You can see that it’s quite a quick operation!
You might also notice that there is a lot of noise that can damage your ears so it’s a good idea to wear some ear protection when doing this.

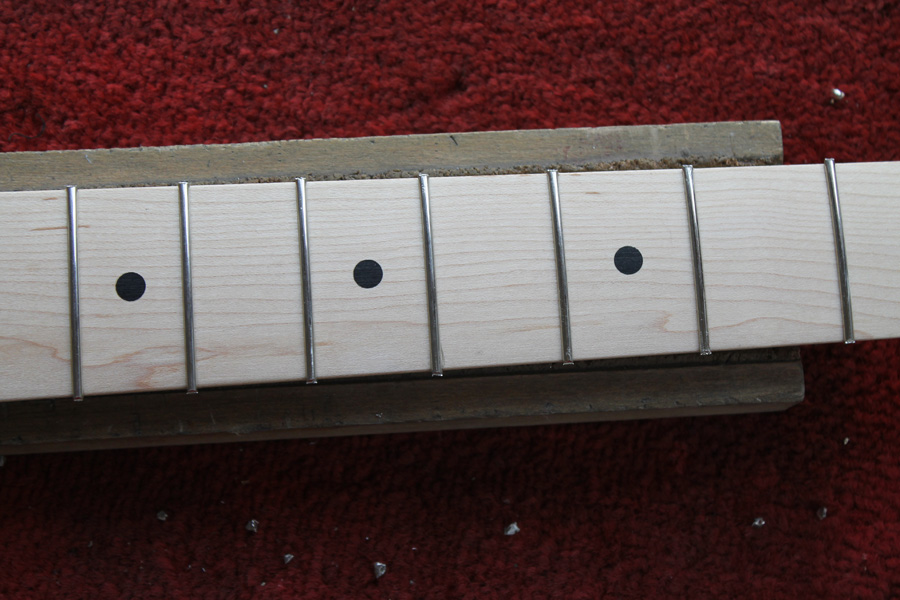
Frets all seated
Once the frets are seated, the next step is to cut the ends close to the neck. Before doing this however it’s a good idea to place a drop of super glue under each protruding end. This will secure the fret to the neck and avoid it being lifted when the end is trimmed.
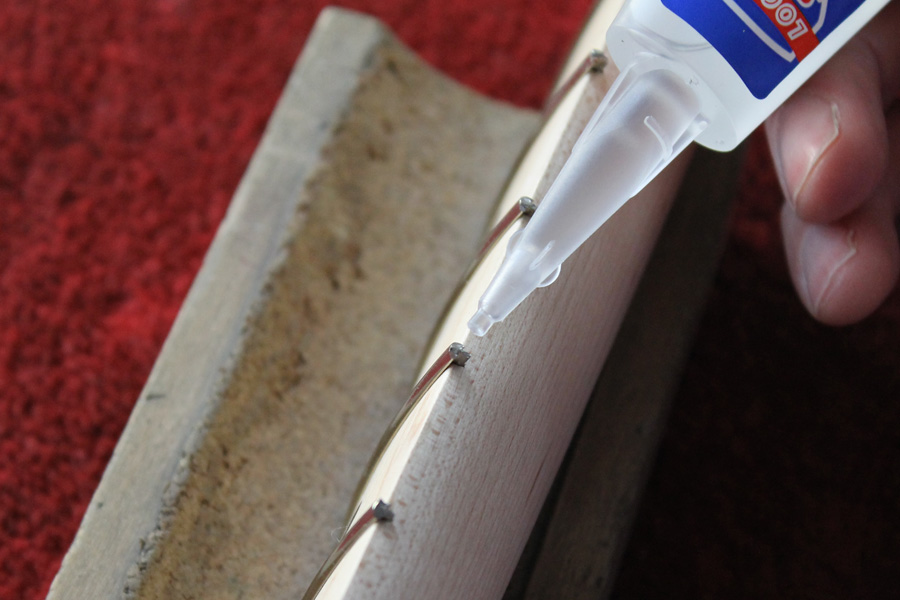
Securing the fret ends with a dab of super glue
Don’t worry that the fret won’t be easy to remove when it’s time for a refret, a bit of heat on the fret will vapourise the glue and release the bond.
Trimming the frets
There are three steps here, firstly cutting the frets as close to the neck as possible, then beveling the fret ends and finally filing the tangs flush with the neck.
Fret ends clipped short
I used a pair of pincers to trim the fret ends as close as I could to the edge of the neck. This minimises the amount of filing required.
Once I had trimmed the ends, I made sure to vacuum the workspace as I didn’t want bits of metal getting embedded in my nice new neck.

Beveling the fret ends
Next I used a fret beveling file to trim the fret ends at a 35 degree angle from vertical. It’s easy to tell when the file is just touching the neck and it’s time to stop.
I have two of the files, one for each side of the neck, but it’s also possible to bevel the fret ends with an ordinary file or a diamond coated steel by hand. It just takes a bit more care.
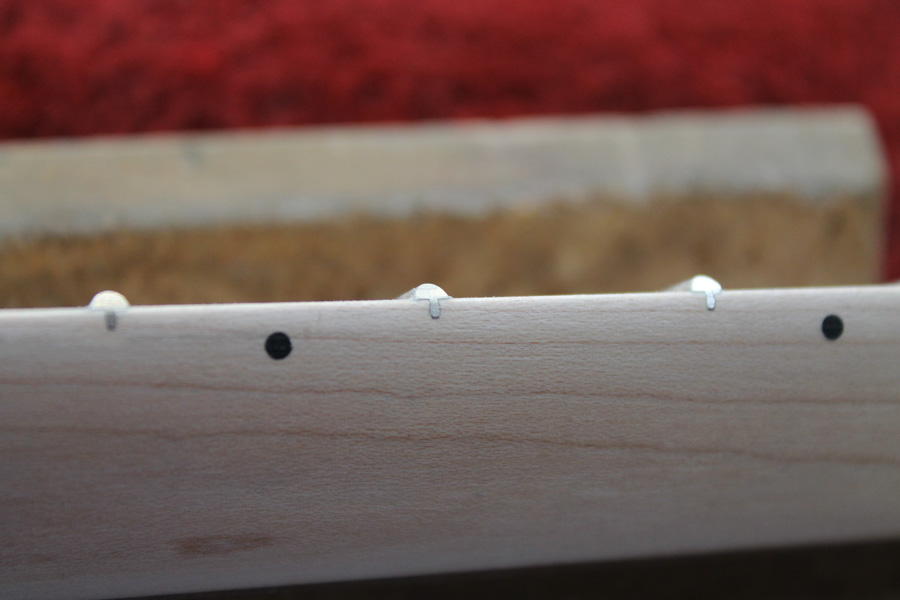
You can see in this shot the beads of super glue on the fret end. This will be removed when the tangs are filed flush with the neck.
Once I had done this I had lots of metal filings around so again vacuumed the area thoroughly to remove them.
I used a diamond coated steel to file the fret tangs flush and followed this with 320 grit abrasive to give a smooth finish.
Fret ends filed flush
Fret ends are neatly beveled
That’s the frets inseted, they’ll be levelled and the ends dressed properly once the neck has been finished.
Fitting the nut
Nut fitted and flied flush with the neck
Now is a good time to fit the nut. You can use a variety of materials from hard plastic to bone, or brass. I’m using Tusq here as I had a nut to hand and I do like Tusq. It’s pre-slotted which will save time when I come to adjust the string height.
I tidied the base of the nut slot using a nut file and sanded the nut to the correct width by rubbing it on sandpaper on a flat surface until it was a snug fit in the slot. I made sure that the curvature of the base was correct and that it was a good fit with no gaps at the ends before gluing it in place with a small dab of super glue at each end. You can use carpenters glue if you prefer but I like that superglue sets very hard, which ought to transmit sound better. Fender nuts don’t need much glue as the curved base keeps them in place.
Once the glue had dried, I filed the ends flush with the neck using a small file and sanded smooth.
Like the final fret dressing, the fine-tuning of the nut will be done once the neck has been sprayed with lacquer.
Spraying the finish
I want to spray a light tint on the neck to give it a slightly aged appearance. A 1969 neck would have been finished in polyurethane which doesn’t yellow much so I don’t want to add too much colour. I will add a bit more colour to the headstock face as this would be finished over the transfer in nitrocellulose which naturally yellows more readily. Of course I’ll be using nitrocellulose lacquer throughout.
The finish is covered in the next post, Spraying the neck

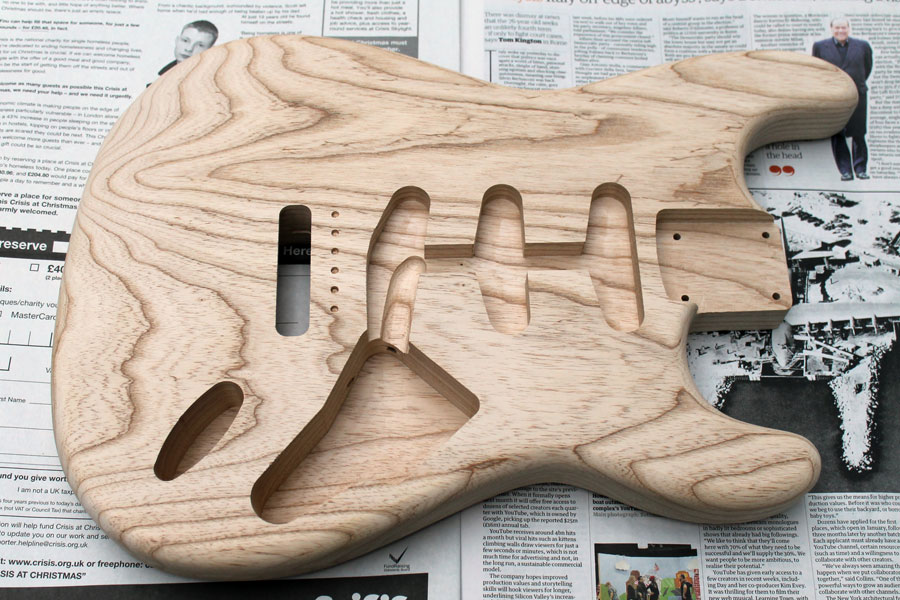
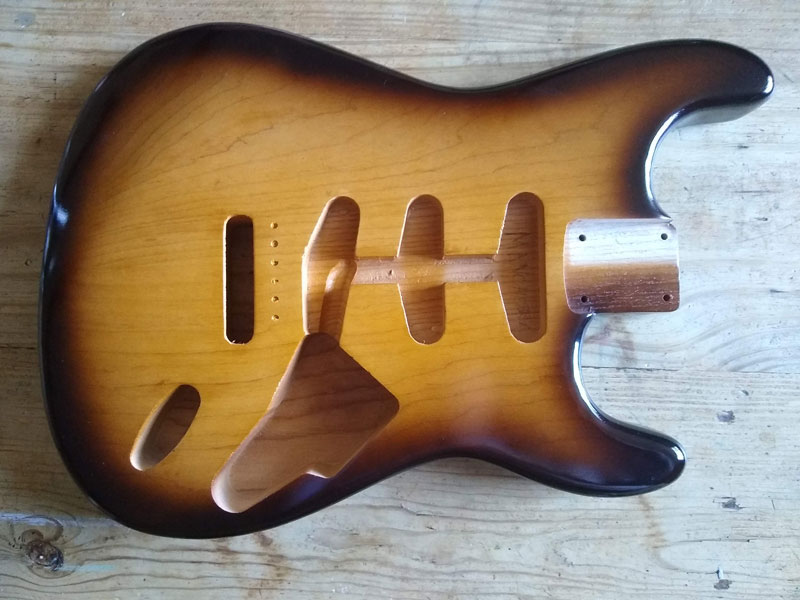
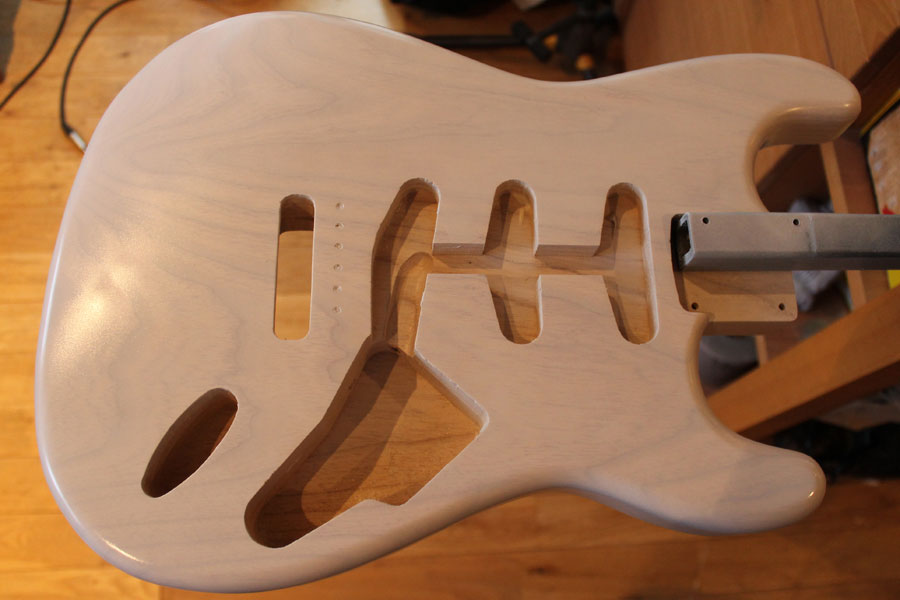
Ash Stratocaster body
I’m building a Stratocaster using this beautiful one-piece ash body from GuitarBuild.co.uk. It is made from Phil’s special order only premium wood stock and weighs just 3½ pounds. I’m expecting the finished guitar to weigh in at about 6½ pounds (about 3kg). This premium wood might cost a little more but this is one of the nicest bodies I have ever used. I think it will sound amazing.
The grain is so strong that it would be a shame to cover it up so the plan therefore is to spray this body white blond and fit gold hardware and a one-piece maple neck, to make a “Mary Kaye” style guitar.
Grain Filling
The reason this piece of wood is so light is that it contains a lot of air which incidentally will contribute towards its resonance. The air resides in the grain structure of course and this means lots of large pores. These pores are a challenge for finishers, as they must be properly grain filled before any lacquer is applied.
The other thing to watch out for on wood like this is that the open pored areas are considerably softer than the close-grained bands and tend to sand preferentially. It’s therefore very important to use a block when sanding to maintain a flat surface.
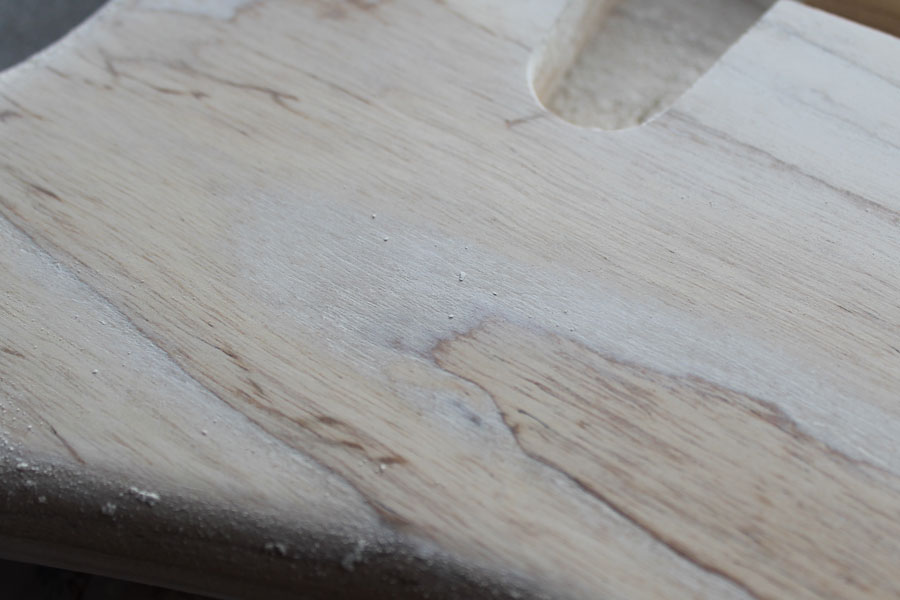
First grain fill
My first application of grain filler wasn’t sufficient to do the job so I reapplied and sanded smooth again with 320 grit 3M Sandblaster. There is quite a bit of grain filler showing – a little more than I would normally like – but this is necessary and will not be seen under the blond lacquer.
Sanding sealer
Well I didn’t manage to get this body painted over Christmas but did get the sealer coats done.

Sealer coat sanded and ready for colour
I used practically a whole can of sealer making sure that the surface is prepared dead flat with no low spots or pinholes. In all I did four applications of sanding sealer, flatting back each time. If I hit wood I stopped and sprayed another coat, repeating until I had no low shiny spots and a uniform flat base of sealer.
Don’t skimp this step, go over the body centimetre by centimetre and check that you have a smooth flat sealer coat with no pinholes.
I can’t stress enough how important this stage is for a good finish, it’s essential for a professional looking finish that this is flat.
Now is also a good time for picking out any stray blobs of grain filler you might have left in the cavities. Better to do this now than risk chipping your top coat when things don’t fit later on.
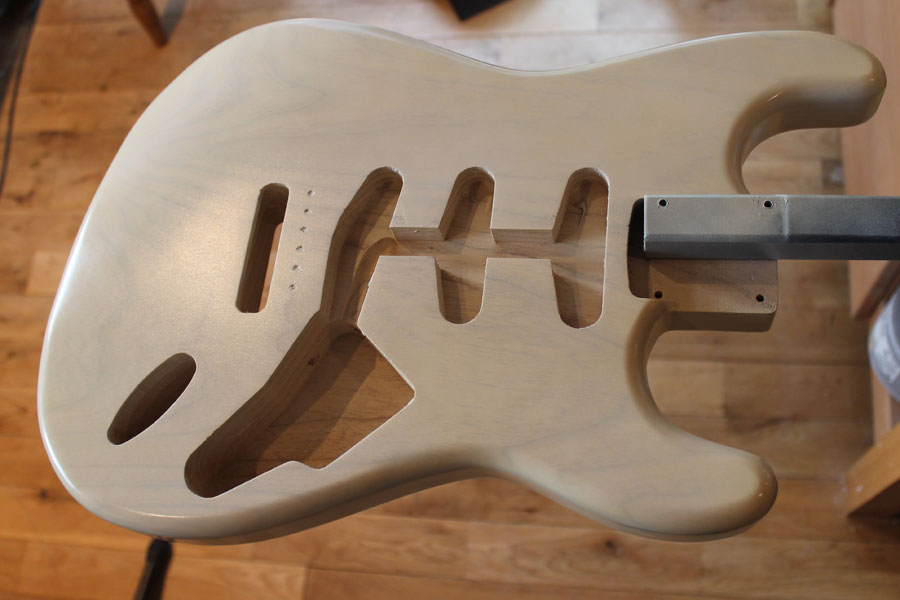
White Blond coat
White blond lacquer applied
The next step is the White Blond lacquer. I sprayed front and back first, with passes along the length of the body until the opacity was about right. Next I sprayed the edges, taking special care to apply enough in the cutaways.
The White Blond is quite opaque so that it’s possible to achieve either a transparent or more opaque effect by controlling the amount applied. I used a single coat with only about four passes to get the degree of opacity I wanted. I certainly didn’t want to hide the grain.
The photo is taken in natural light (with room lighting and light through the window) and is actually a bit brighter white than it appears here so the next step will be a tinted lacquer to soften the white and replicate the natural yellowing of nitrocellulose lacquer.
Tinted lacquer
I have now sprayed a coat of my Light Tint lacquer, giving a light-tan colour all over.
Light Tint lacquer applied
It’s tricky to get an even coat but spraying lightly is the key to success. The low dye loading of the Light Tint helps too as it reduces any risk of banding. It’s easy to get carried away and over do the tint, I sprayed one coat with three or four passes.
Unfortunately the different lighting conditions (due to time of day) mean that it’s hard to see the difference in the photos!
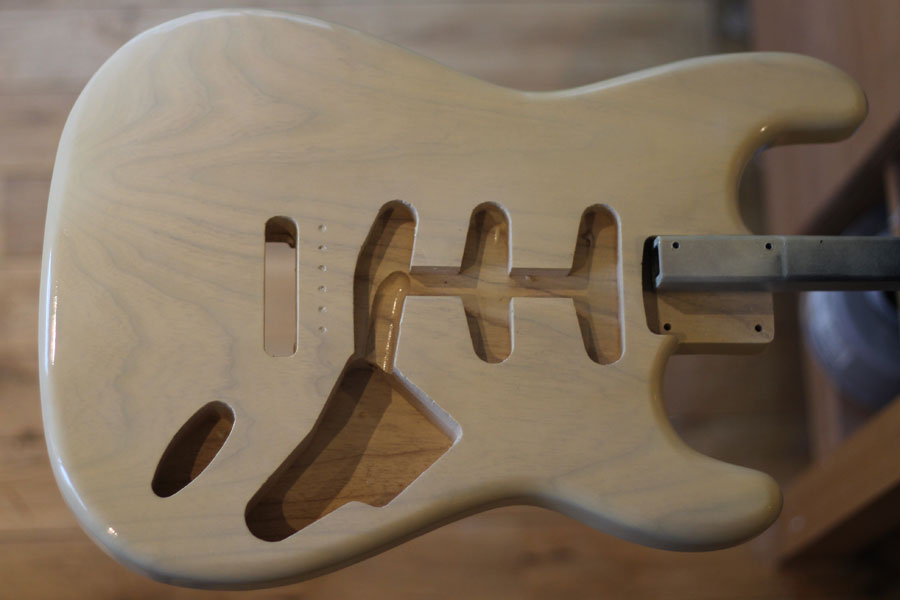
Clear lacquer applied
Clear coats
I have applied a couple of coats of clear gloss lacquer and it’s looking very shiny I must say. I think I might leave it there and not even flat sand.
The forearm chamfer looks paler but that is just the natural light through the window. It is difficult to capture the colour but once the white pickguard is on the contrast should be clear.
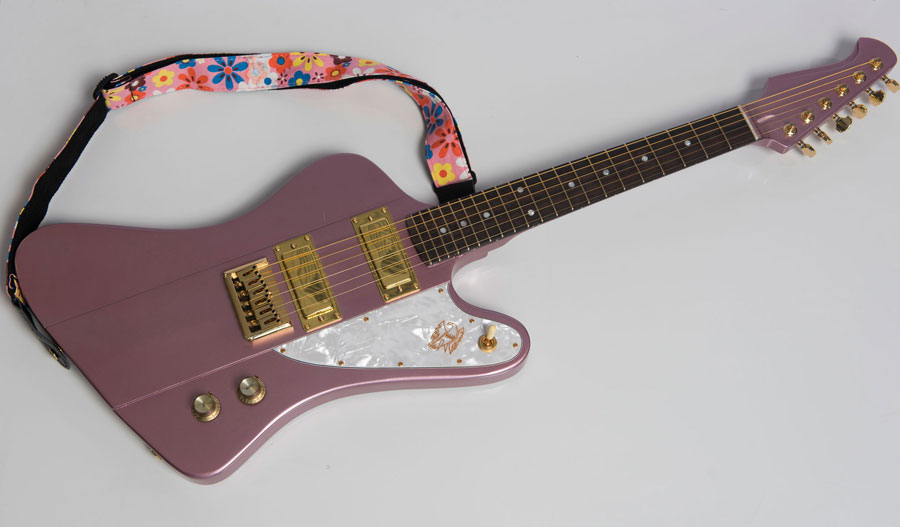
Complete
Here is the completed guitar, with appropriate “Mary Kaye” style gold hardware fitted, all genuine Fender from John at First Avenue Guitars. The pickups are currently a Don Mare Josie/Vaughan set but I might try something different as I have these earmarked for another build.
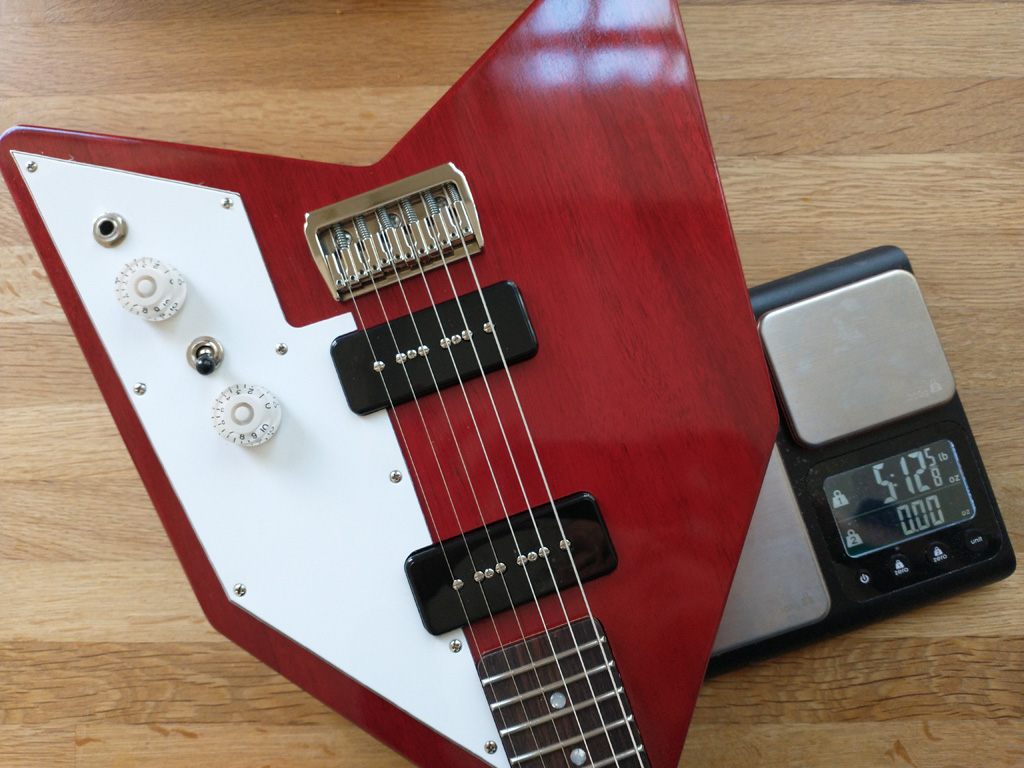
It is, as expected, a pretty light weight guitar at 3.1kg, that’s about 6 pounds 13 ounces in old money. The finish by the way is straight out of the aerosol can – no flat sanding, no buffing and it is very thin.
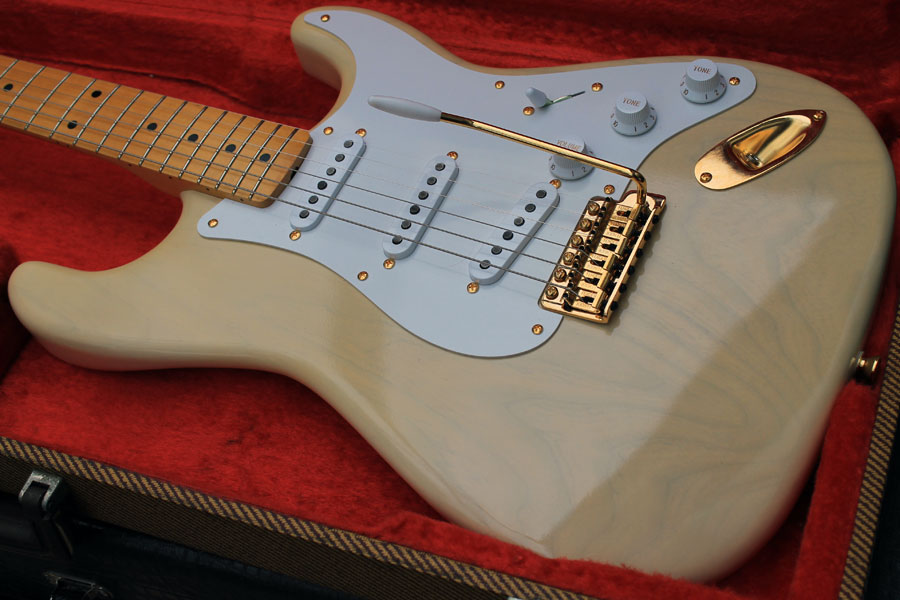
Mary Kaye tribute Stratocaster completed