
Manchester Guitar Tech
New build – “Mary Kaye” Stratocaster

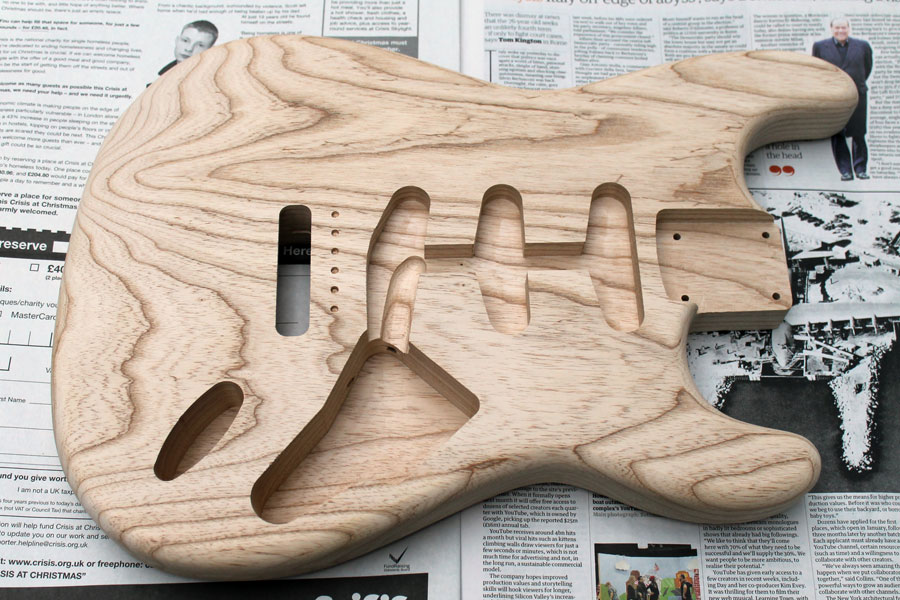
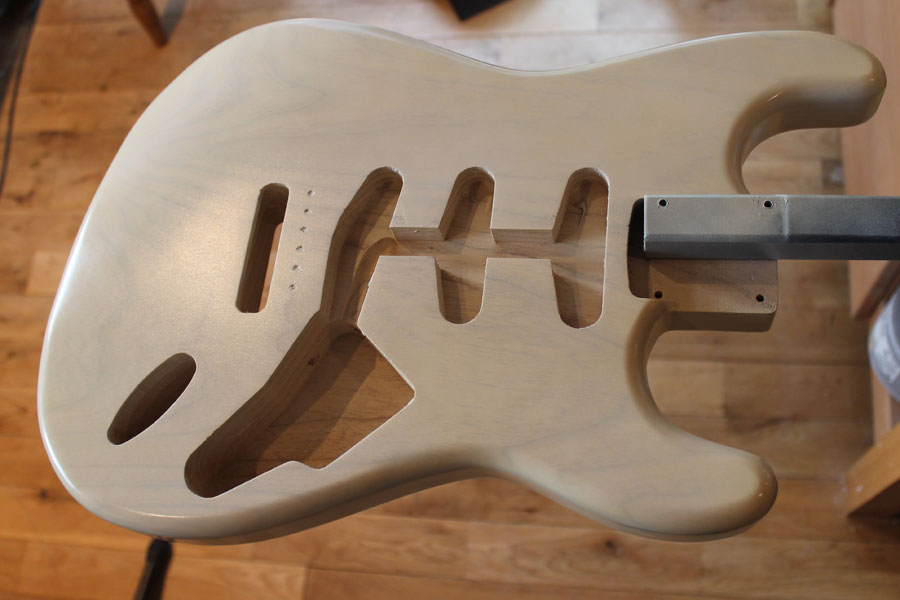
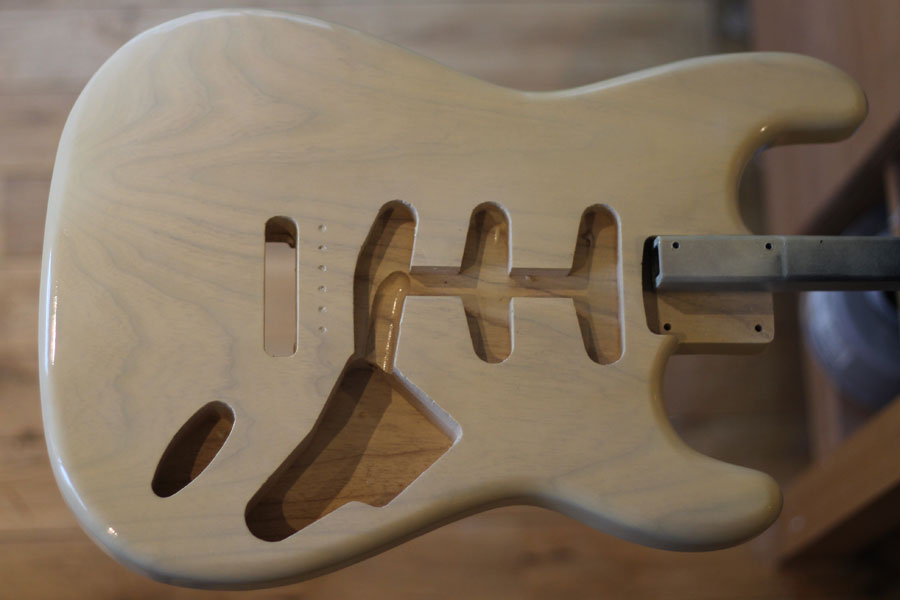
Ash Stratocaster body
I’m building a Stratocaster using this beautiful one-piece ash body from GuitarBuild.co.uk. It is made from Phil’s special order only premium wood stock and weighs just 3½ pounds. I’m expecting the finished guitar to weigh in at about 6½ pounds (about 3kg). This premium wood might cost a little more but this is one of the nicest bodies I have ever used. I think it will sound amazing.
The grain is so strong that it would be a shame to cover it up so the plan therefore is to spray this body white blond and fit gold hardware and a one-piece maple neck, to make a “Mary Kaye” style guitar.
Grain Filling
The reason this piece of wood is so light is that it contains a lot of air which incidentally will contribute towards its resonance. The air resides in the grain structure of course and this means lots of large pores. These pores are a challenge for finishers, as they must be properly grain filled before any lacquer is applied.
The other thing to watch out for on wood like this is that the open pored areas are considerably softer than the close-grained bands and tend to sand preferentially. It’s therefore very important to use a block when sanding to maintain a flat surface.
First grain fill
My first application of grain filler wasn’t sufficient to do the job so I reapplied and sanded smooth again with 320 grit 3M Sandblaster. There is quite a bit of grain filler showing – a little more than I would normally like – but this is necessary and will not be seen under the blond lacquer.
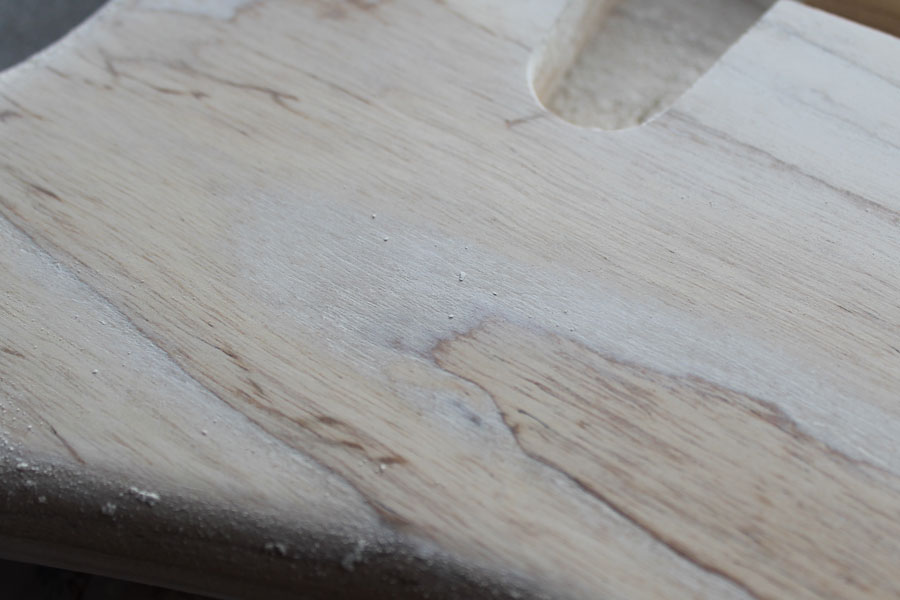
Sanding sealer
Well I didn’t manage to get this body painted over Christmas but did get the sealer coats done.

Sealer coat sanded and ready for colour
I used practically a whole can of sealer making sure that the surface is prepared dead flat with no low spots or pinholes. In all I did four applications of sanding sealer, flatting back each time. If I hit wood I stopped and sprayed another coat, repeating until I had no low shiny spots and a uniform flat base of sealer.
Don’t skimp this step, go over the body centimetre by centimetre and check that you have a smooth flat sealer coat with no pinholes.
I can’t stress enough how important this stage is for a good finish, it’s essential for a professional looking finish that this is flat.
Now is also a good time for picking out any stray blobs of grain filler you might have left in the cavities. Better to do this now than risk chipping your top coat when things don’t fit later on.
White Blond coat
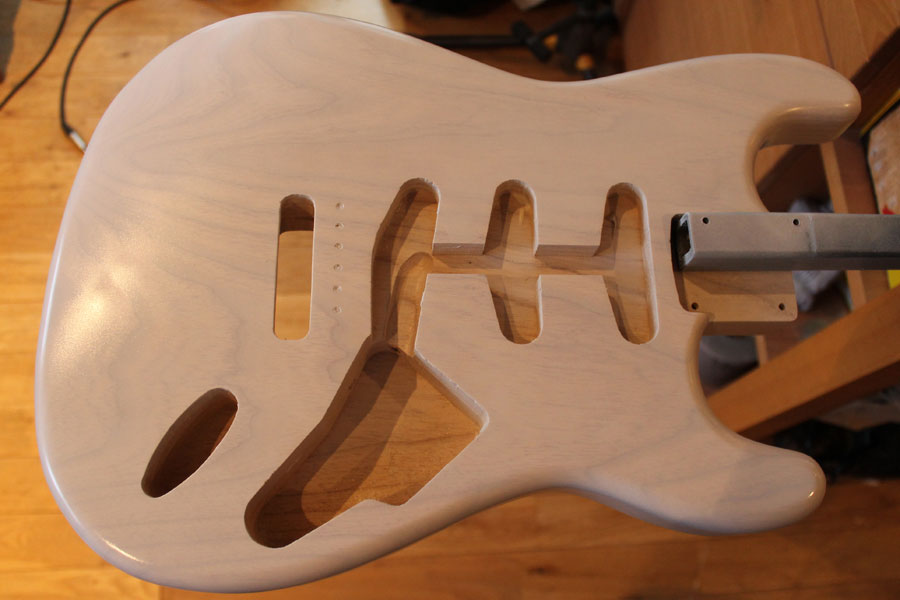
White blond lacquer applied
The next step is the White Blond lacquer. I sprayed front and back first, with passes along the length of the body until the opacity was about right. Next I sprayed the edges, taking special care to apply enough in the cutaways.
The White Blond is quite opaque so that it’s possible to achieve either a transparent or more opaque effect by controlling the amount applied. I used a single coat with only about four passes to get the degree of opacity I wanted. I certainly didn’t want to hide the grain.
The photo is taken in natural light (with room lighting and light through the window) and is actually a bit brighter white than it appears here so the next step will be a tinted lacquer to soften the white and replicate the natural yellowing of nitrocellulose lacquer.
Tinted lacquer
I have now sprayed a coat of my Light Tint lacquer, giving a light-tan colour all over.
Light Tint lacquer applied
It’s tricky to get an even coat but spraying lightly is the key to success. The low dye loading of the Light Tint helps too as it reduces any risk of banding. It’s easy to get carried away and over do the tint, I sprayed one coat with three or four passes.
Unfortunately the different lighting conditions (due to time of day) mean that it’s hard to see the difference in the photos!
Clear lacquer applied
Clear coats
I have applied a couple of coats of clear gloss lacquer and it’s looking very shiny I must say. I think I might leave it there and not even flat sand.
The forearm chamfer looks paler but that is just the natural light through the window. It is difficult to capture the colour but once the white pickguard is on the contrast should be clear.
Complete
Here is the completed guitar, with appropriate “Mary Kaye” style gold hardware fitted, all genuine Fender from John at First Avenue Guitars. The pickups are currently a Don Mare Josie/Vaughan set but I might try something different as I have these earmarked for another build.
It is, as expected, a pretty light weight guitar at 3.1kg, that’s about 6 pounds 13 ounces in old money. The finish by the way is straight out of the aerosol can – no flat sanding, no buffing and it is very thin.
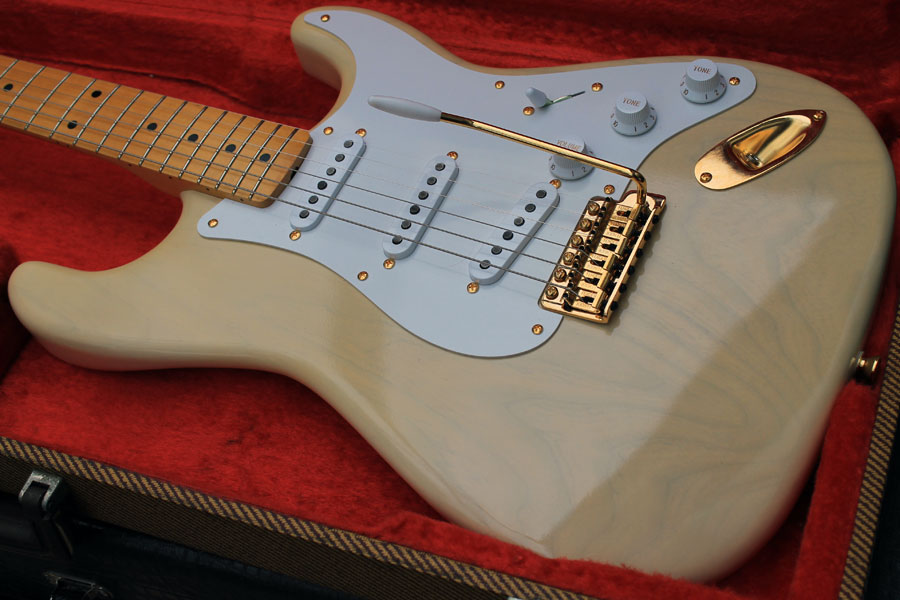
Mary Kaye tribute Stratocaster completed
I am planning on purchase this body too, but i can’t decide between 60s or 50s body. Which one is more authentic (pronounce) contoured strat?
I don’t think there’s much in it but you should ask the maker what they can do
What spec body is used? 60s of 50s?
It’s a “60s” spec., you can see from the extra wood in the control cavity that would take a screw for an 11-hole ‘guard.
Absolutely lovely job on this guitar. When finishing a plain body would you recommend drilling holes for the scratch plate before or after finishing with Nitro laquer?
I had planned to drill all my pilot holes first but have now read if you wet sand water can get in the holes and swell the finish.
Many Thanks
Lee
I always drill after spraying for the reason you mention. There’s no need to drill before spraying.
When you do drill, it’s best to countersink the holes slightly, this stops the screws from splitting the lacquer as they go in.
Thanks for the advice Steve it is most appreciated.
Lee
Hi Steve any tips for avoiding dust when gloss coating, I’m having an absolute nightmare with it at the moment! I’m spraying in my garage with the door open.
Rob
You probably need to damp down (spray water) to stop the dust rising.
It might be better to spray outdooors while we have the weather!
Spraying light coats that dry quickly will give the dust less chance to stick. Also wipe down between coats with a tack cloth.
Hi Steve,
I’ve been following you guides, very useful! I’m attempting to paint a telecaster body white blonde. Done the grain filler and sanding sealer. Want to keep it quite transparent if I can, so my question is this:
When applying the colour, how long should I wait between coats. Am I right in thinking that I should just wait 10 mins or so between coats of colour? And then leave it 24 hours before sanding if it needs it, and then clear coat?
Thanks for your hlep and your awesome website full of info!
YOu can spray the nexy coat as soon as the previous is touch dry, the length of time depends on the ambient temperature.
Just spray enough of the White Blond to get the degree of tranlucency you want.
I’d strongly recommend that you don’t sand before the clear coat as you’ll be removing the blond lacquer and will make it uneven and patchy.
hi.of course your job it is awesome.i want to ask where can i find the prices of all these fantastic things.thank you!
Thanks, most of the suppliers are linked to on the page.
Hello again and thanks for your reply.I ordered a swamp ash unfinished body from Guitarbuild and it has wonderful ”wood waters”(i think grain is the right word).So i want to keep them exactly like this,to give as natural like as possible.In other words i want to make it gloss without nothing more. How is it possible?
The steps are:
* Grain fill
* Sanding Sealer
* Clear Gloss
* Flat sand, buff and polish
You can find demos of all these steps in my blog posts.
Thanks again.I’m thinkin to give the body to you because i’m totaly new to this and because you’re doing amazing job.Can you give a price for this?
Thank you for your kind words but I don’t generally offer a finishing service.
Great work as always Steve, love the 54 2TS you did for me, great to have a 54 to drag around with without worrying about it. It gets regular compliments and the odd…”…what you bring an original 54 out to gigs” :)
Cheers
Beautiful Steve. Might have to think about building one myself……..
Simply Stunning! Looks even better that I thought it would. A fantastic example of what can be achieved with the MGT products (and a lot of skill).
Looking fab Steve – I feel a set of Creamery vintage ’64 would compliment this, what thoughts did you have?
Looks fantastic! I’m thinking of buying some of your nitro and doing something very similar to a Jazzmaster body. However, I’d like to get a slightly more vintage-accurate finish by making the sides more opaque but I’m not sure how to go about doing this. I’ve had two ideas:
– Spray a bit more of the white blonde nitro on the sides, or;
– Before spraying the blonde, spray some of your white nitro primer (I already have a can of this!) on the sides.
Would either of these approaches work? If so, how would you go about making sure the transition from the more opaque sides to the more transluscent centre is smooth and “natural” looking?
Just spraying more on the sides is the way to go. The pigment is around 15% loading so you should be able to get a good smooth transition easily by following the contours of the body.
The reason Fender opaqued the edges was to disguise the joins in multi-part bodies.
Thanks Steve. Great – I’ll get myself a body then and will shortly be ordering some of your nitro.
Wow! This is really looking great Steve. You’ve got the transparency perfect and the tint will just take the edge off the extreme whiteness. I think that some white-blonde finishes can look a bit harsh and/or grey and the hint of yellow warms them back up nicely. Fantastic work, as ever.
Thanks Brendan, I think the tint is looking good now, I’ve sprayed a couple of clear coats and will probably stop there.
This one looks really special Steve – good luck with the build!
Wow! That body looks amazing. As a non-woodworker I never cease to be amazed by how much thought and effort goes into these things. At least there’ll be something interesting going on over Christmas!