
Manchester Guitar Tech


Ozzy Lister – guitar and bass repair
Here’s how to get the ferrules into a Telecaster without chipping the lacquer. This only works for guitars finished in nitrocellulose.
The heat of the soldering iron melts the lacquer which also acts as an adhesive holding the ferrule in place.
You can probably see from my shaking hand that I’m exerting quite a bit of pressure with the iron.
To remove the ferrules, heat again with the soldering iron and they’ll pull out easily.
I’m often asked how to spray a butterscotch guitar body so thought I’d put together a bit of a tutorial.
Please note that I do not offer a refinishing service.
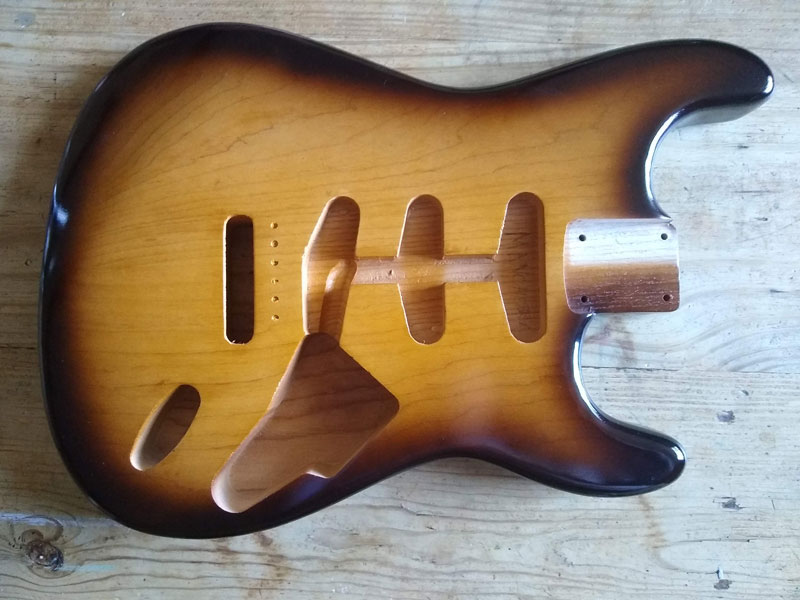
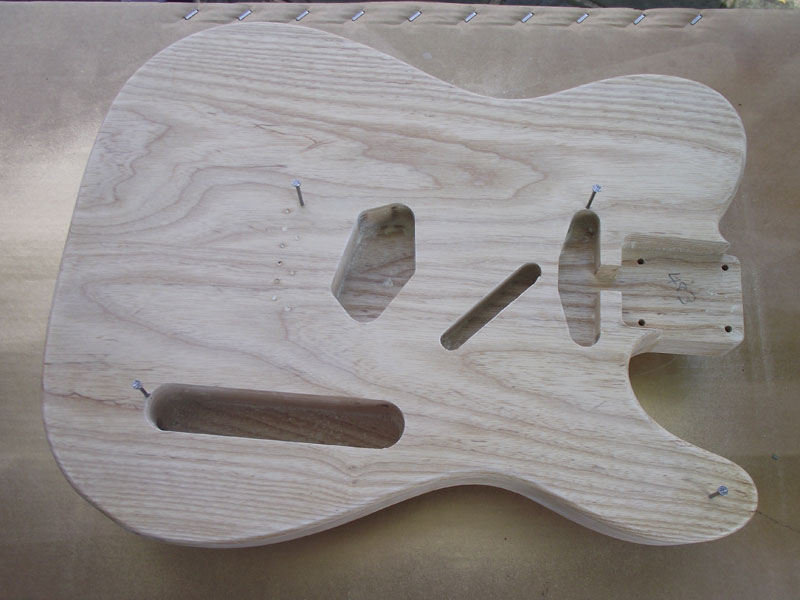
The body I’m using is by Guitar Build who offer a range of CNC machined guitar bodies. I’m very impressed with the accuracy of the shape, which even includes a “router’s hump” for vintage fans. It is two piece, centre joined and a reasonable weight. One piece bodies are available.
I can’t stress enough how preparation is key to a good result. Every stage in painting relies on the previous one being done right. It’s not difficult, it just takes care and patience, and the results are worth the effort.
Initial sanding.
The first step to finishing a guitar is to sand the wood to make sure every surface is flat and free from ripples and imperfections. Remember that you can’t make a guitar body flat when finished if it doesn’t start out flat. Any holes must be filled before proceeding. Use P240 grit paper and a flat block, moving along the grain and sand thoroughly until you are satisfied your surfaces are smooth. Don’t forget to sand the edges of the routs smooth too as they often have a fuzzy edge straight out of the machine.
Grain filling
The next step is to fill the grain. I’ve already covered grain filling in a previous post, so won’t show the details again but I will say that if you don’t fill the pores in the wood, you will get pin-holes which will spoil your finish.
Once the filled body has been sanded with P320 grit sandpaper it should feel very smooth to the touch and it will be ready for the next step, sanding sealer.
Sanding Sealer
 You should spray 2 or 3 coats of sanding sealer. The purpose of sanding sealer is to give you a perfectly smooth, non-porous surface for the lacquer.
I just laid the body flat, sprayed the front and sides, let it dry, flipped the body over and sprayed the back and sides. The sealer only takes an hour or so to be hard enough to handle.
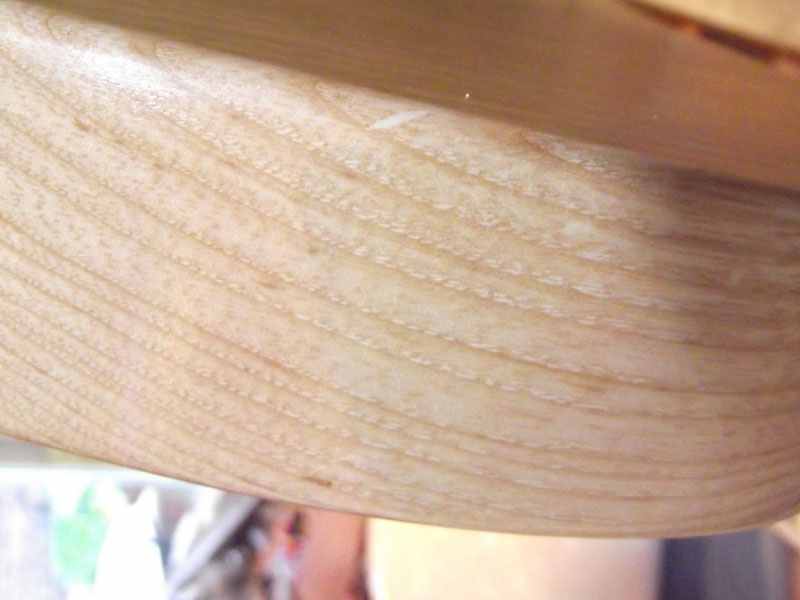
 Sand the sealer using a flat block and P320 sandpaper. You should end up with a matt appearance all over the body. If you have any shiny areas then they are low spots and you shouold spray another couple of coats of sealer, allow to dry and sand again.
Low spots, which I’ve tried to show in the photo (the darker areas) generally appear in the more porous parts of the wood, which are softer and prone to sanding more easily than the denser, harder areas.
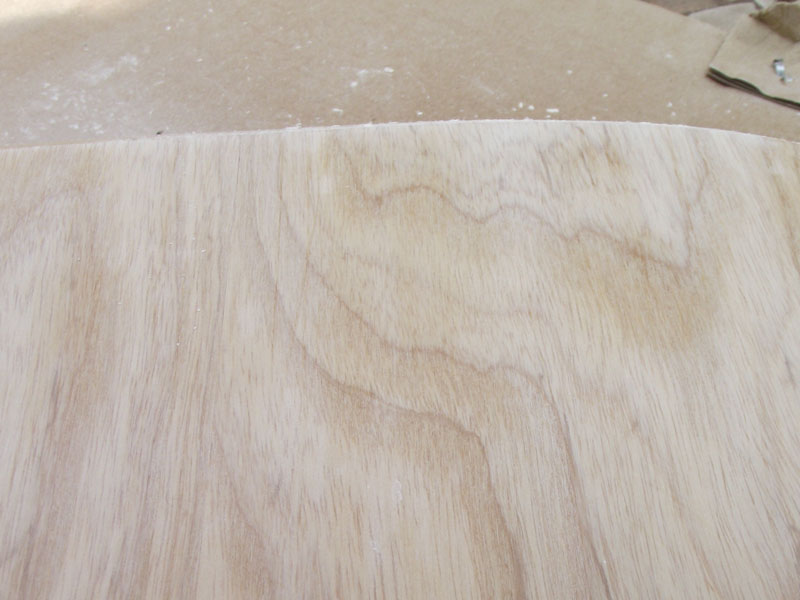
 Inspect the body carefully for any rough areas or pores that may have escaped the filling and sealing process, and if neccessary, use more sealer or even grain filler if necessary.
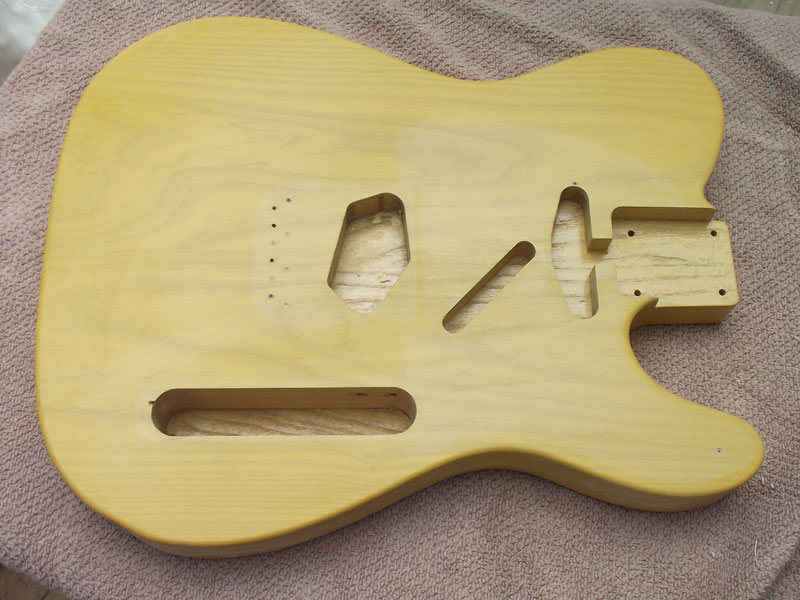
The picture shows how it should look. You can see the grain filler (the lighter spots) in the pores of the wood. You can see too that the grain filler has coped with a small imperfection on the edge of the body.
The sealing process took about half a can of my nitrocellulose sanding sealer.
Once you are happy that the body is perfect it’s time to apply the lacquer.
Nitrocellulose colour coat
Inspect your sanded guitar body and make sure that it’s ready for the butterscotch lacquer. Give it a final sand if necessary and lightly wipe it down with a tack cloth. Now is also a good time to clean out the ferrule holes on the back of the body.
 There are a few different ways to support the guitar body whilst spraying. You can hang it from a hook through a neck mounting screw hole or you can fasten a length of wood or metal through the neck screw holes to act as a handle.
I used a third method, and the one that Fender used up until 1965 of using nails as legs. There is an account of this on the Vintage Fender website.
The front of the body is sprayed first, then once dry enough to handle, it is flipped over onto its legs to spray the back.
Spraying technique – the front
I have supported the body on a small box so that the sides are clear of the work surface.
Note how I spray in overlapping lines, starting and stopping the spray at the start and end of each pass. Each coat consists of two or three complete passes of the spray and dries in minutes.
Spraying the sides
See how my aerosol can follows the curves of the sides, especially in the cutaway. Also the way I start and end each pass so that there are no hard edges and each pass blends with the next.
Spraying the back
Once dry enough to handle, the body was flipped over onto its nail legs. Again, just like the front, the back was sprayed with overlapping straight lines, starting spraying before the lacquer hits the body, stopping one the spray is clear of the body. The sides were sprayed again with the body in this position, giving them a little more coverage, just like the old Fenders of the 50s.
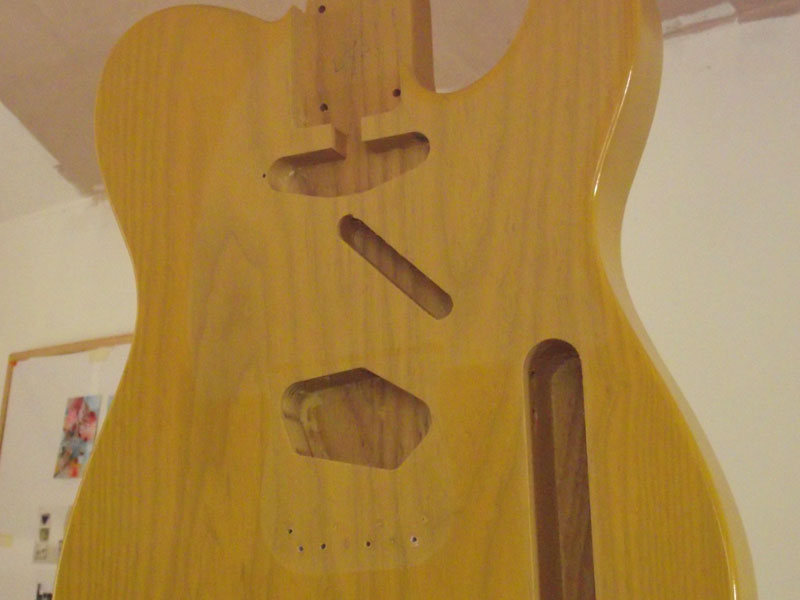
You can see I hope the way that the colour is starting to build up. On the front and back of the body I sprayed three or four coats each consisting of two or three passes. I left a few minutes drying time between each coat.

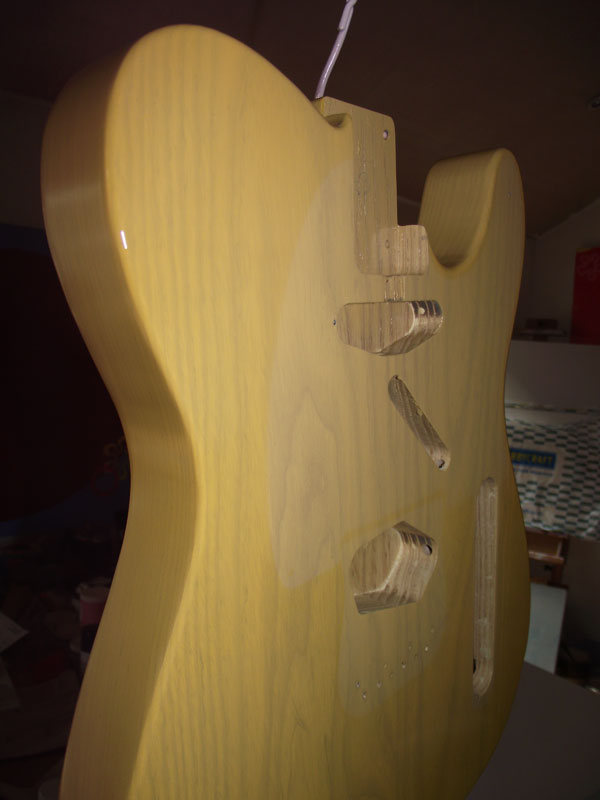
Butterscotch coat hanging to dry overnight
I used almost the whole can of butterscotch lacquer on the body and the whole process, on a warm summer day, took no more than half an hour for the whole body.
Here’s the body hanging to dry before the next step.
Darkening the finish
Now I like a nice creamy butterscotch but as this is meant to be a tutorial I thought I’d yellow it slightly for a more aged look.
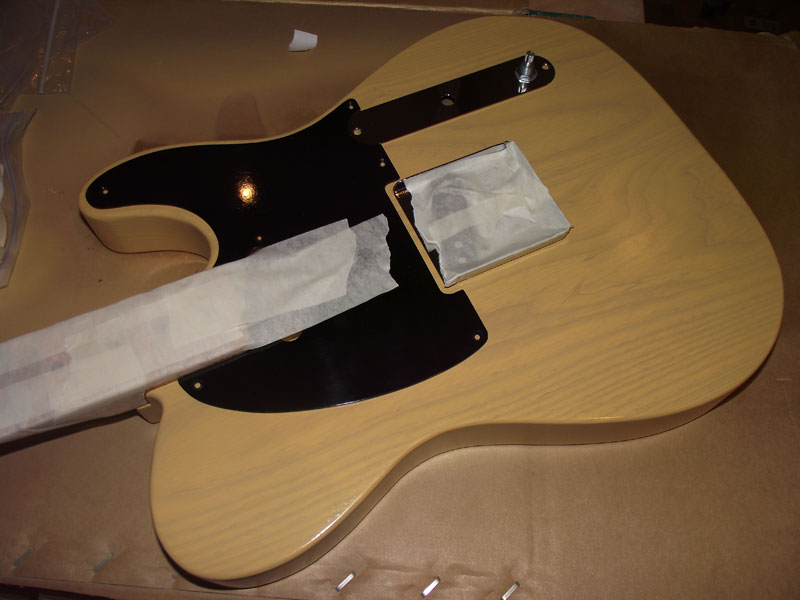 As an experiment I thought I’d mask off all the areas that wouldn’t see sunlight by attaching the hardware and spraying a tinted lacquer over the rest.
The bridge was held with nails in the string-holes and the pickguard and control plate with small pieces of double-sided tape.
I could have covered the hardware with masking tape but didn’t want to over-mask and it was easier to clean the chrome with cellulose thinners than to mask!
 I sprayed the body using the same technique as above with some amber tinted lacquer, front back and sides. Spraying took about 15 minutes with about three or fours passes of the spray.
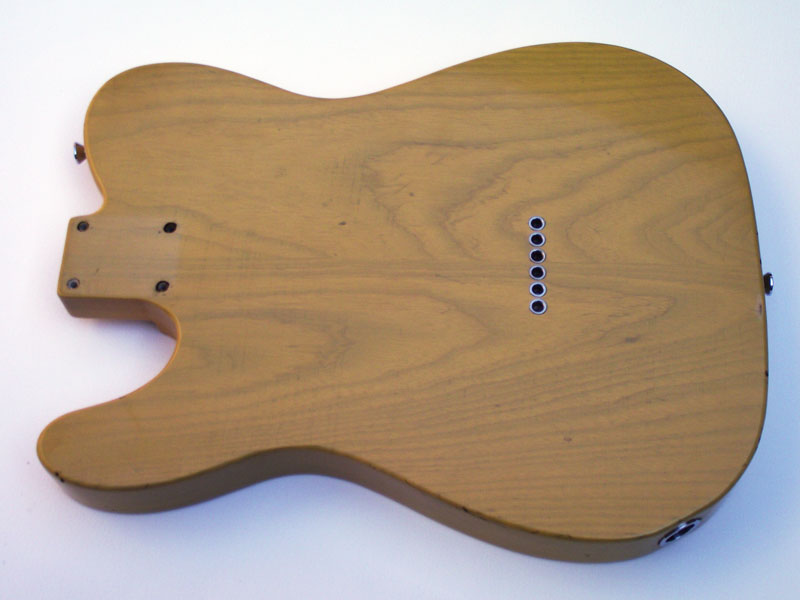
Here’s how it looks after the hardware was removed. I think it’s cool that it has tan-lines around where the “ashtray” bridge cover would be fitted.
It’s hanging to dry until tomorrow when, weather permitting, I’ll put the nail legs back in and spray the clear coats.
Nitrocellulose Clear Coats
Well it was a dry day today so I took the opportunity to spray the clear coats.
Spraying technique is the same as for the butterscotch but moving the can a bit more slowly so that the coats went on wetter and flowed to a gloss finish. Again, spraying front and back took no more than about half an hour and I used one and a half cans of Clear Gloss lacquer. You may need more if you are inexperienced!
You can see in the shots below that there is already a reasonable degree of shine.
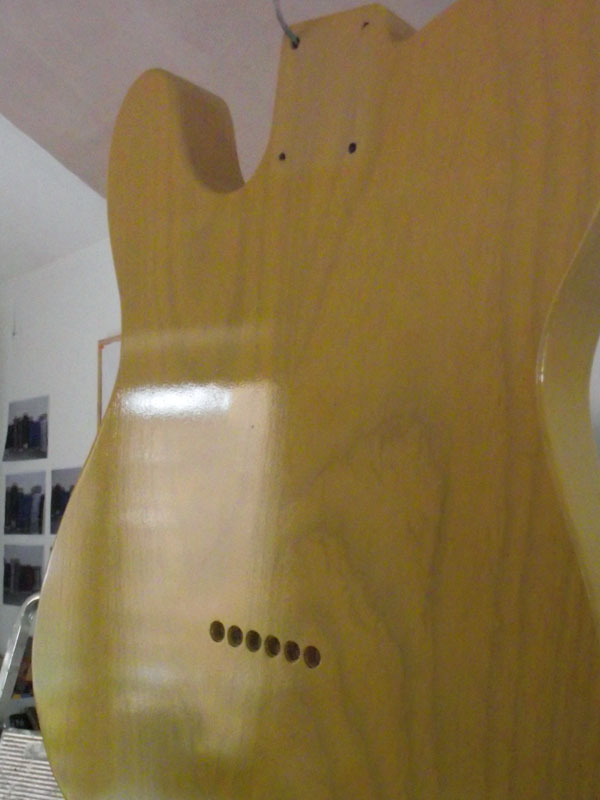
Note that I have not sanded the lacquer since the last coat of sanding sealer. To do so would risk sanding through the colour and creating uneven patches.
Next job, after the lacquer has hardened for a couple of weeks is flat sanding.
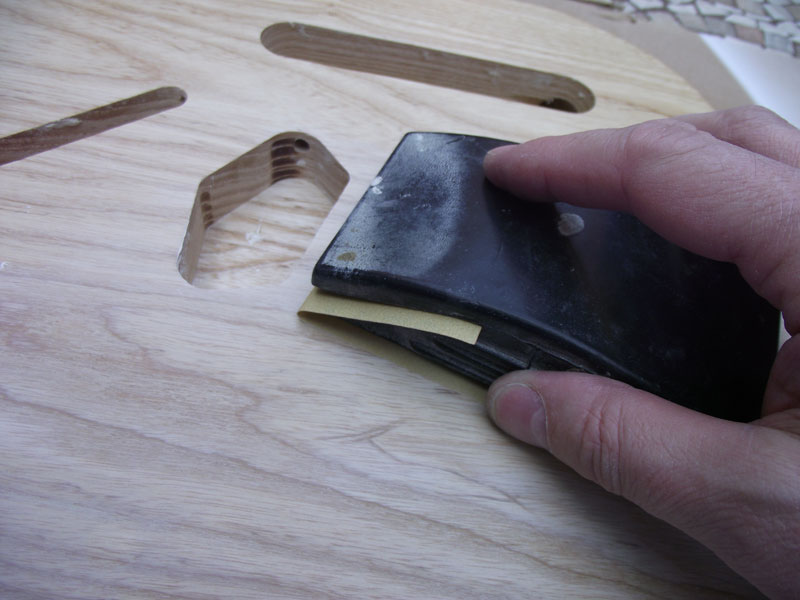
Flat sanding the body
 If you want to get a perfect shine to your guitar body, flat sanding is essential. You’ll need a rubber sanding block and some water with a dash of washing up liquid. The detergent helps keep the abrasive clear of lacquer and lubricates the body so you get a finer finish.
I started with P800 grit paper as my body was pretty flat to start with. If you have an uneven finish (and you shouldn’t if you prepared well and sprayed correctly) then you may need to start with P400 paper. This will however increase the risk of a sand-through which is disastrous.
Also don’t get the body too wet as if water gets onto bare wood it will swell the wood and crack your new finish. You can plug holes with wax to help avoid this.
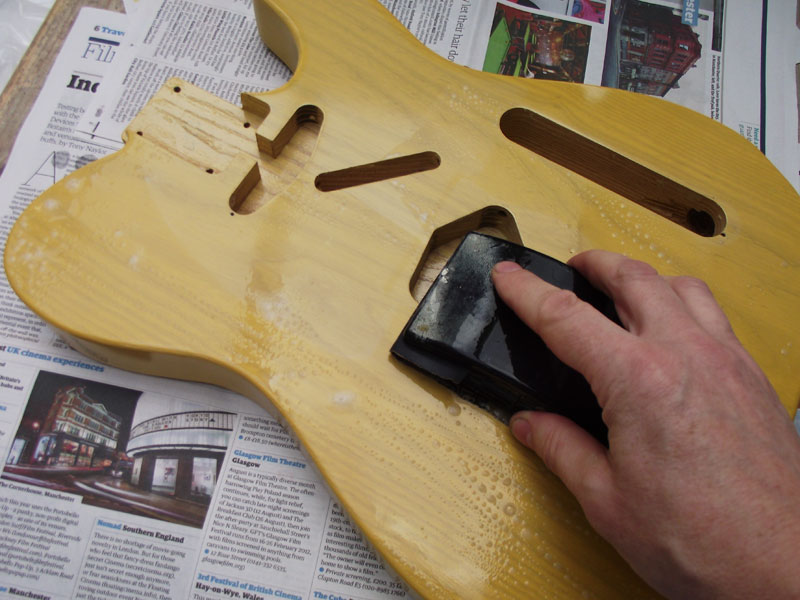 Wet your block and sand the body in a circular motion. Be very careful not to sand the corners as this risks rubbing through your lacquer.
You should be able to feel the suction between your sanding block and the flat surface of your guitar body.
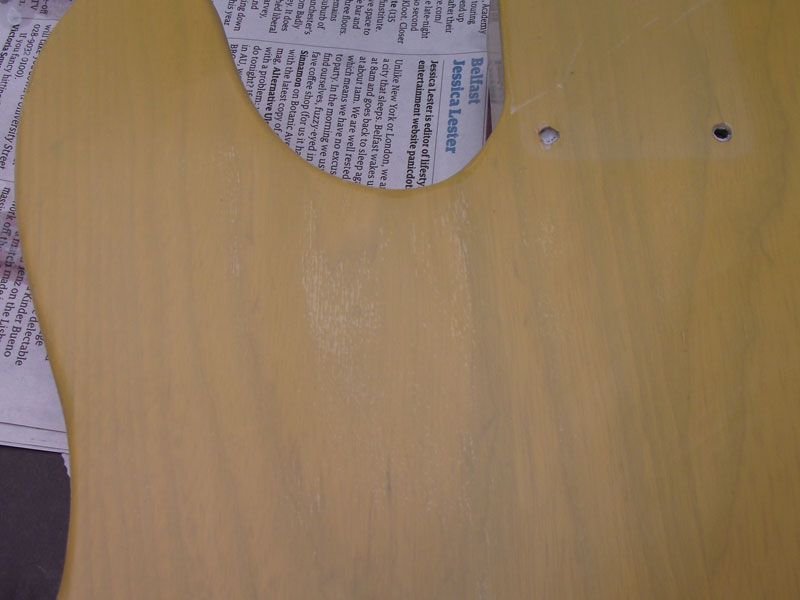 Once you think the surface is flat, wipe down with a paper towel and inspect for shiny spots as shown in the photo. These will generally be (as with the sanding sealer previously) in areas of more porous grain. Sand until these spots are gone, but do be careful not to sand through so take things slowly and use discretion. It’s better to have a bit of grain sinkage than patches of bare wood.
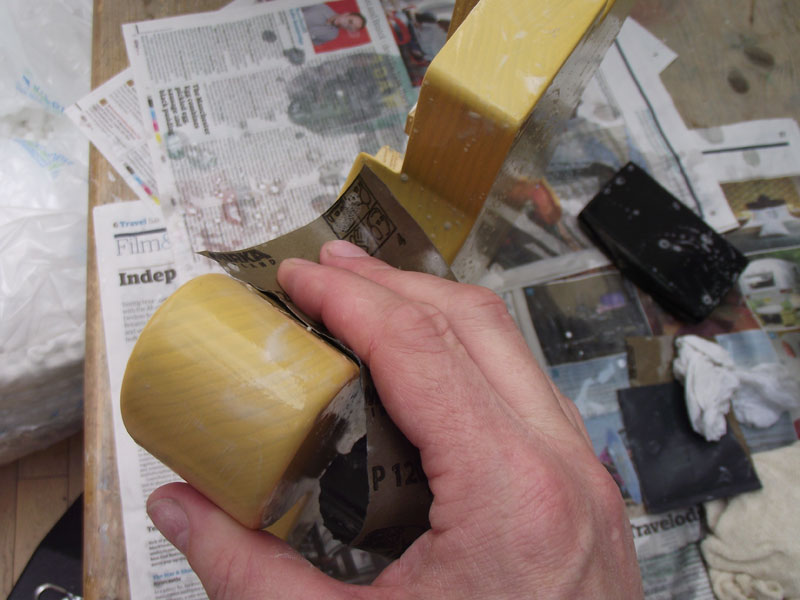 Take extra care on the sides, using your fingers to follow the curves. I’d recommend that you don’t sand the edges at all, rather than risk a sand-through.
Once you have eliminated all low spots, you can follow with P1200 paper, which should leave you with a flat, matt guitar body as shown.
Buffing the shine
 The next step is to buff to a high gloss and an automotive scratch remover like T-Cut is fine for the job. Specialist products however such as Farécla will give a deeper shine.
 I never use a mechanical buffer as doing it by hand doesn’t take very long. A couple of minutes with T-Cut on a piece of mutton cloth brought the body to a high gloss.
Work your way across the whole guitar body, taking extra care inside the cutaways and on the edges. Check carefully for dull patches and buff again if required.
The finished guitar
Here is the guitar assembled, strung and set up.
I have since “reliced” the body.

The assembled guitar


Gretsch inspired Telecaster
I put this Telecaster together over the weekend. It has a Warmoth replacement body and a neck and bridge from a Fender Classic Series guitar.
I cut the scratchplate out of 2mm acrylic sheet and painted the back with Plasti-Kote metallic gold paint to complete the look.