
Manchester Guitar Tech

Building a SAGA TC-10 Part 5 – Wiring the Electrics
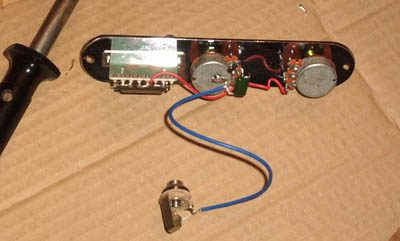
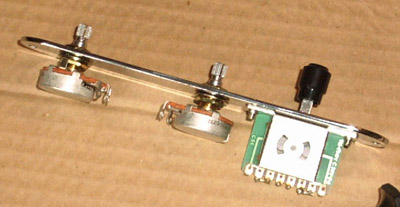
Attaching the switch and controls
Attach the 3-position switch using the screws provided. Attach the volume and tone pots with the soldering lugs facing. Use the lower nut to adjust the height of the potentiometer. Place the star washer between this nut and the control plate. use a dress washer beneath the upper nut and tighten fully.

Wiring the control plate
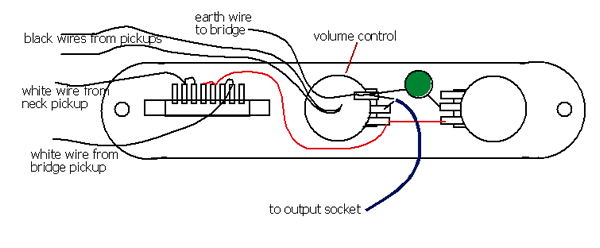
Solder a wire from the centre two contacts of the switch to the lower contact on the volume pot. Solder another wire from here to the lower contact on the tone control. Solder the upper leg of the volume pot to the body of the pot and connect a 0.047?F capacitor from here to the centre leg of the tone pot. Connect a length of shielded wire from the volume pot to the output jack. The shield should be soldered to the body of the volume pot and the centre wire to the middle leg of the volume pot.
Since then the set I’ve got here in Ukraine wires have steel sleeves for contacts and set doesn’t have capacitor, no need for soldering, but I ended up with my neck pickup doesn’t work and I will have to find out what doesn’t work, and I consider to re-wire whole set with twisted pair that I have, should be better.
If you are able to solder it’s probably better to start from scratch, push connectors can be very unreliable.