
Manchester Guitar Tech
Spraying a Gibson style TV Yellow finish
I often get asked how to spray a TV Yellow finish and have been meaning for a while to demonstrate the process, so here it is.
I think it’s unlikely that TV Yellow guitars left the factory as yellow as they are today. As with “butterscotch” Telecasters the colour has become more yellow over the years as the lacquer has degraded in UV light. Contemporary adverts list the finish on the Les Paul TV and Les Paul TV Specials variously as “limed mahogany” (older models) and “cream”. As such there is no “right” colour for a TV “yellow” guitar and you can create anything from white through “wheat” to something very yellow indeed.
As far as I can tell, the original limed magogany finish used a thin translucent white basecoat/filler combined which was brushed on and oversprayed with a clear beige top coat. The later TV cream finish used a darker filler over a thicker, more opaque white basecoat, again with a clear beige/yellow top coat. It’s the latter version that I’m copying here.
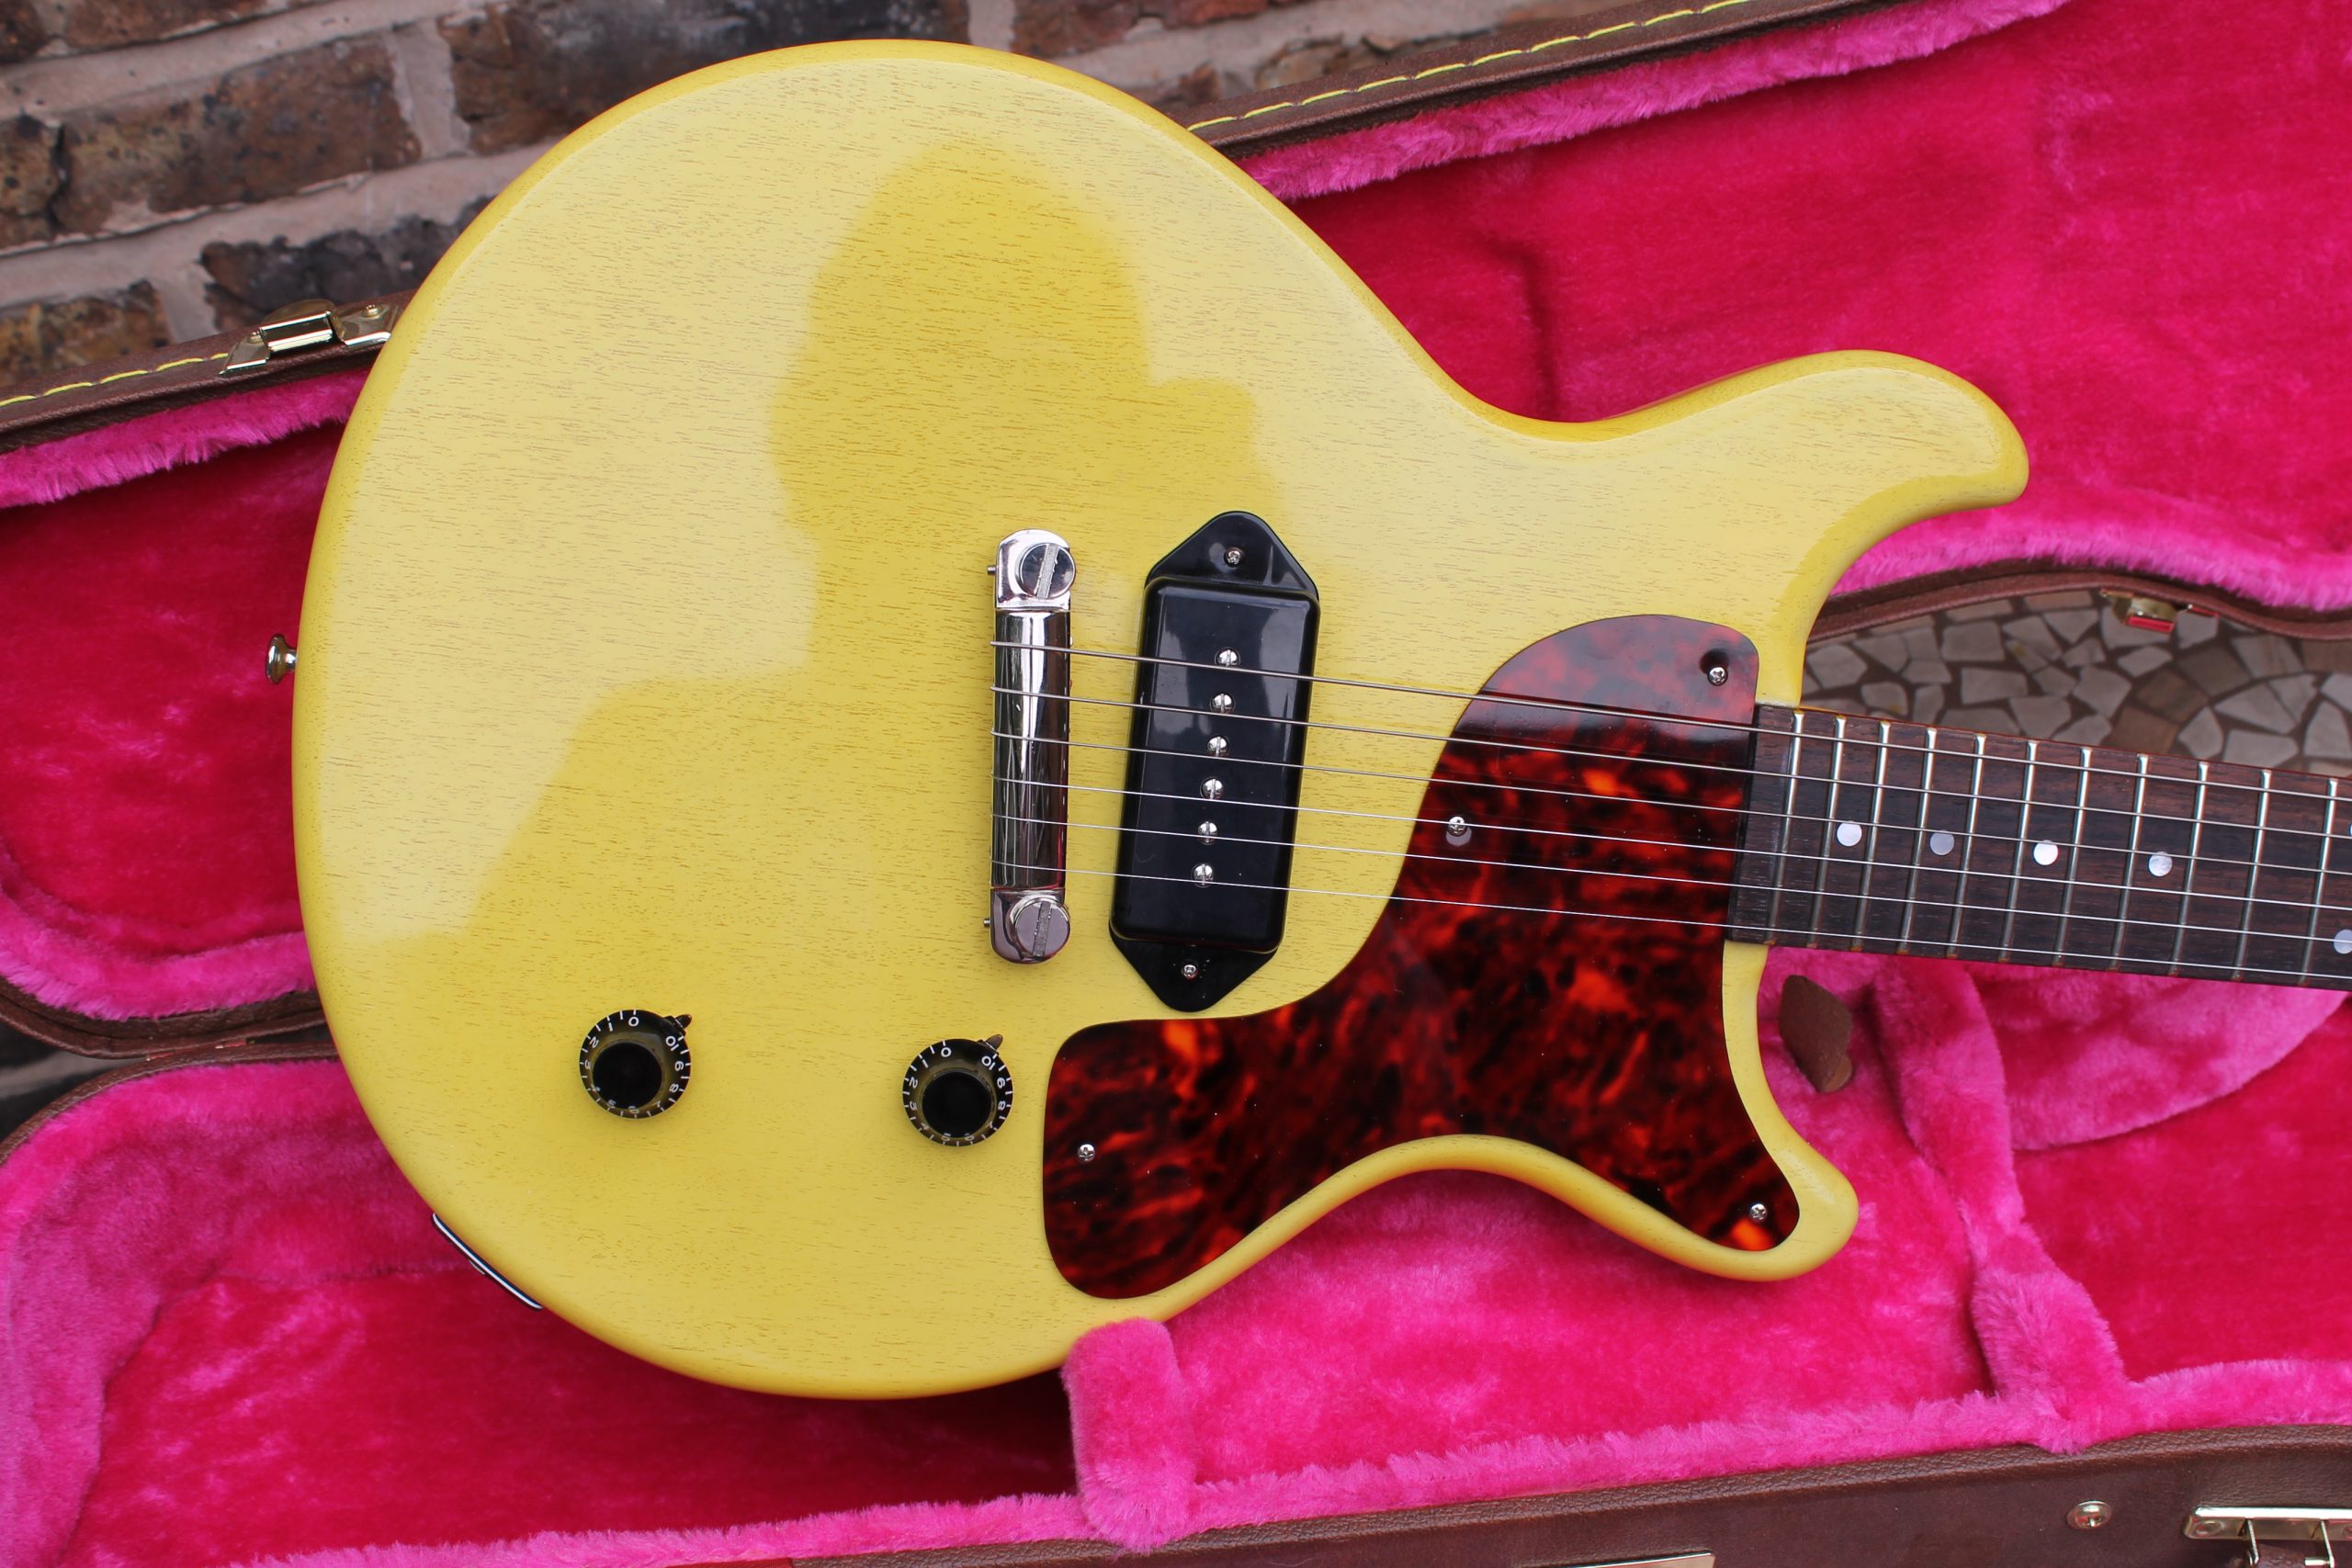
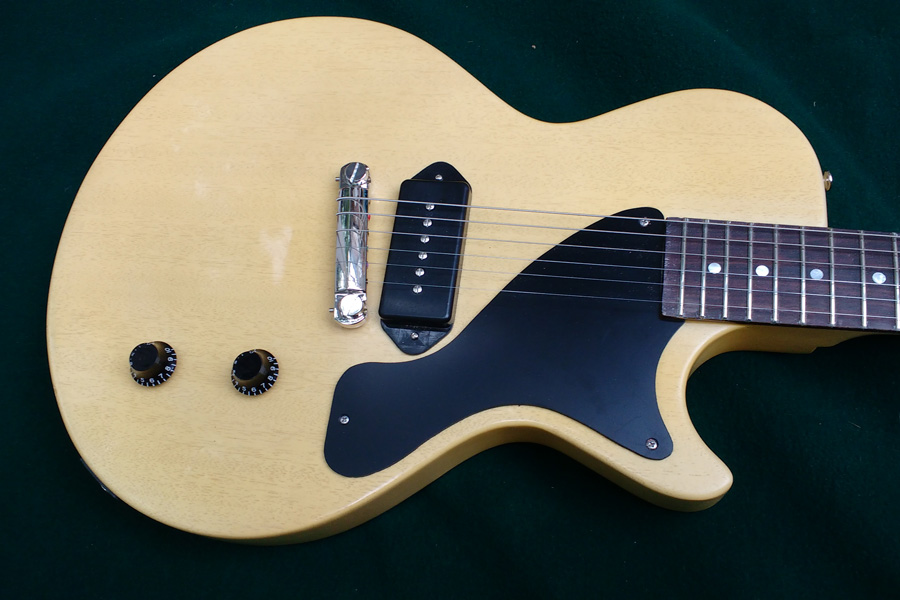
I’m basing my guitar on the 1959 Les Paul TV owned by Mick Ralphs from Bad Company which is a custard yellow shade.
Sanding
The first and most important step is to sand every scratch from the mahogany*. If scratches remain, they will be emphasised by the grain filler step.
I started with 240 grit and progressed to using 320 grit using 3M Sandblaster abrasives, and kept going until I thought that every scratch was eliminated.
Once thoroughly sanded I used an air line to blow the wood dust out of the pores of the wood, as I want to fill the open grain at a later stage of the process. You could probably use a computer keyboard duster aerosol for this if you don’t have access to compressed air.
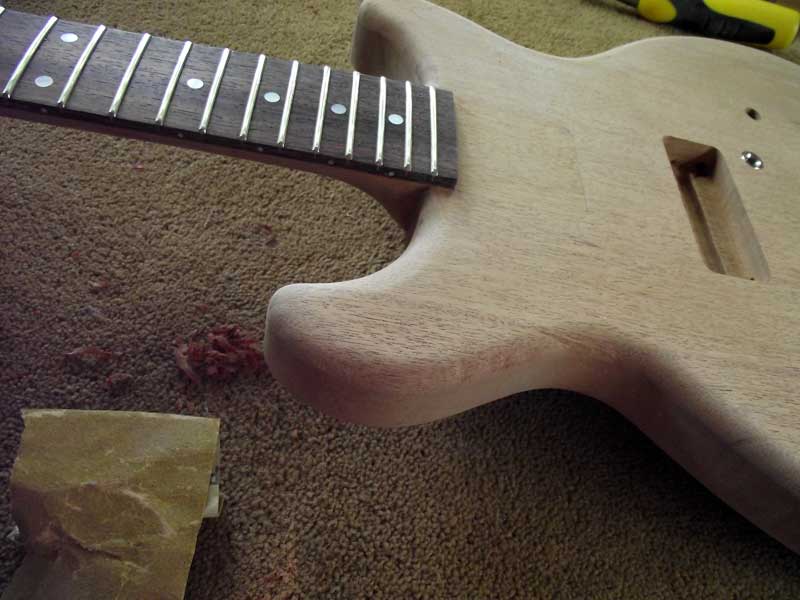
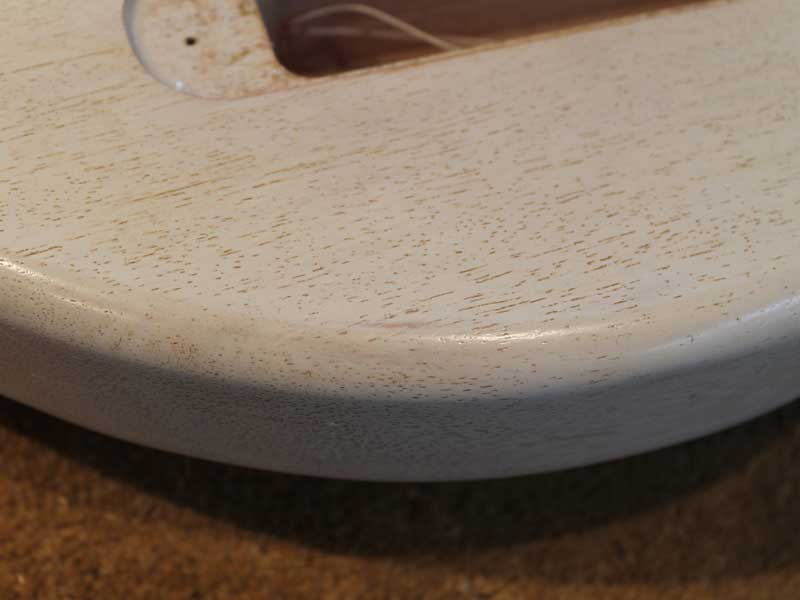
You might notice that I’ve routed a 3/8″ radius on the body edges as I’m aiming to reproduce a 1959 style guitar which I think feels nicer to play than the sharper-edged earlier version.
* Yes it’s got to be mahogany or a wood with a very similar grain for this to work!
Base Coat
The next step is to spray a white base coat. I used my White Primer which I knew would cover well in a thin coat.
Before spraying, I masked the fretboard sides, end and the nut using 3M fine line tape which gives a very clean line, and the fretboard face using standard masking tape.
The primer needs to be applied in such a manner that the grain of the mahogany is not filled with paint, so applied it fairly dry by spraying from about 10 inches away.
I applied one coat of primer then sanded lightly with 320 grit paper to denib, removing any raised grain.
Again, I used my air line to blow any dust out of the wood grain and applied another coat of primer before leaving it to dry overnight.
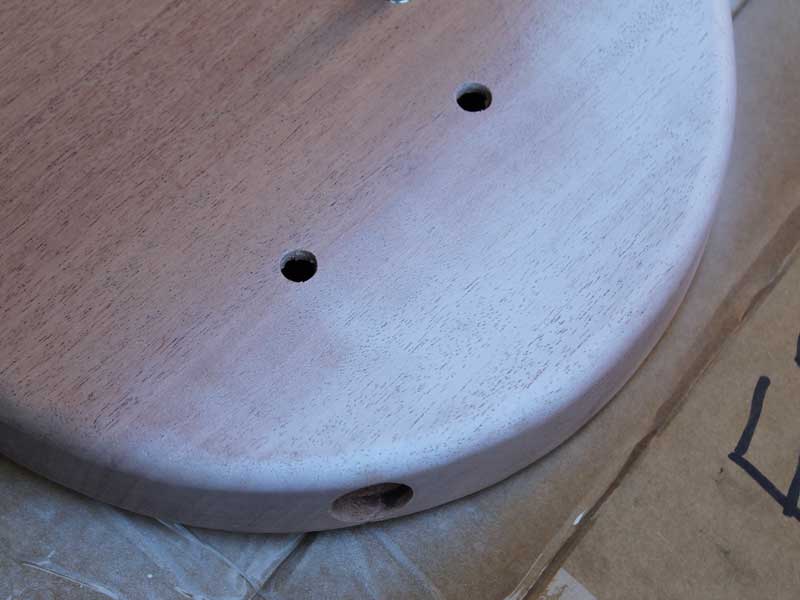
Grain filler
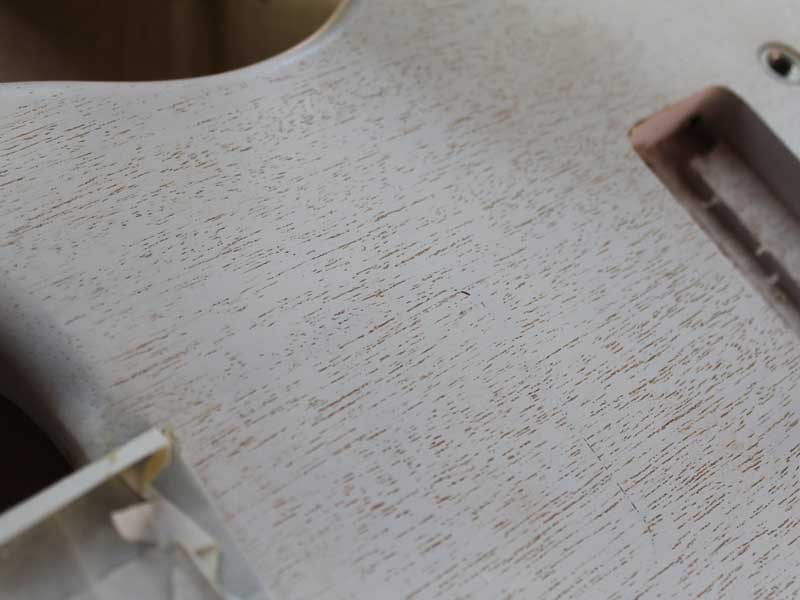
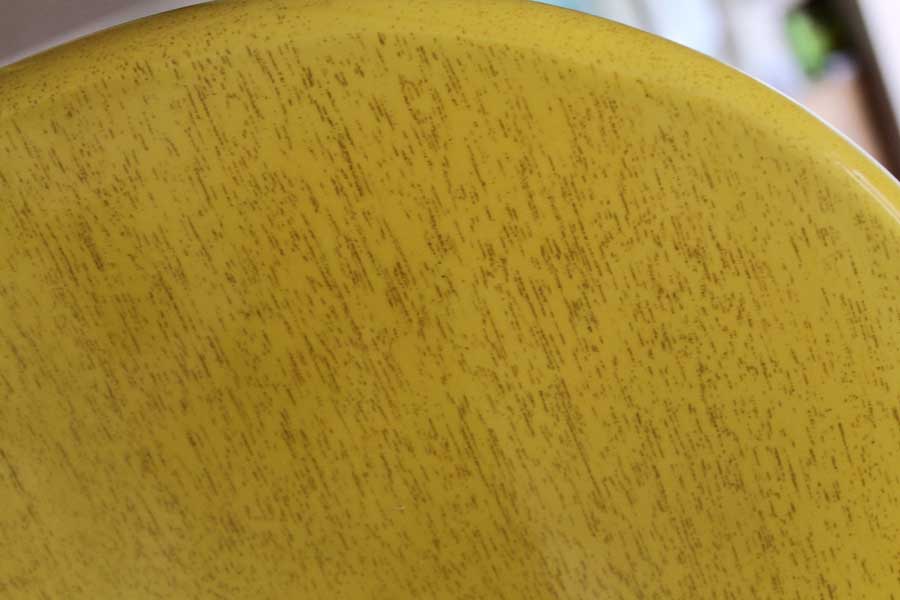
The look of a TV Yellow guitar rests on the grain filler being visible through the lacquer.
I used Rustins Grain Filler which I darkened with a touch of pigment. I’m not sure the pigment was entirely necessary and probably wouldn’t use it next time, but I did want the grain to stand out.
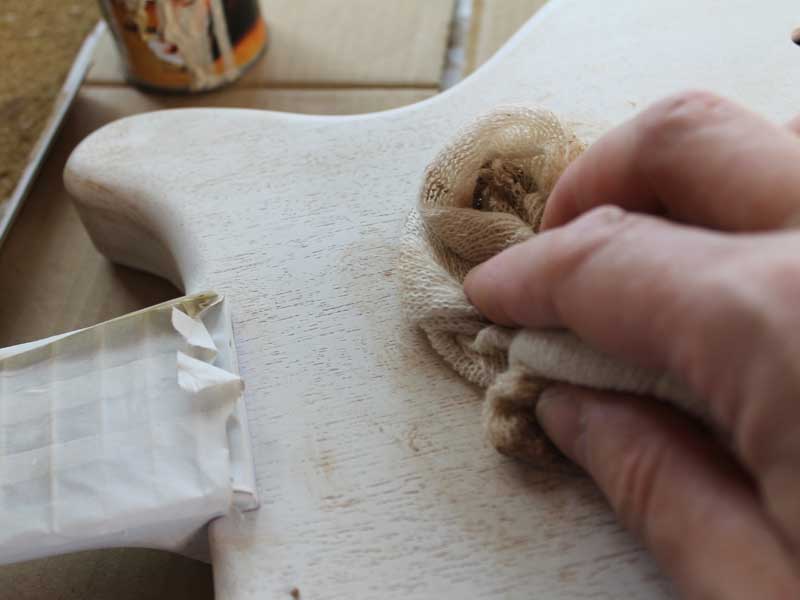
I applied the filler using mutton cloth, working in a circular motion, a small area at a time. I used a second piece of clean mutton cloth to wipe the surface of the guitar clean of filler, being careful not to lift the filler out of the pores.
I worked carefully over the whole of the guitar until I was happy that all the pores were filled as well as was possible. I felt this technique (rather than the squeegee/credit card application) gave the best compromise between thorough filling of the pores and minimisation of damage to the thin white base coat.
Finally I used a cloth lightly dampened with naphtha (lighter fluid) to carefully wipe any remaining residue of grain filler from the surface of the guitar, again being careful not to remove filler from inside the wood grain.
Sealer coat
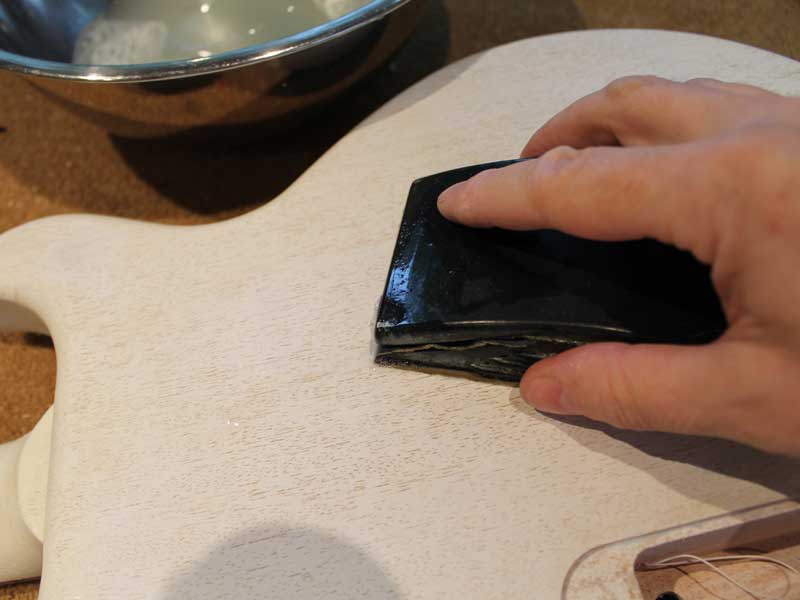
The grain filled guitar was of course not now perfectly smooth, due to the less than perfect filling of the grain so in order to provide a level surface for the colour I applied about four good of coats of cellulose sanding sealer to the whole guitar and left this to dry overnight.
The next day I block sanded the sealer coats level using P400 abrasive, wet with bit of Fairy Liquid in the water to help prevent clogging of the paper.
I did manage to sand through the base coat in one small area but touched this up invisibly by dabbing on some white primer before giving the area another light coat of sanding sealer.
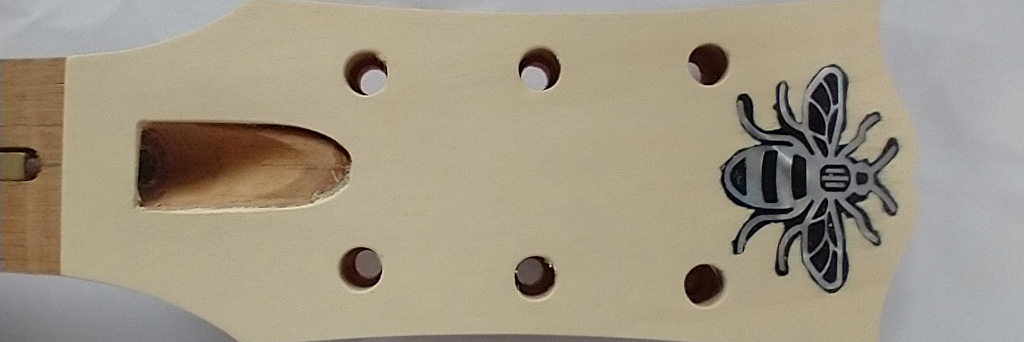
At this stage I also blackened the headstock face by masking off the sides and spraying about three light coats of black nitrocellulose lacquer until the face was fully covered and an even black colour.
The body was now ready for the clear yellow coat.
The yellow coat
Of course if I wanted a “TV White” guitar I would skip the yellowing step and go straight on to the clear coat.
If I was aiming for a wheat/cream colour as the guitars probably were when new, I’d use my Light Tint lacquer for the colour step. If I was after a full-on yellow I’d use my TV Yellow lacquer.
Whatever you use it’s important that you experiment first to make sure you can get the colour you want.
I’m actually using a lightly tinted amber lacquer that I made specially for the job. In hindsight, it’s probably a bit too yellow. Further down the page there is a single cut Junior which I sprayed in my Light Tint lacquer which is a better colour.
The image on the left shows the result of one coat of yellow. I could have left it there but I’m aiming for something darker. I have to be careful though as it’s all too easy to spray too many coats and end up with too dark a shade.
I wasn’t too concerned about achieving an even colour all over as the aged finishes often appear patchy where the lacquer differs in thickness either from the factory or from natural abrasion over the 50 years of use.
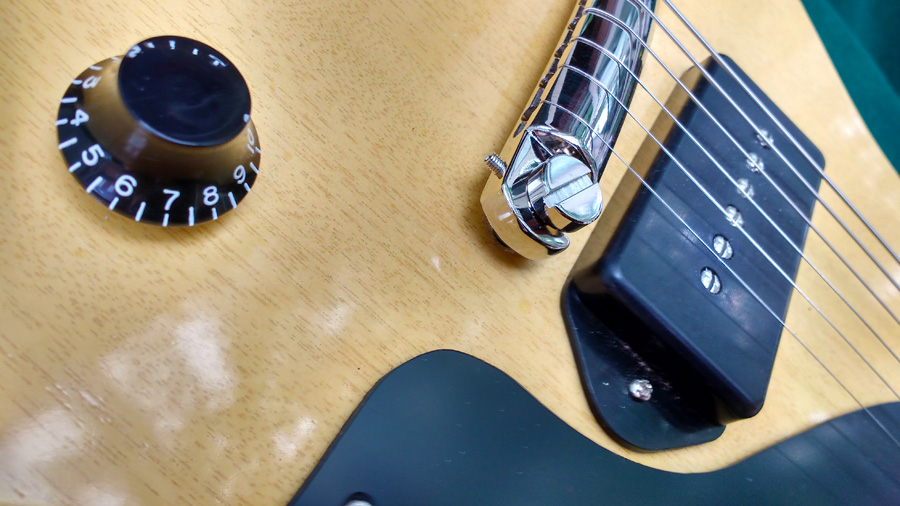
Here is the result of a few more coats of yellow. That’s more like it, I’m happy with that colour so will leave it there.
Clear coats
If you want to be able to flat sand and buff your guitar without disturbing the colour coat and sanding paler patches, it’s important to spray a good thickness of clear lacquer. The clear coat also protects the colour coats from damage and if you want to age your guitar, the clear coat will craze under thermal shock (heat/freeze cycles).
I sprayed sufficient coats of clear gloss so that I achieved a flat surface and enough of a thickness that I will be able to block sand without rubbing through. This will take at least two cans of Clear Gloss lacquer including the neck, but more is hardly ever a bad idea.
Once I had the clear gloss on, I left the guitar to dry and harden for a week before I block sanded, buffed and assembled.
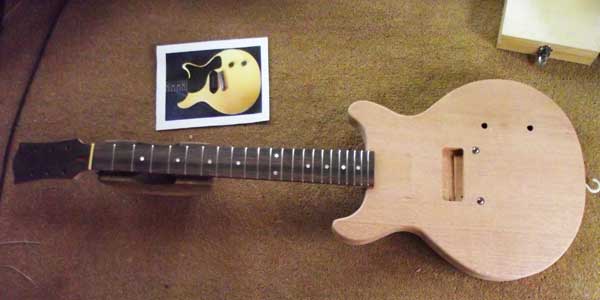
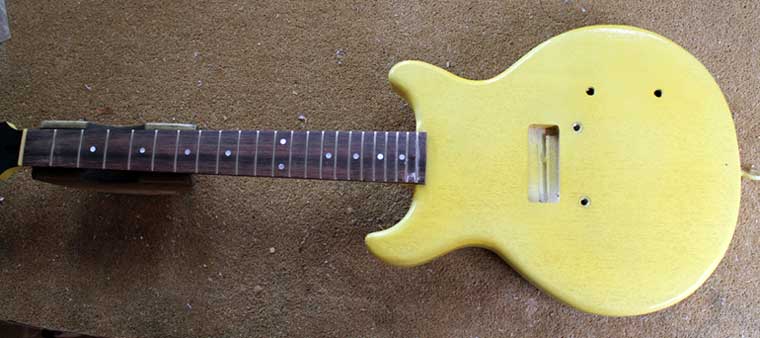
I’ve since also sprayed a single cut Junior using the same technique, but a different, less aged colour:
More info
Check out Eric Coleman at stew-mac doing a TV yellow repair.
https://www.stewmac.com/video-and-ideas/online-resources/learn-about-guitar-bridge-and-tailpiece-installation-and-repair/1955-gibson-tv-finish-recreating-that-unique-see-thru-yellow/
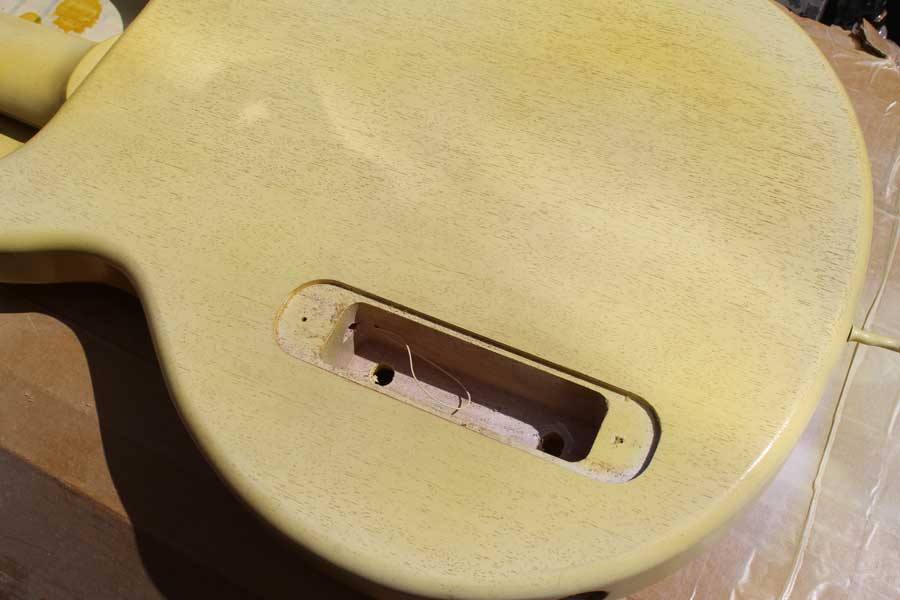
I have an original Gibson Les Paul ’56 Special & case in my shop from the original owner for restoration to a TV limed colour. He had sanded on it in attempts to change its colour.
The body is 1 piece Honhuras mahogany and has a thick solid white base coat that covers the pores but does not level them.
The yellow topcoat appears to be next and then a light brown grain filler that matches the original mahogany colour. The grain filler does not have any yellow colour or lacquer on it. The grain is very subtle. Then clear was applied over that. Buffing compound still remains in the pup cavities. The body colour faded significantly from that under the pups which was deeper yellow.
Interesting that the neck & body seem to have been finished separately through to the yellow stage as evidenced by the lack of over spray or masking at the neck joint and the tooling marks.
Hi Steve,
Thanks for sharing your detailed process on creating a Gibson-style
TV Yellow finish. I’ve been wanting to try this on my own guitar project.
A couple of questions:
1. You mentioned that the original TV Yellow guitars likely weren’t as yellow as they are today due to lacquer degradation in UV light.
How would you recommend replicating the original, less yellow shade?
2. I noticed you used a 3/8″ radius on the body edges. Is this a standard radius for a 1959-style guitar, or did you choose this specific radius for a particular reason?
Looking forward to trying this out on my own guitar!
Best,
Ryder
The colour changed over the years. The colour of the first guitars was called “limed mahogany” in the catalogue. For a lighter, mid-50s colour use my Light Tint like the one above. I think the colour changed to a deliberate yellow in 59.
Yes, 3/8″ radius is correct for a ’59. Earlier guitars had a much sharper edge.
Hi Steve
Is there a technique to applying the tinted lacquer evenly?
I find that unlike solid colour coats the tinted lacquers can look darker in some areas over others and you can end up applying too many coats to try and even it out
Cheers
Steve
Yes you’re right that the colour darkens with film thickness. That’s why you have to spray in long overlapping passes (pretty much like a solid colour actually).
Once you’ve sprayed too heavily in one area it’s difficult to rectify and as you say spraying “just one more coat” can take it over the top.
Light, overlapping coats is the way to go.
Hi Steve,
Looks awesome!!
This is probably a silly question, but……
Once you have sprayed the face of the headstock black, do you mask it off before spraying the yellow/tinted lacquer?
Or do you spray over the black with the yellow/tinted lacquer?
Many thanks,
I can’t remember what I did. I might actually have sprayed the black *after* the tinted coat.
Remember though that the yellow is from the clear coat ageing and this will have been sprayed over the headstock face too, so it’s “historically accurate” if you like to NOT mask and spray the tint over the headstock face.
Thanks Steve.
Hi, Great info and guide here, love the look of the ‘wheat’.
I have a question regarding the grain filler, I am using the Rustins as recommended, and managed to get an Oak color too, however, I have noticed that the grain filler is leaving a brownish tint over the primer, is this normal? btw, as lighter fluid is now a bit hard to come by, I used methylated spirit to clean the excess grain filler.
And I may or may not have primed the body with about 4 coats, is this too many?
Does the colour come off with meths? Maybe the oak shade contains a dye? You can get lighter fluid in most newsagents I think, you certainly can in teh one across the road from me!
Yes I think 4 coats is maybe too much, it might fill too much of the wood grain. You just need enough to make the guitar white.
Thank you for your prompt reply. :)
I’ve just finished a TVY Junior using Steve’s (brilliant) instructions. You do need to swipe the surface with naptha (lighter fluid) to get the brown out – it’s to be expected. I used a very dark brown tint, and the lighter fluid brought the white primer up a treat. Just don’t scrub too hard with it.
Hi, what color did you use for the single cut? Tank you
Simone
I used my Light Tint lacquer for this one.
Hi Steve. This advice is excellent, thank you – I am following it carefully to try and achieve an identical ‘59 TVY result. So far, so good, having finished the white primer; I’m about to undertake the grain filling. I have a tin of Rustins grain filler but only in the ’natural’ colour. I get her that is linseed oil-based? Could you provide details of what stain you used to darken this? All the ones I can find are water-based – will they work? Alternatively, I have a much darker Ronseal ‘multipurpose wood filler’ – probably the right colour but I’m not sure what base that is (water?) or if it will be fine enough. Can you offer any advice please?
Yes, it’s linseed oil-based. I didn’t use a stain, which would risk staining the primer but added a brown pigment from an artists supplier – burnt umber maybe?
I do think however that the filler was too dark and on subsequent TV Yellow jobs I seem to recall that I didn’t darken it at all and there was just enough contrast between it and the white base coat.
Ah of course – artists’ oil paints are linseed oil-based!
I assume that you did not use the ‘Natural’ coloured Rustins but possibly the ‘Mahogany’ or ‘Teak’? They don’t seem very easy to find in shops/online but I shall persevere.
Thanks again Steve ?!
I used the natural colour Rustins Grain Filler each time. Mahogany is too orange, Teak too dark. The “Oak” version, if you can find it, is probably ideal.
Could you post some pictures of the neck and headstock rear please, Steve. I’ve purchased all the supplies from your site and ready to go, I just haven’t considered the neck yet.
The same steps for the neck and back of the headstock?
Regards
Toby
Sorry but I don’t own the guitars any more. The neck and rear of the headstock are however treated in exactly the same way as the body.
Mask off the sides of the fretboard before spraying the white basecoat of course.
Brilliant. Thanks Steve.
Steve,
I’m now embarking on a red 335 style guitar using your clear red. Would it be the same principle as the TV yellow (which was awesome, by the way), or would I miss out the white primer stage just grain fill and spray?
Definitely no primer! You will need to grain-fill the neck if it’s mahogany but not the maple body. I’d recommend a coat of sanding sealer to seal the wood before adding the colour. Once you have a nice flat surface spray the Clear Red to get the shade you want, scrape the binding clean and apply plenty of Clear Gloss to finish.
You can mask the binding before spraying the colour but there’s almost always some bleed under it that needs scraping clean. See this Goldtop project.
Huge thanks, Steve.
After much reading and what info I could find online, your process makes it easy to figure it out. My question is about the base coat of opaque white. I put down one very light coat, lightly sanded with 320, and blew out the grain. It still seems pretty light, meaning you still see the wood color. I know you should, but it’s really light. Should Spray a little more and repeat the process? I’m afraid of making it too yellow.
You do need to get full coverage with the white. A few light coats should do it, don’t spray too heavily and fill the grain.
My TV Yellow has a low-medium dye loading and you should easily be able to control the depth of the yellow.
Wow. What a wonderful looking job. Thanks for all the info. I always wanted to know how to do this. You taught me a lot about how to get the grain to come through. I am going to try this.
“TV Yellow” smocks I suppose? Gibson developed the color for Les Paul’s frequent television appearances although it is believed he never played a TV Yellow guitar at least not on television.
Well that’s one theory. Others are that the guitars were the same colour as limed mahogany TV cabinets available at the time, or that TV Yellow was a response to Fender’s TELEcaster.
Love this Junior you’ve inspired me to do the same. My question is I’m seeing so many people say you have to wait 1-2 months before final wet sanding and polishing for assembly. Do you feel a week is long enough? I really don’t want to wait 1-2 months to assemble I want to play it!! Thanks
hey man, I have the same guitar ,,, the neck is already glued on… is it too later to do that routing ? I agree with you that it feels better… miss the 59 shape.
I did the roundover with the neck attached. The back was no problem of course but for the front I had to raise the router above the body using a some MDF.
You don’t need to get tight in to the neck as the roundover tapers off.
Hi Steve,
What kind of plastic Is the pickguard? It looks translucent ,not laminated . I like it . Where I can buy it? Thanks
It came from WD Music Products
Hi Steve
Which product did you use for the final coats on the single cut Junior? Love that off white finish!
Thanks, Dave
I used my Light Tint lacquer
Great article. It has given me the confidence to finish my own partscaster. I’m going for a TV white finish. Is the sanding sealer really necessary if I don’t mind if the texture of the wood remains visible. Can I spray the finish straight over the grain filler?
Thanks,
Robin
The sanding sealer is to help you get a smooth finish. If you don’t mind a bit of grain sinkage then you can go straight to lacquer.
Thanks for a very helpful how-to. I’m a former Mancunian who lived with me back to the old Moss Side, in the late 1960s, if you can picture that. Right on Oxford Road across from The Eye Hospital. I’m now in Atlanta, Georgia, USA and understand the Moss Side is very different since renovations in the mid-1970s.
So then, my question: the translucent yellow you achieved on the LPJr with the tort guard, that’s what I’m shootin for. But when I look at your Light Tint Lacquer (https://www.manchesterguitartech.co.uk/product/light-tint-gloss-nitrocellulose-lacquer-aerosol/) it appears so much more pale than the result on the guitar. How’s that, sir?
Cheers,
Doug
The colour of any transparent lacquer deepens with film thickness, so the more coats you spray, the darker it gets.
Great job !! Congrats.
I found a better white primer. When dry, it does not dissolve under pressure from the pore-filler. For all those USA people, it’s called: Zinsser’s “B-I-N,” shellac-based primer. It gives the same effect as shown in your photo, “close-up of grain-filled body.”
When you refer to “cellulose primer,” above, your are referring to “nitrocellulose primer?” I think I may need to nail down the “base” of the correct primer. It may just be a matter of different nomenclature. In America, “mutton cloth” is called “cheese cloth.” I can inquire all day long to try to purchase “mutton cloth.” And people from Bangor, Maine, to SanDiego California, will look at me crazy.
Yes in UK we shorten nitrocellulose to cellulose, rather than nitro as in US.
Cheesecloth is woven (whereas mutton cloth is knitted) and we used to wear shirts made from it in the 1970s.
Mutton cloth is also known as stockinette.
After spraying the white, flat, base coat, and letting it dry overnight, I sanded, blew, and began to
apply the grain filler. However, the grain filler rubbed off all the white paint. What gives? For white, I am using Rustoleum Painter’s Touch 2X “Ultra Cover” Paint and Primer. It is solved with Acetone. Perhaps this product is not similar to the one you used. Can you thing of an American product which is similar to yours? Thanks.
I’m not familiar with the primer but it should be okay. I think that your grain filler may contain some solvent that softens the primer – what brand grain filler are you using?
I was using “Mahogany Pore Filler,” made by “Cardinal,” and purchased at Luthier’s Mercantile Inc.
I’m not familiar with it sorry, but clearly from your experience it isn’t compatible over the primer.
The Rustins grain filler I use is simply pumice powder and linseed oil, is there something similar in US maybe?
Well, I will check for something similar to Rustin’s. Also, I went out and bought 3 different brands of
flat white primer. I’m testing them on scrap right now. Tomorrow, I will rub them with pore filler, and look for a different result. Thanks much for your input. It takes years of trial and error, I suppose, to find the right ingredients.
Do you need to dilute the Rustins grain filler or do you apply it ‘neat’
Thanks,?
I generally thin it a bit with white spirit. It has to be firm enough to stay put though.
Most helpful and very much appreciated. I’d really like to recreate the wheat model. Being in the USA I’m unable to obtain any of your products. What would you recommend that is obtainable here in “light tint” nitro?
I think that Mohawk produces something you could use. Here’s a link to their product catalogue.
.
Nice work!
I do have to comment on your description of Gibson’s procedure in the 50s, however. My research has shown that no colored lacquers were used for this finish. The yellow color comes from a minuscule amount of yellow aniline dye added to the oil-based grain filler, which would bleed into successive top clear coats giving the yellow tone to the finish. Because of the yellow aniline’s propensity for bleeding (even more so than that of red dye), the amount must be carefully measured. I think this may explain in part the variation in TV Yellow examples form those years.
BTW – I like the “wheat” variation myself.
cheers,
Jack Briggs
Briggs Guitars
nice work! just one silly question, I just realised that some gibson guitar’s color is described as ‘TV Yellow’, and others called ‘Translucent yellow’,like 2015 Gibson Special double cut translucent yellow finish. So is Gibson TV yellow as same as Translucent yellow,just with different name? or they are actually different color? Many thanks.
With the exception of the Historic reissues, modern Gibson finishes bear no resemblance to the old ones and I think that Gibson call them whatever the marketing department want.
A true “TV” finish is as I describe but modern ones generally use fewer steps to create a superficially similar appearance.
As a follow up…..Every once in a while a bad place will show up where the grain isn’t pretty or something…..If this happens you can simply take the white base coat you used and put a little on a very small paint brush and cover the bad grain, then go back and (if you have any artistic skill) paint in new grain. If you do this with Acrylic Craft paint it will wipe off easily if you mess up.
Very good! Most people do not realize that Gibson NEVER used the term (TV Yellow) back in the 50’s, In fact yellow was the very last thing they wanted. It was always supposed to be an off white with grain showing. But, there was no way to keep the Nitro from turning yellow. I have been doing the original type finish for many years and sometimes a customer will want the original off white instead of the yellow. Because I use standard Nitro the finish will turn yellow by itself eventually unless left in the case forever with no exposure to light.
Maybe semantics but Gibson DID use the term “T.V Model”.
It’s right on the headstock.
“TV Model” but not “TV Yellow”. They called it a limed mahogany finish.
Good job. I have a similar finished clone guitar and am curious to find what other junior doublecut owners use as a hard case. The traditional LP cases fit around the body but do not support the neck in anything like a reliable way. Asuming the Gator case in the pic is the one you use for your LPDC, what model is it?
It’s the standard Gator Les Paul case. It’s a bit deep in the body, but does hold the neck well, with support under the first and ninth frets.
Hi Steve,
I am fulfilling one of my bucket list dreams of building my own Telecaster, I have purchased the body and neck from Warmoth (very impressed). It will have a Seymour Duncan humbucker sized P90 ‘Phat cat’ at the neck and a Seymour Duncan ‘Quarter Pounder’ at the bridge. The neck (birds eye maple) is finished in Satin nitro cellulose but the body is raw alder. I am thinking of using some dye to give a cherry sunburst finish. then sealing and lacquering. First of all, can you recommend the right sanding sealer and clear gloss lacquer? Can this be used over a water based dye? Do you also sell dyes? The actual finish may change from sunburst but the broad question is the same regarding the dyes. I like the TV by the way! :-)
Thanks,
Phil
Love it!, Excellent job, I have one,(well a twin humbucker version) to finish when I get time!
I’ve got a Special to do as well (with P-90s) but I’m undecided between TV Yellow and cherry!
I’ve got a 2001 custom shop sg I think is too yellow. Is there a way to lighten it without refinishing?
Sorry but I don’t know of any way
So Steve on a white TV rework- Shall I rely then on the white primer to be my final color or is there a step to add?
I see you said skip to clear coat if not going yellow.
I love the yellow but have a few silver TVs and I think a White would be original.
Thanks
For TV White the steps are White Primer > Grain filler > Sanding Sealer > Clear Gloss
Sanding Sealer optional but it does speed things up. You can just use clear lacquer if you prefer.
Thank you for the quick reply! We’ll see how things go-