
Manchester Guitar Tech
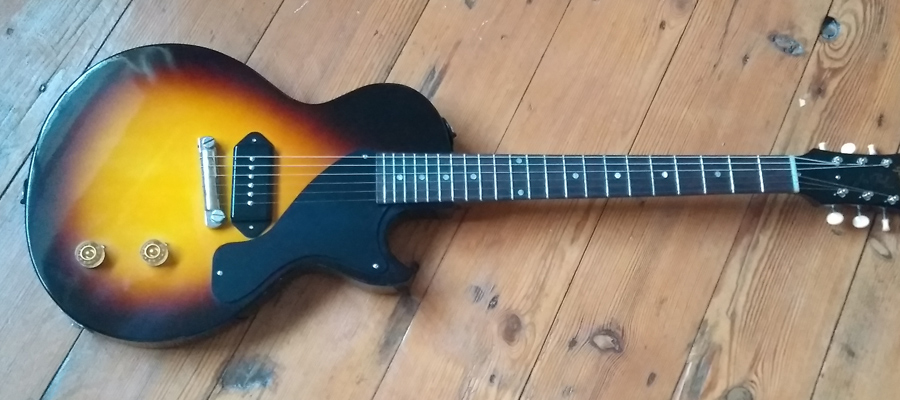
Spraying a Les Paul Junior Vintage Sunburst

The reason for doing this job was that I have not been able to find any other information about recreating this particular finish.
I’ve been fortunate to be able to examine a number of mid/late fifties Gibson guitars to see how they were painted and here I’ve attempted to re-create that using aerosols (of course!)
The first step in any finish is to sand the wood well, then fill the grain. I’m using Rustins grain filler but have darkened it by adding some burnt umber pigment to replicate the dark filler found on these guitars.
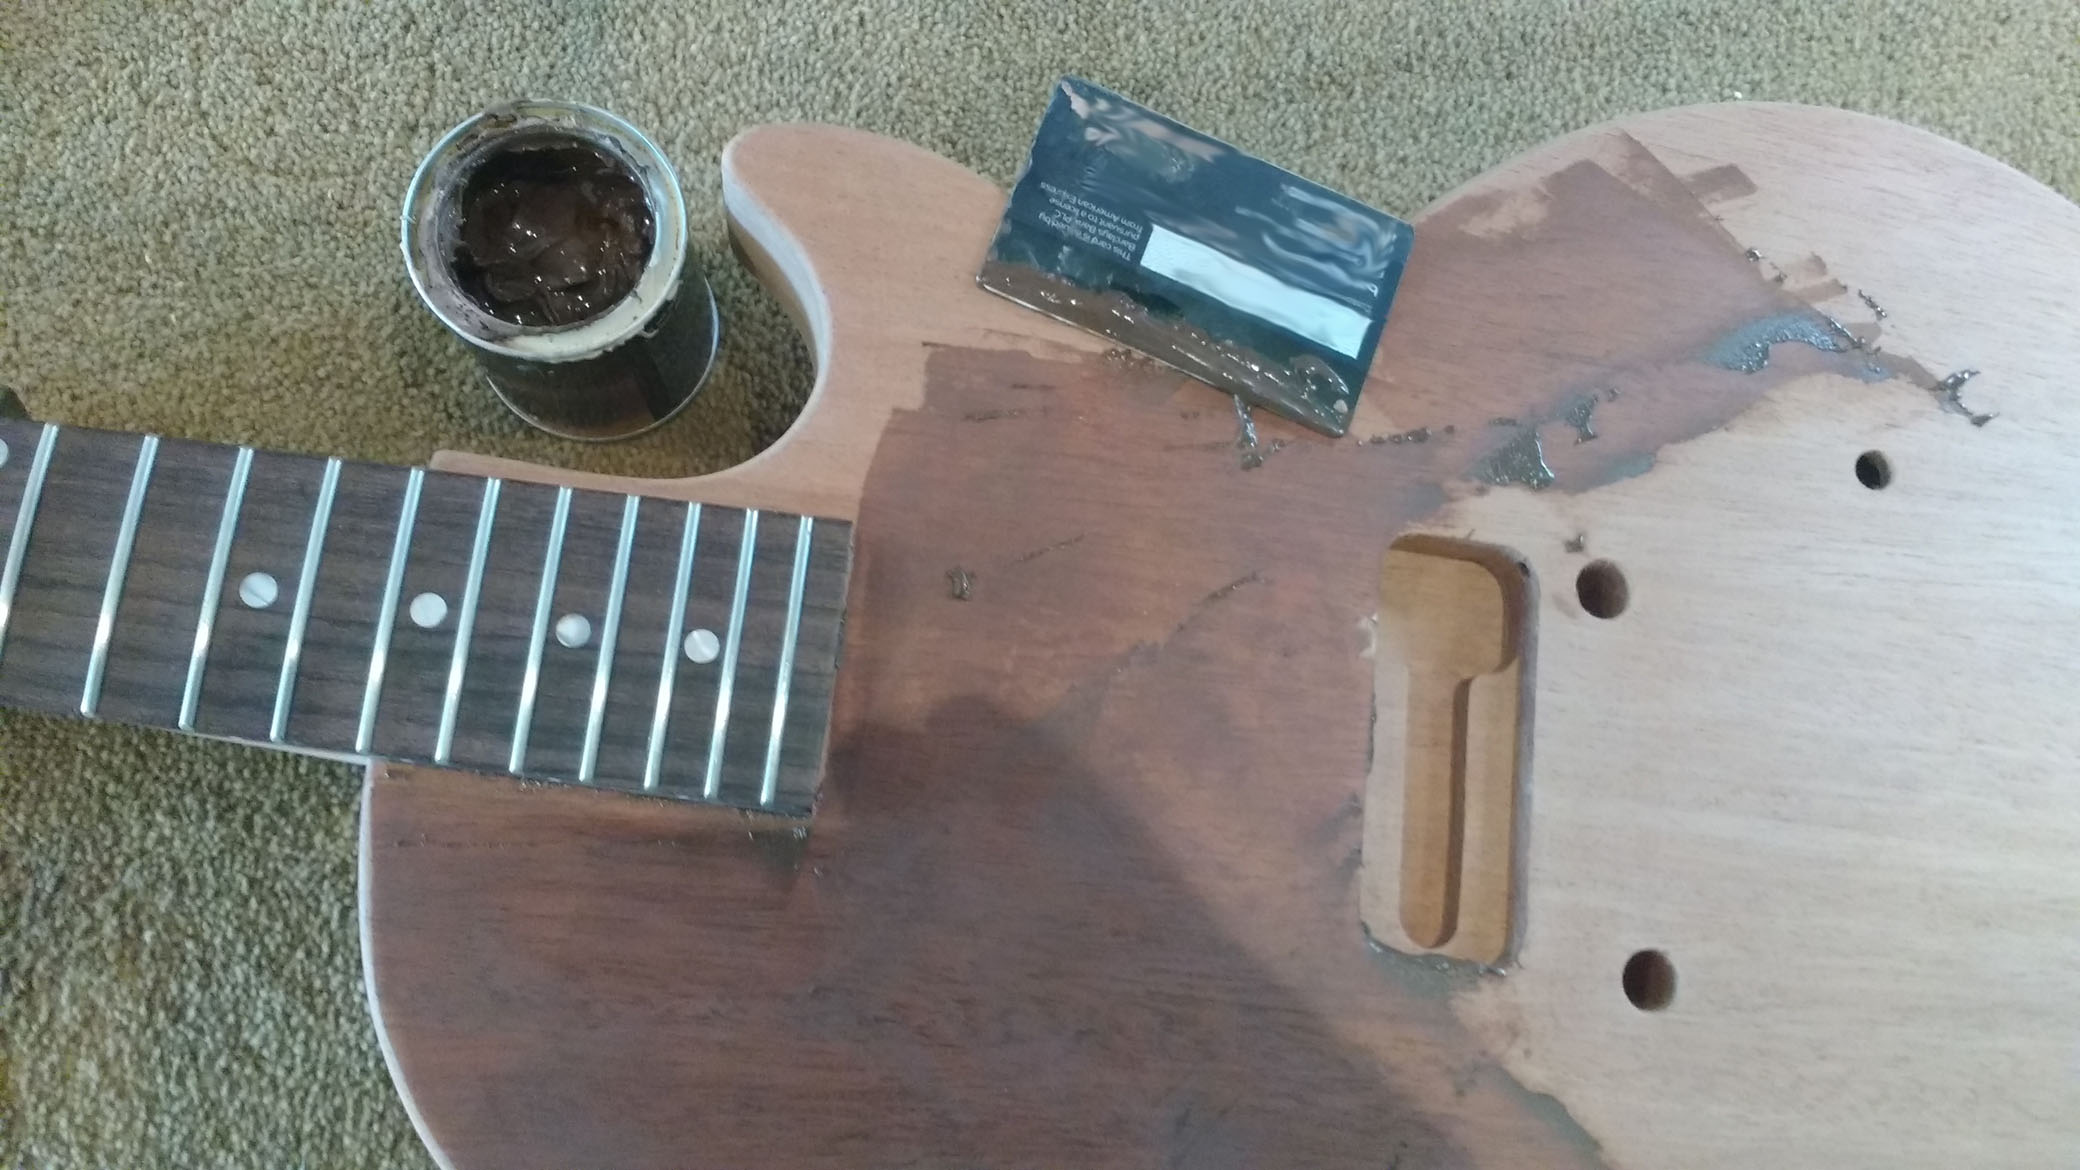
The trick to grain filling is to pack it well into the pores by applying with the grain then remove as much as possible from the surface by scraping across the grain. Hardened filler is very difficult to sand off, so it’s best to remove as much as possible from the surface.
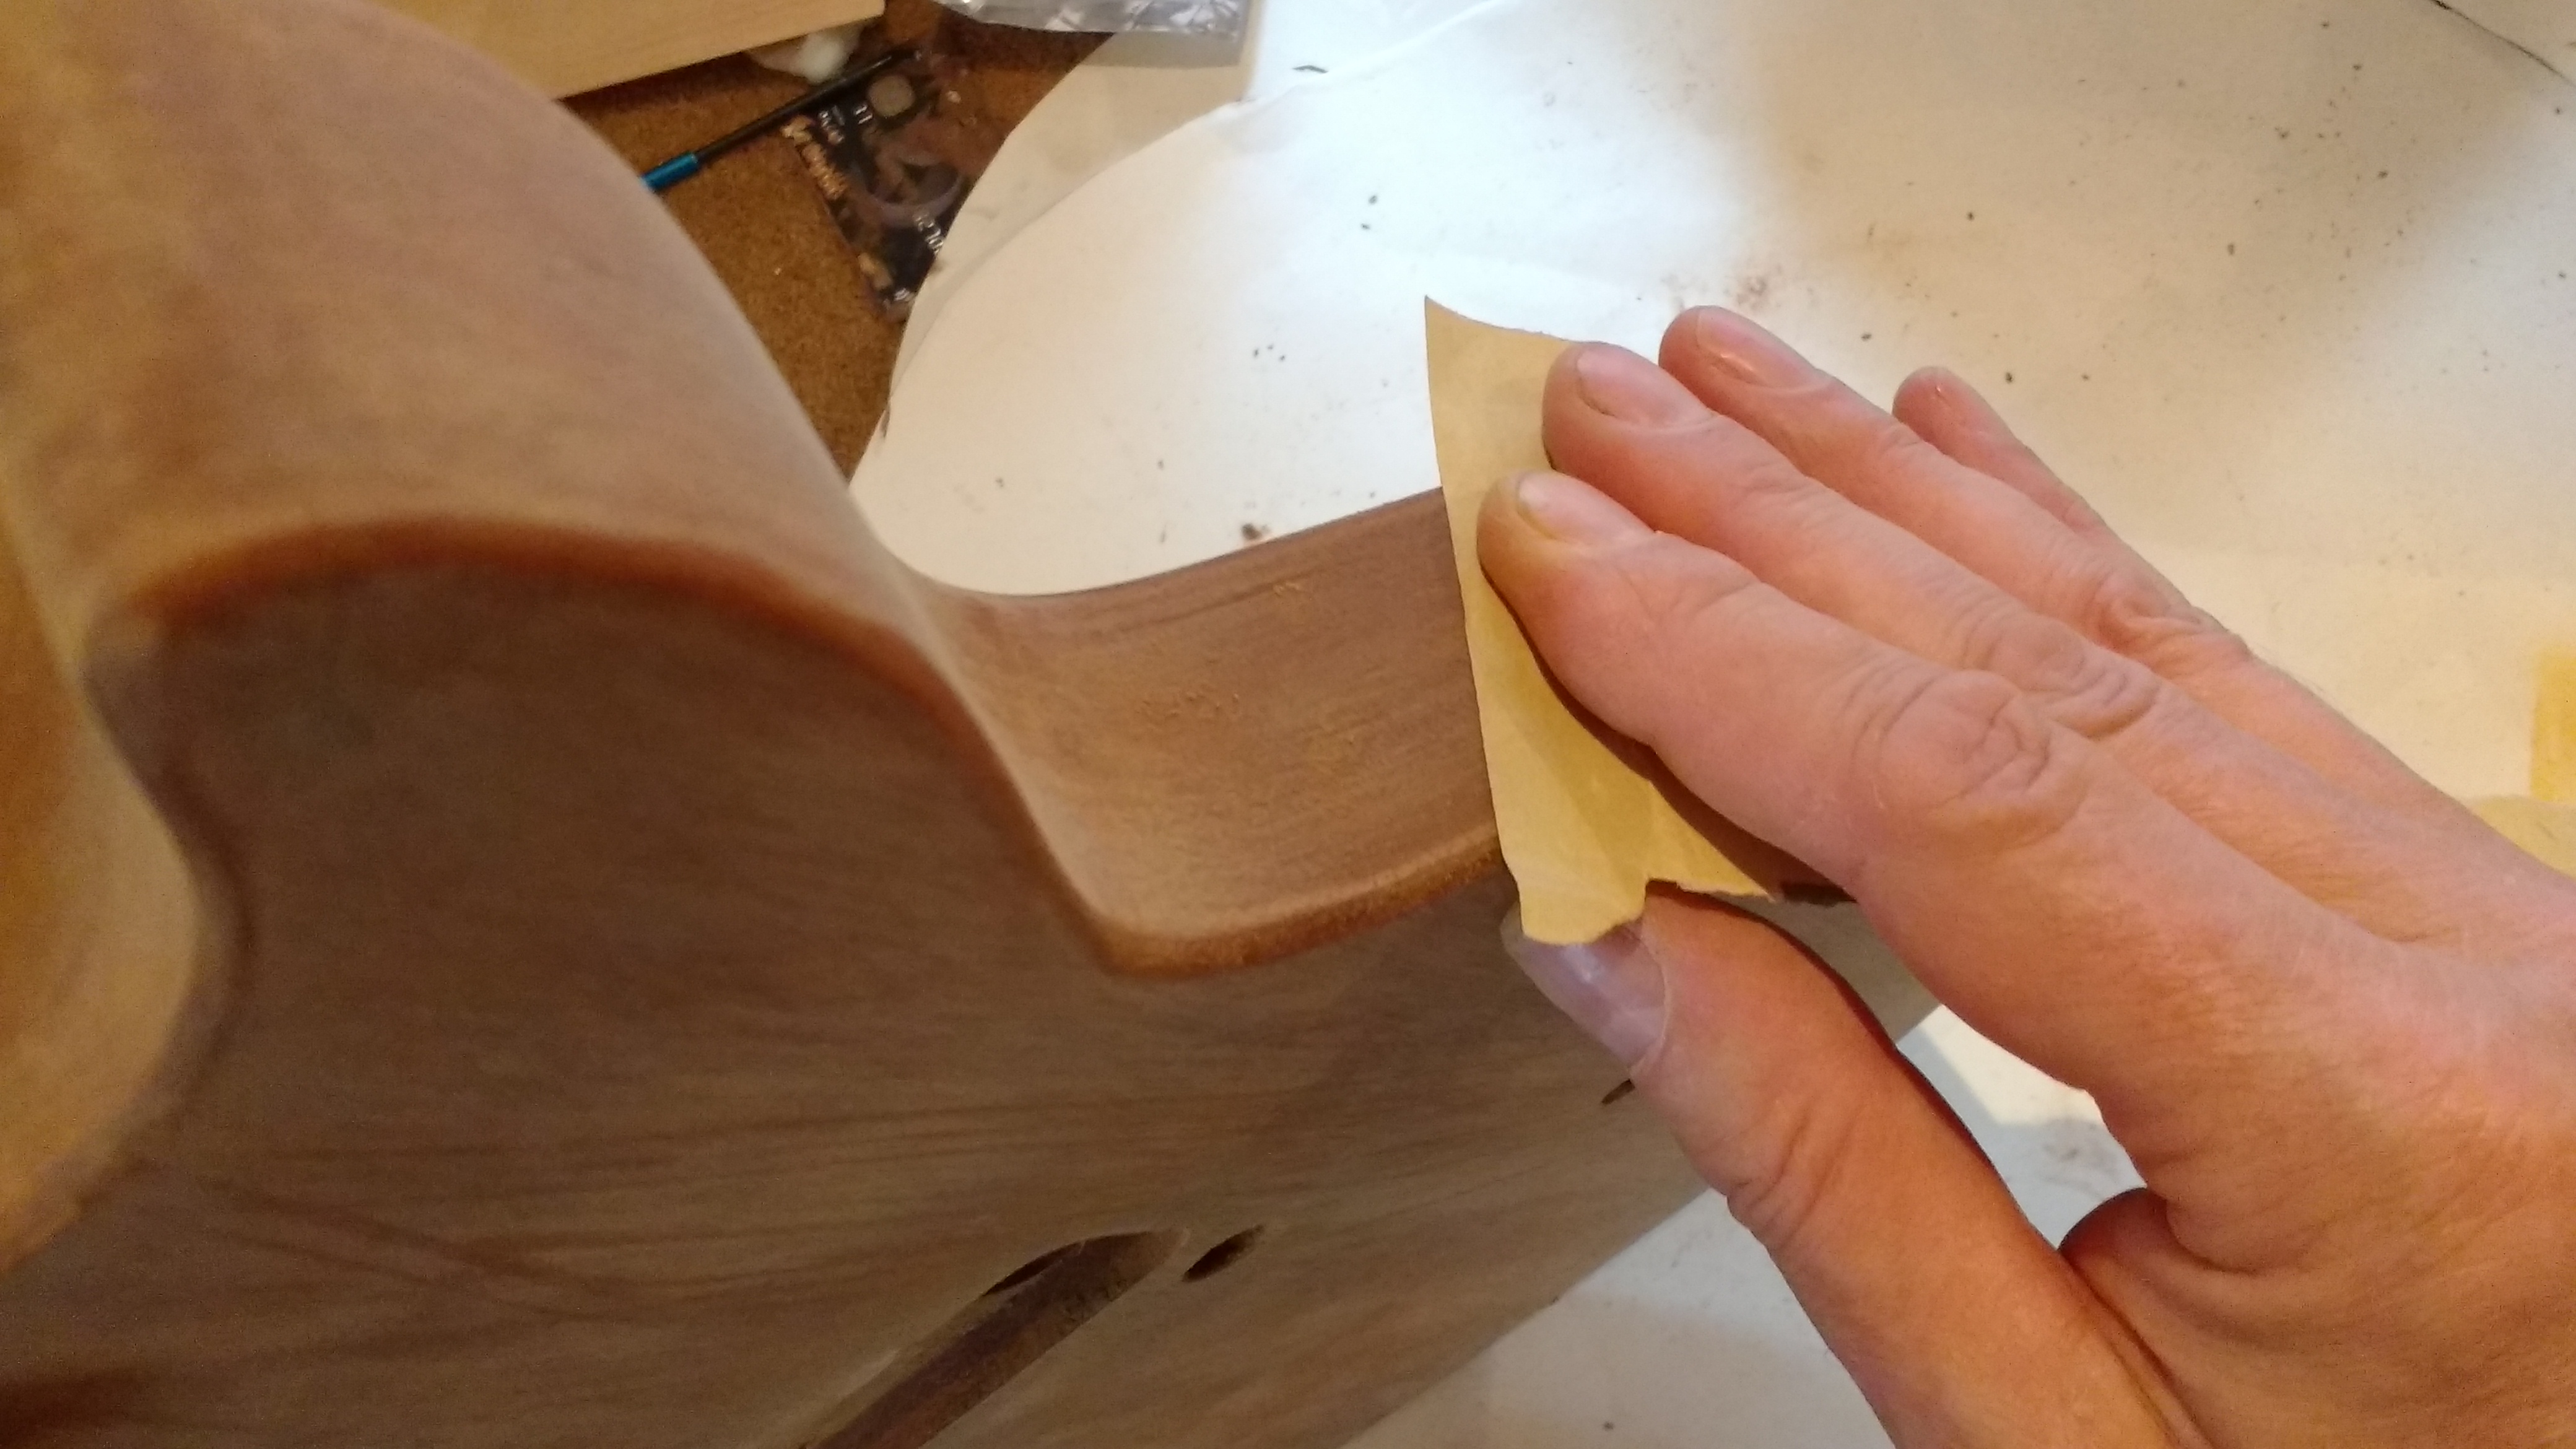
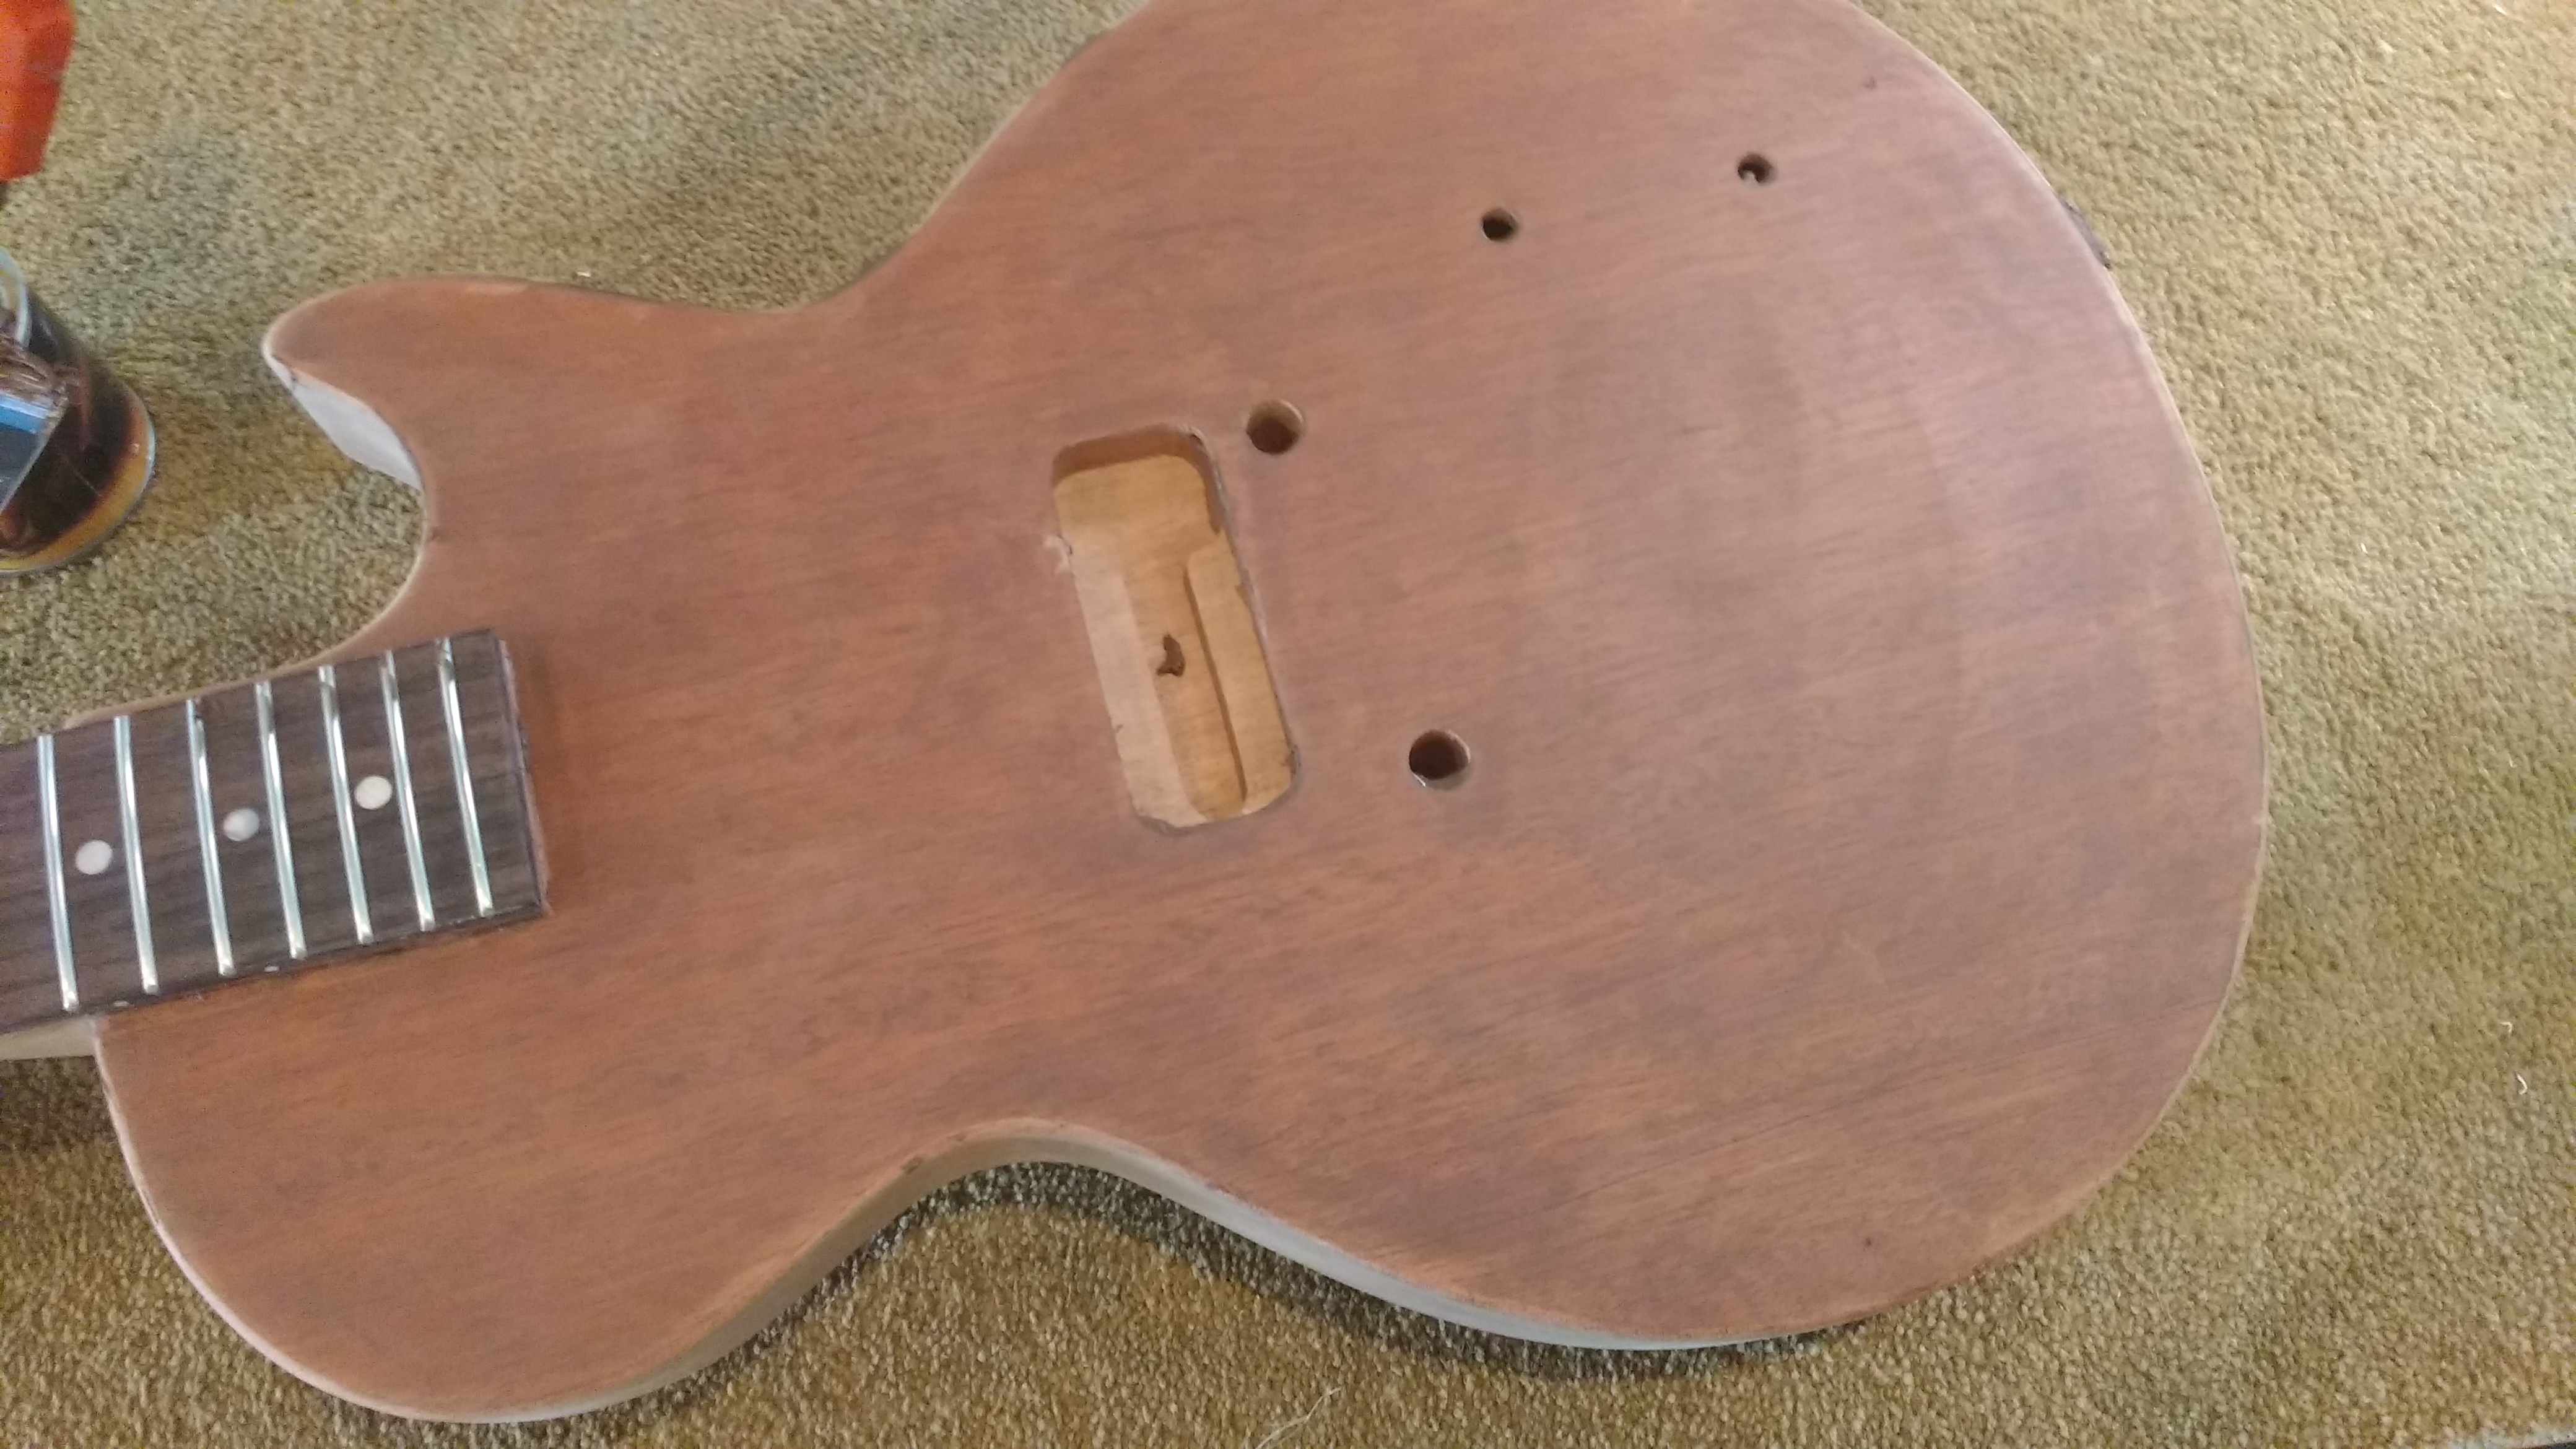
Once the grain filler has been sanded smooth, the next step is sealing the wood. I like to quite a lot of sanding sealer on, then once dried overnight (or longer) sand it back good and smooth.
Once the sealer coat is good then the fun begins.
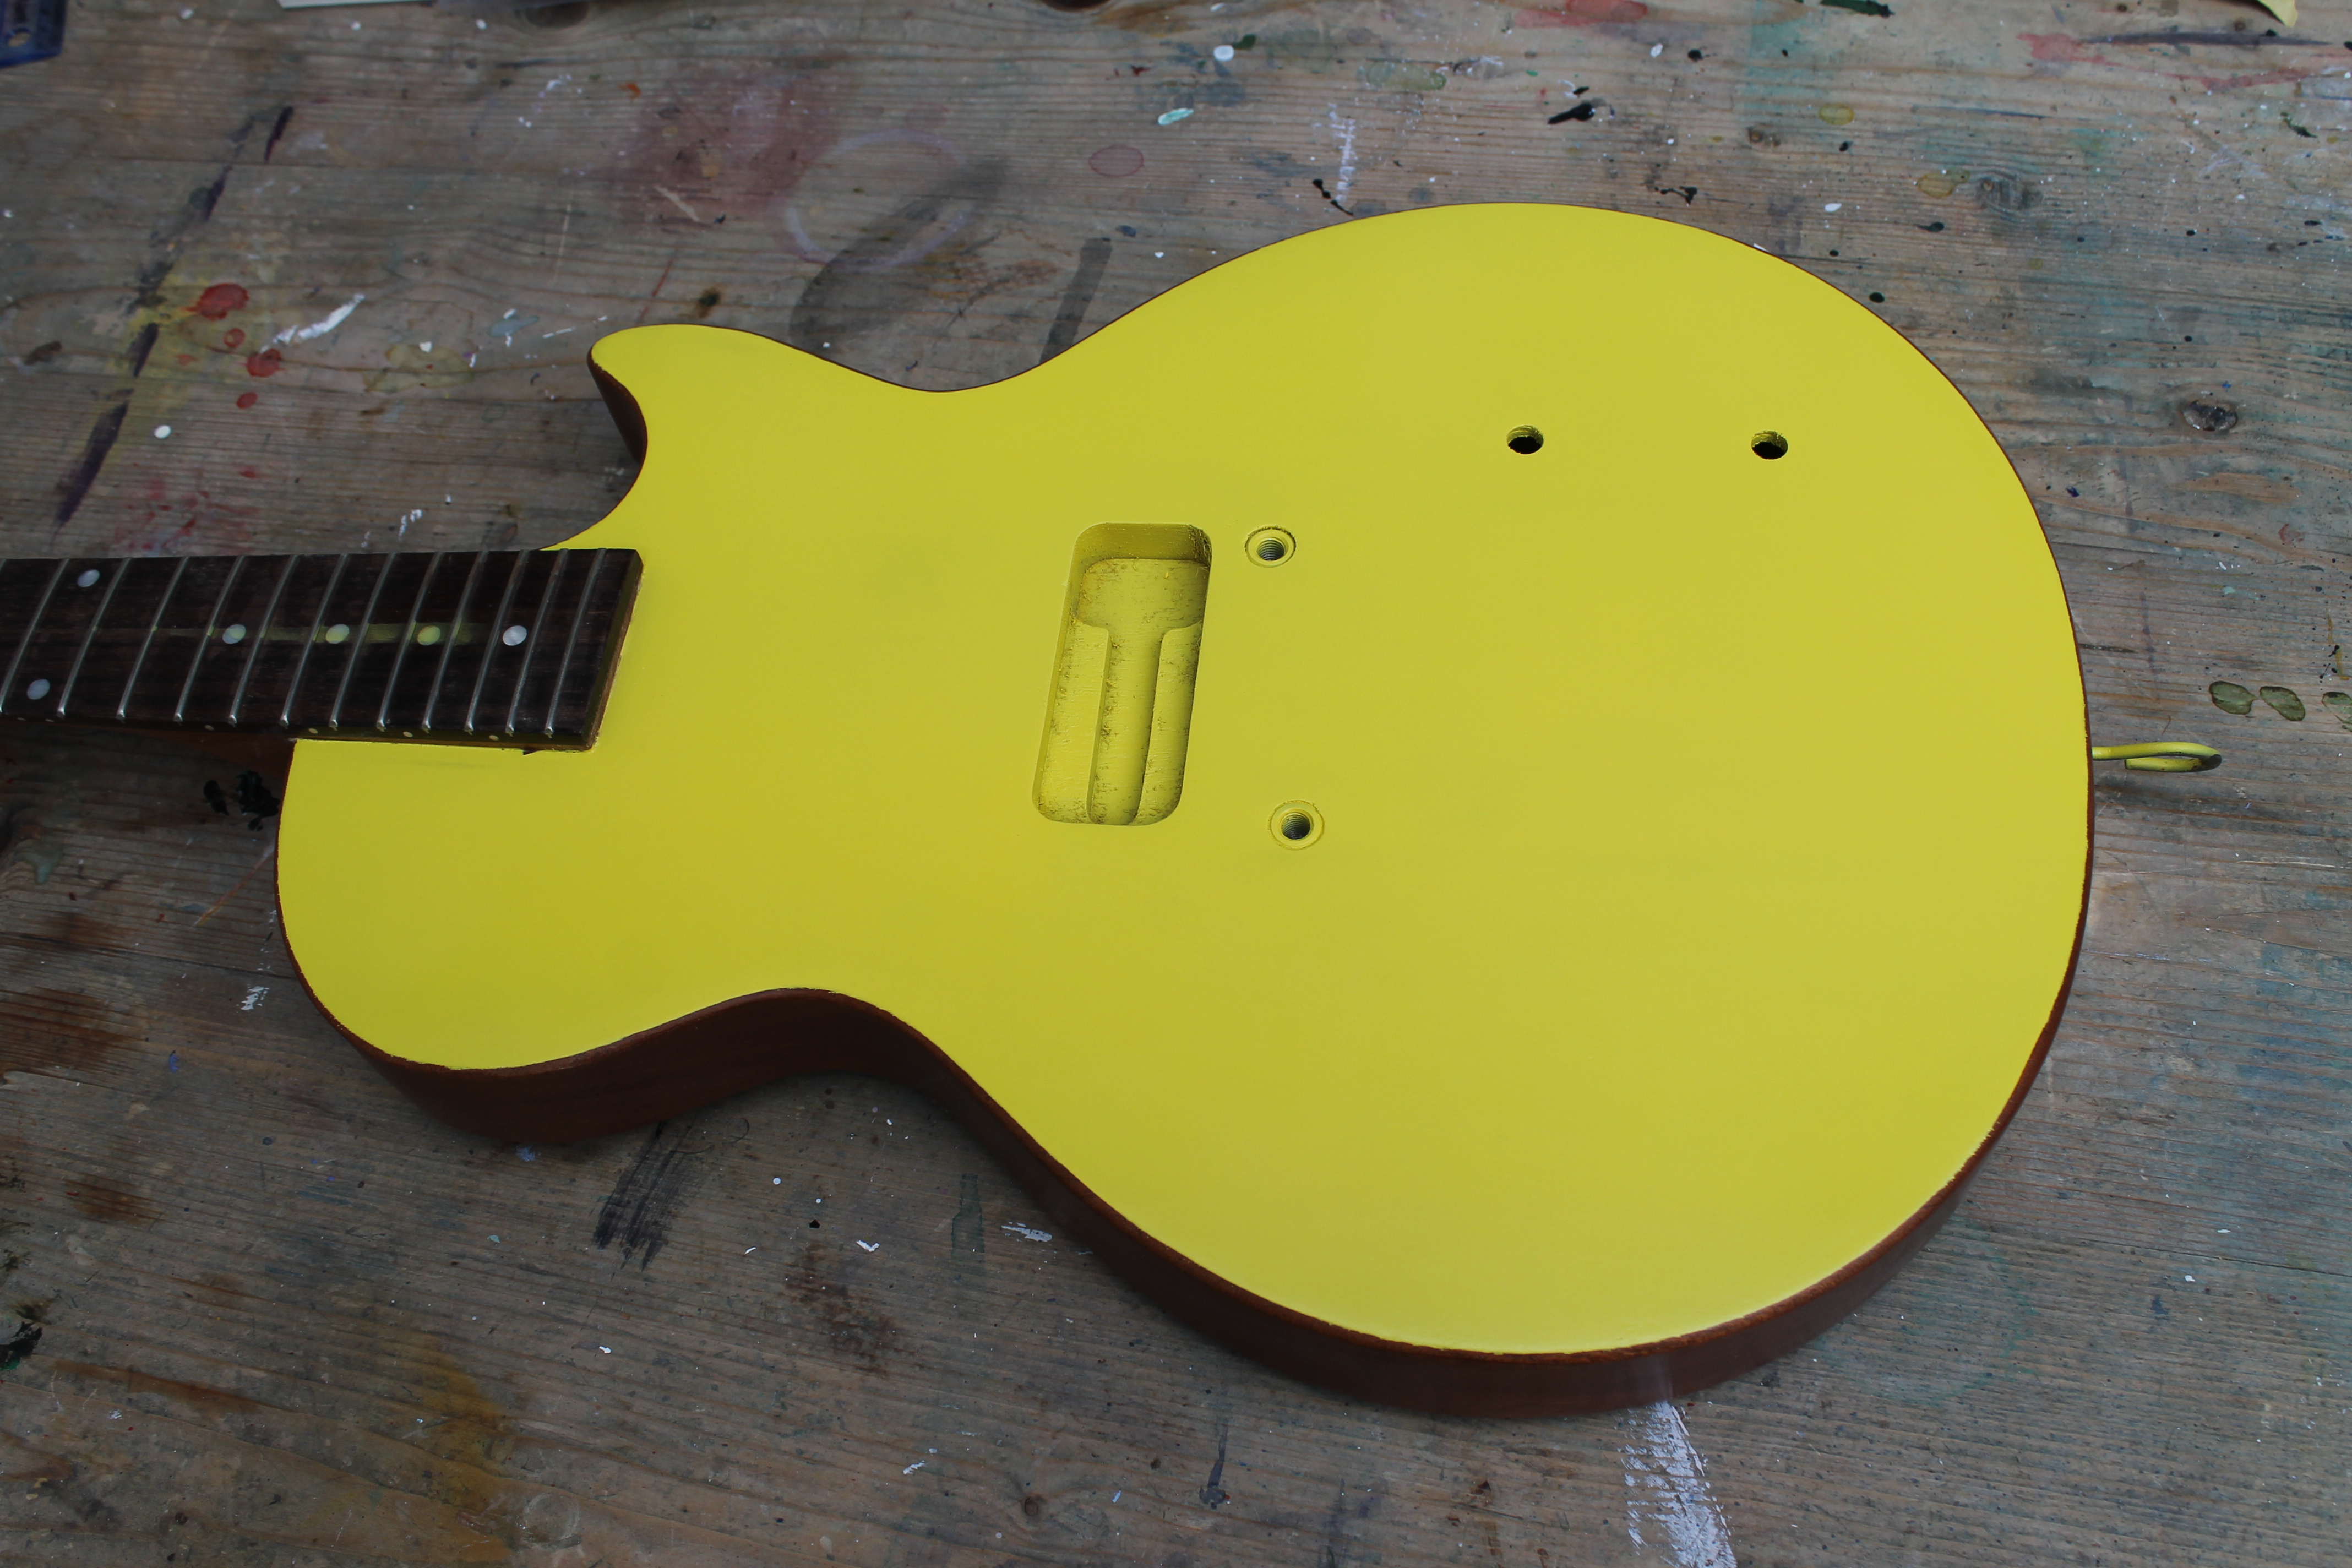
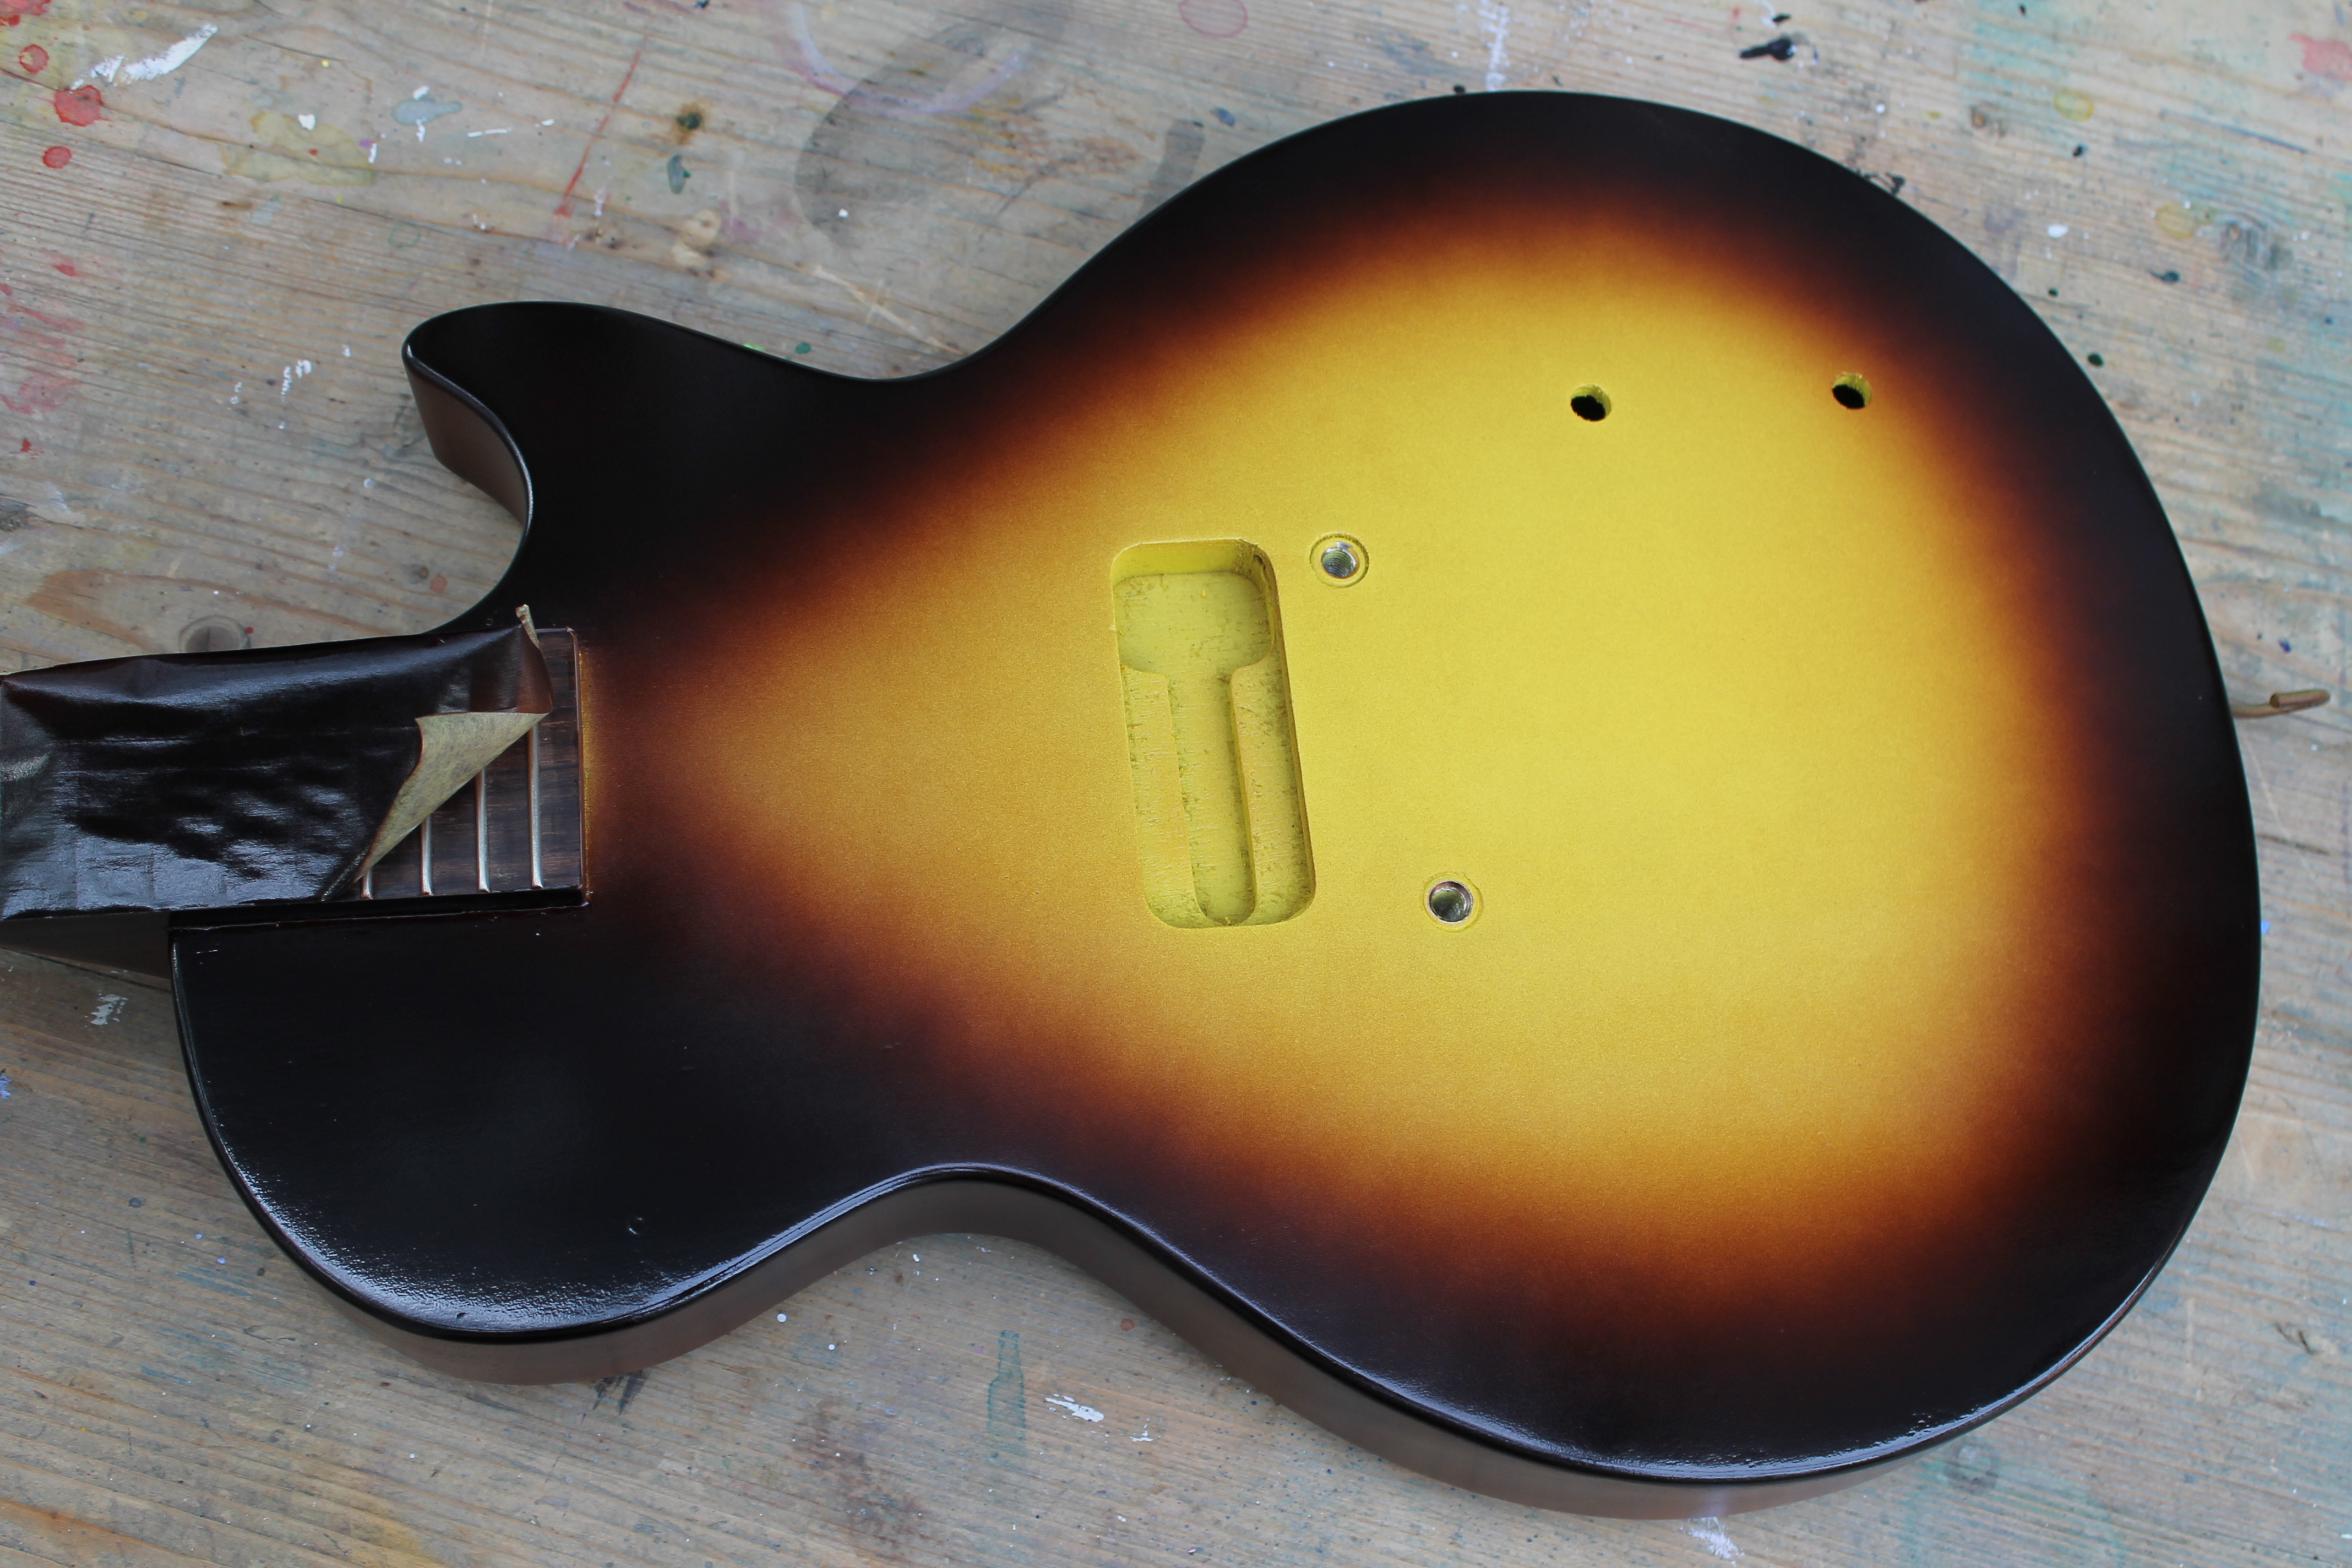
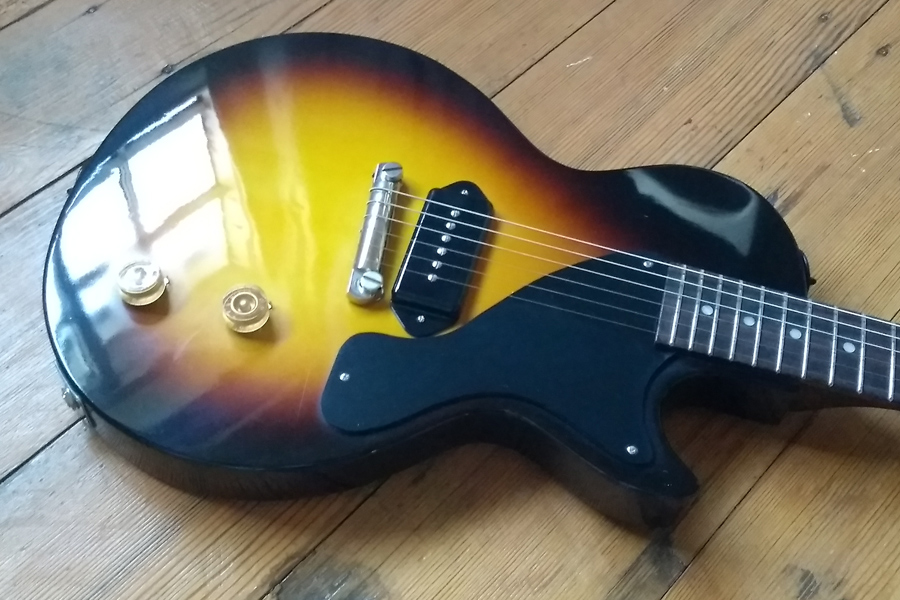
The base layer of the burst on the front is a bright yellow. I’ve used, appropriately enough, my Bright Yellow lacquer for this job. I masked everything but the face of the guitar and got a good few coats on there. Once dried, i feathered the edges at the edge radius, to give a nice smooth transition. Where I sanded through the sealer coat I applied more sealer. Once dry I masked the fretboard edges and face ready to spray the burst.

For the edge of the sunburst, I’ve used my Nut Brown which is a colour I developed espacially for this. It contains some red to replicate the transition of the burst found on some fifties juniors. The burst on fifties Juniors seems to vary from this to practically black so if you want less red in the mix, use my Tobacco Brown.
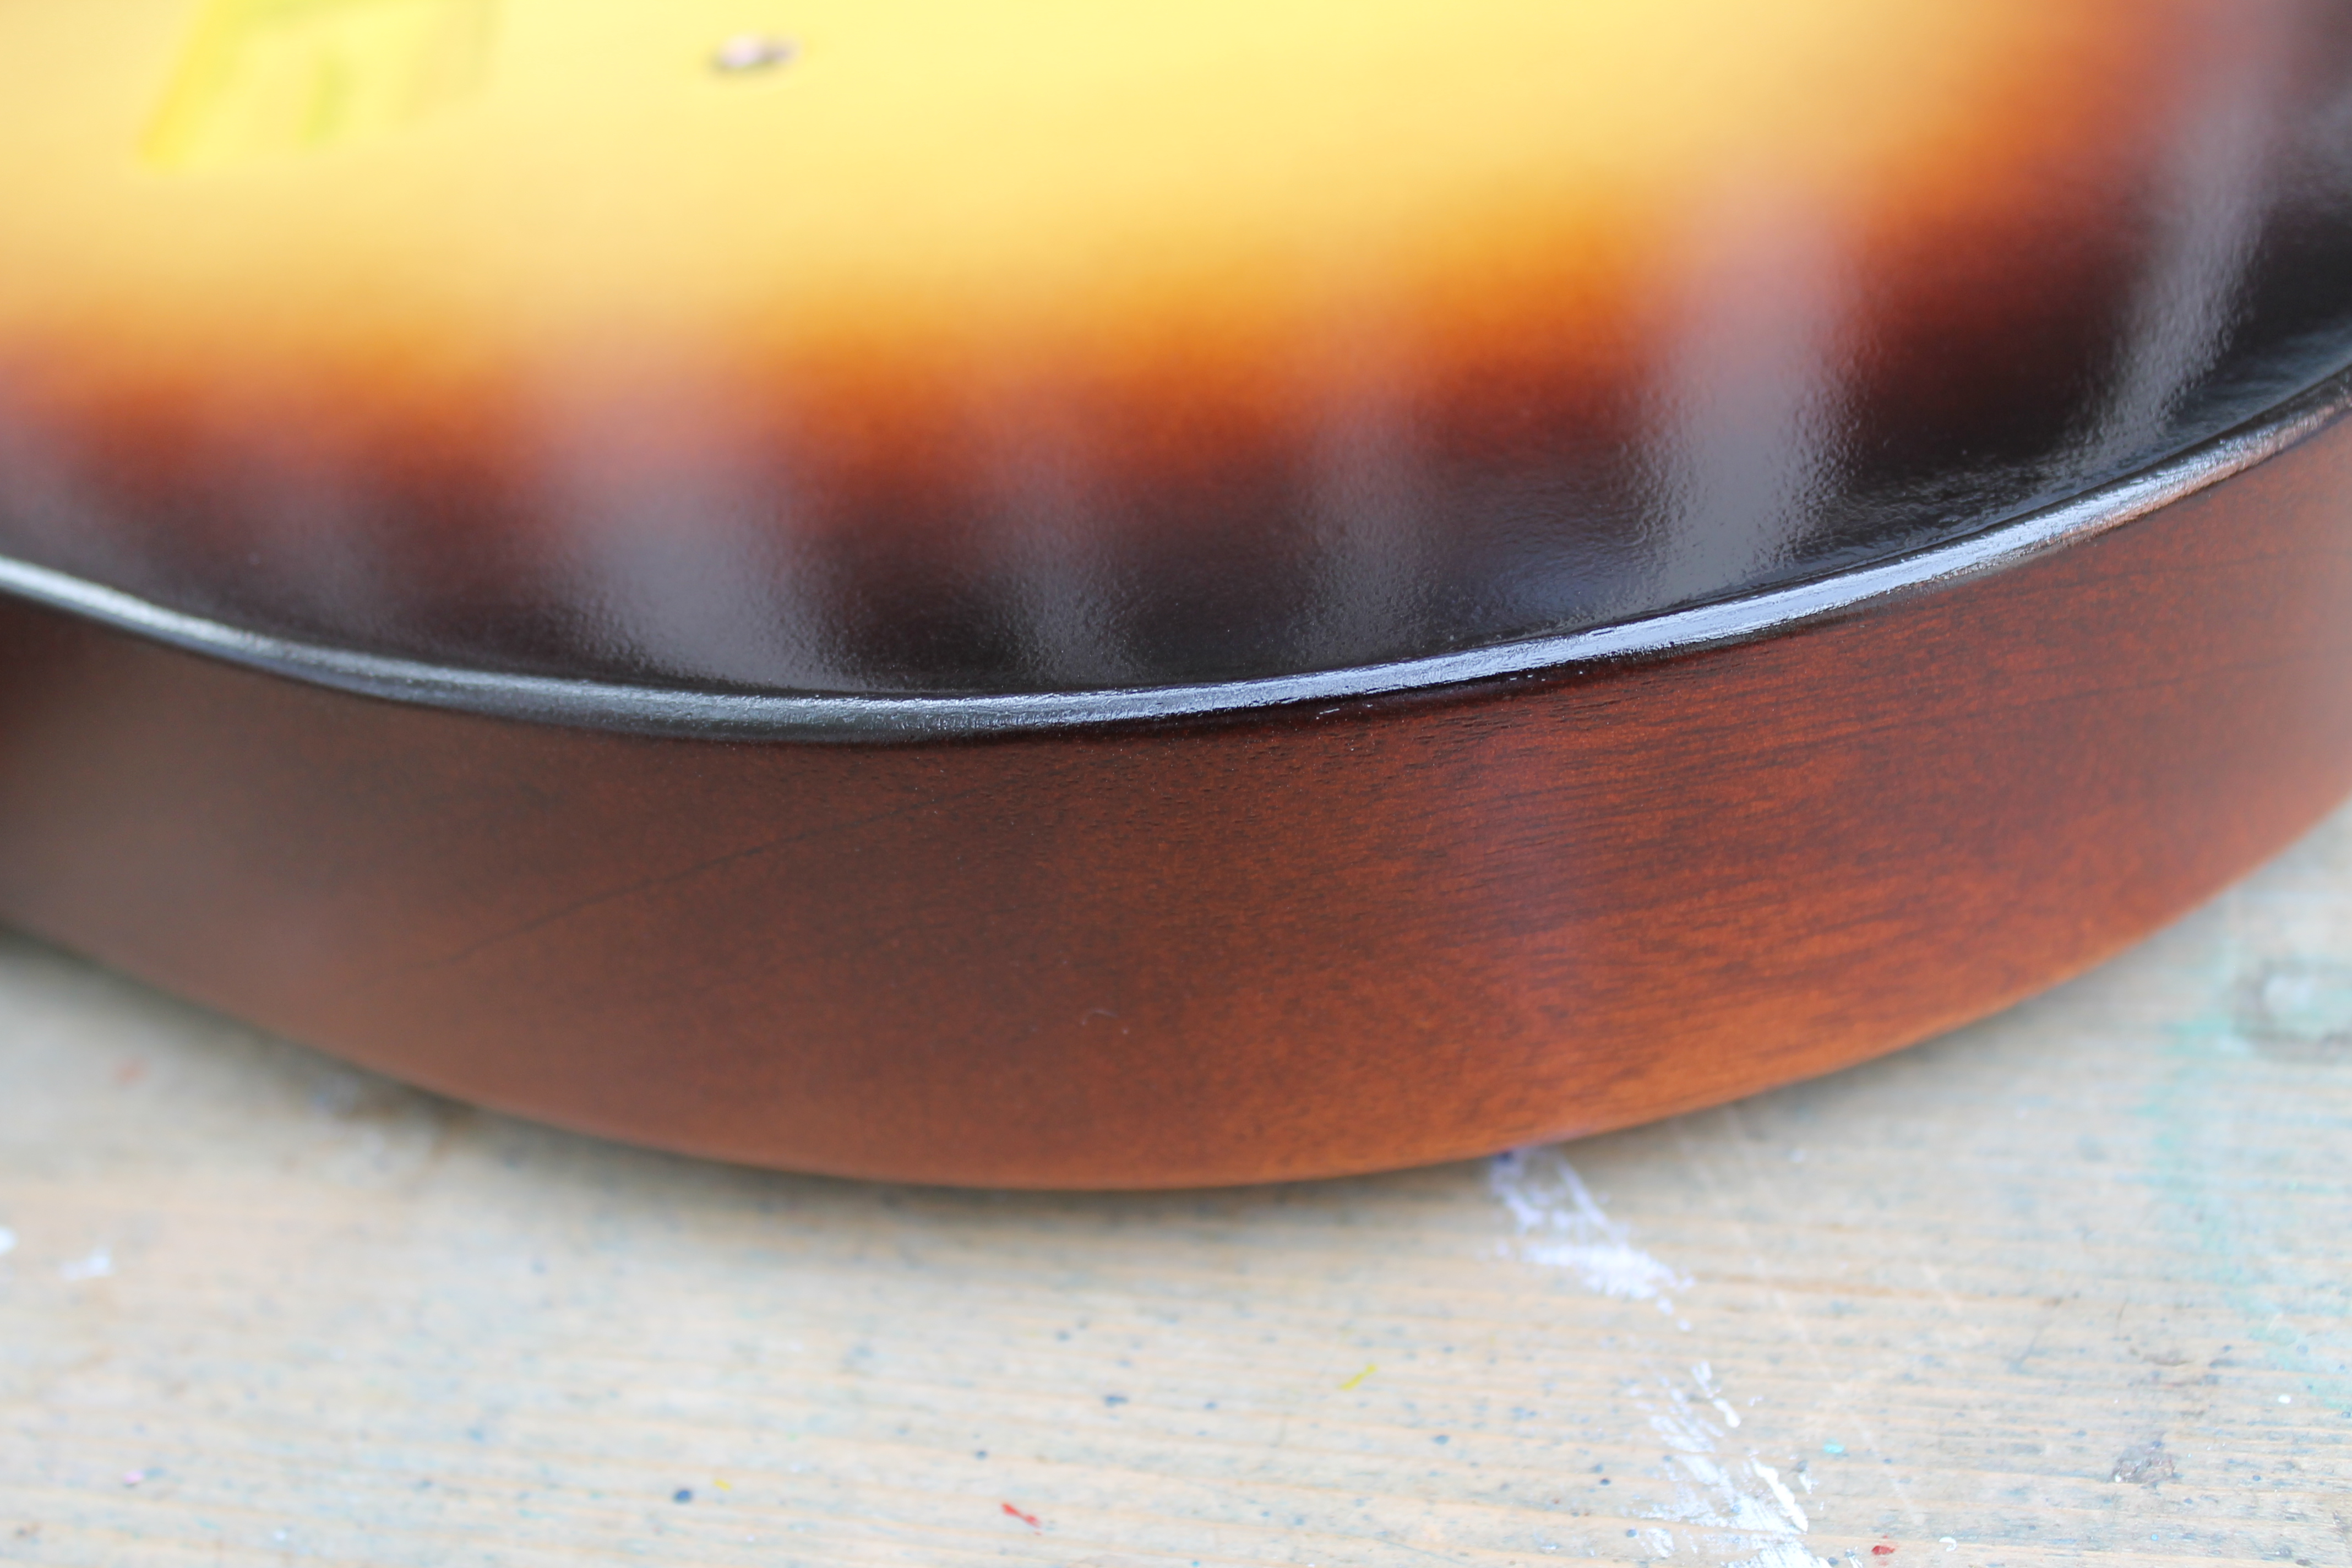
Spraying vertically (or maybe outwards a little) leaves the sides almost untouched. The bass side of the neck heel gets a bit of brown and maybe this is why the heel of these guitars is almost always sprayed with this opaque brown. Or maybe it’s to hide a less than perfect neck joint. Either way, I did the same.
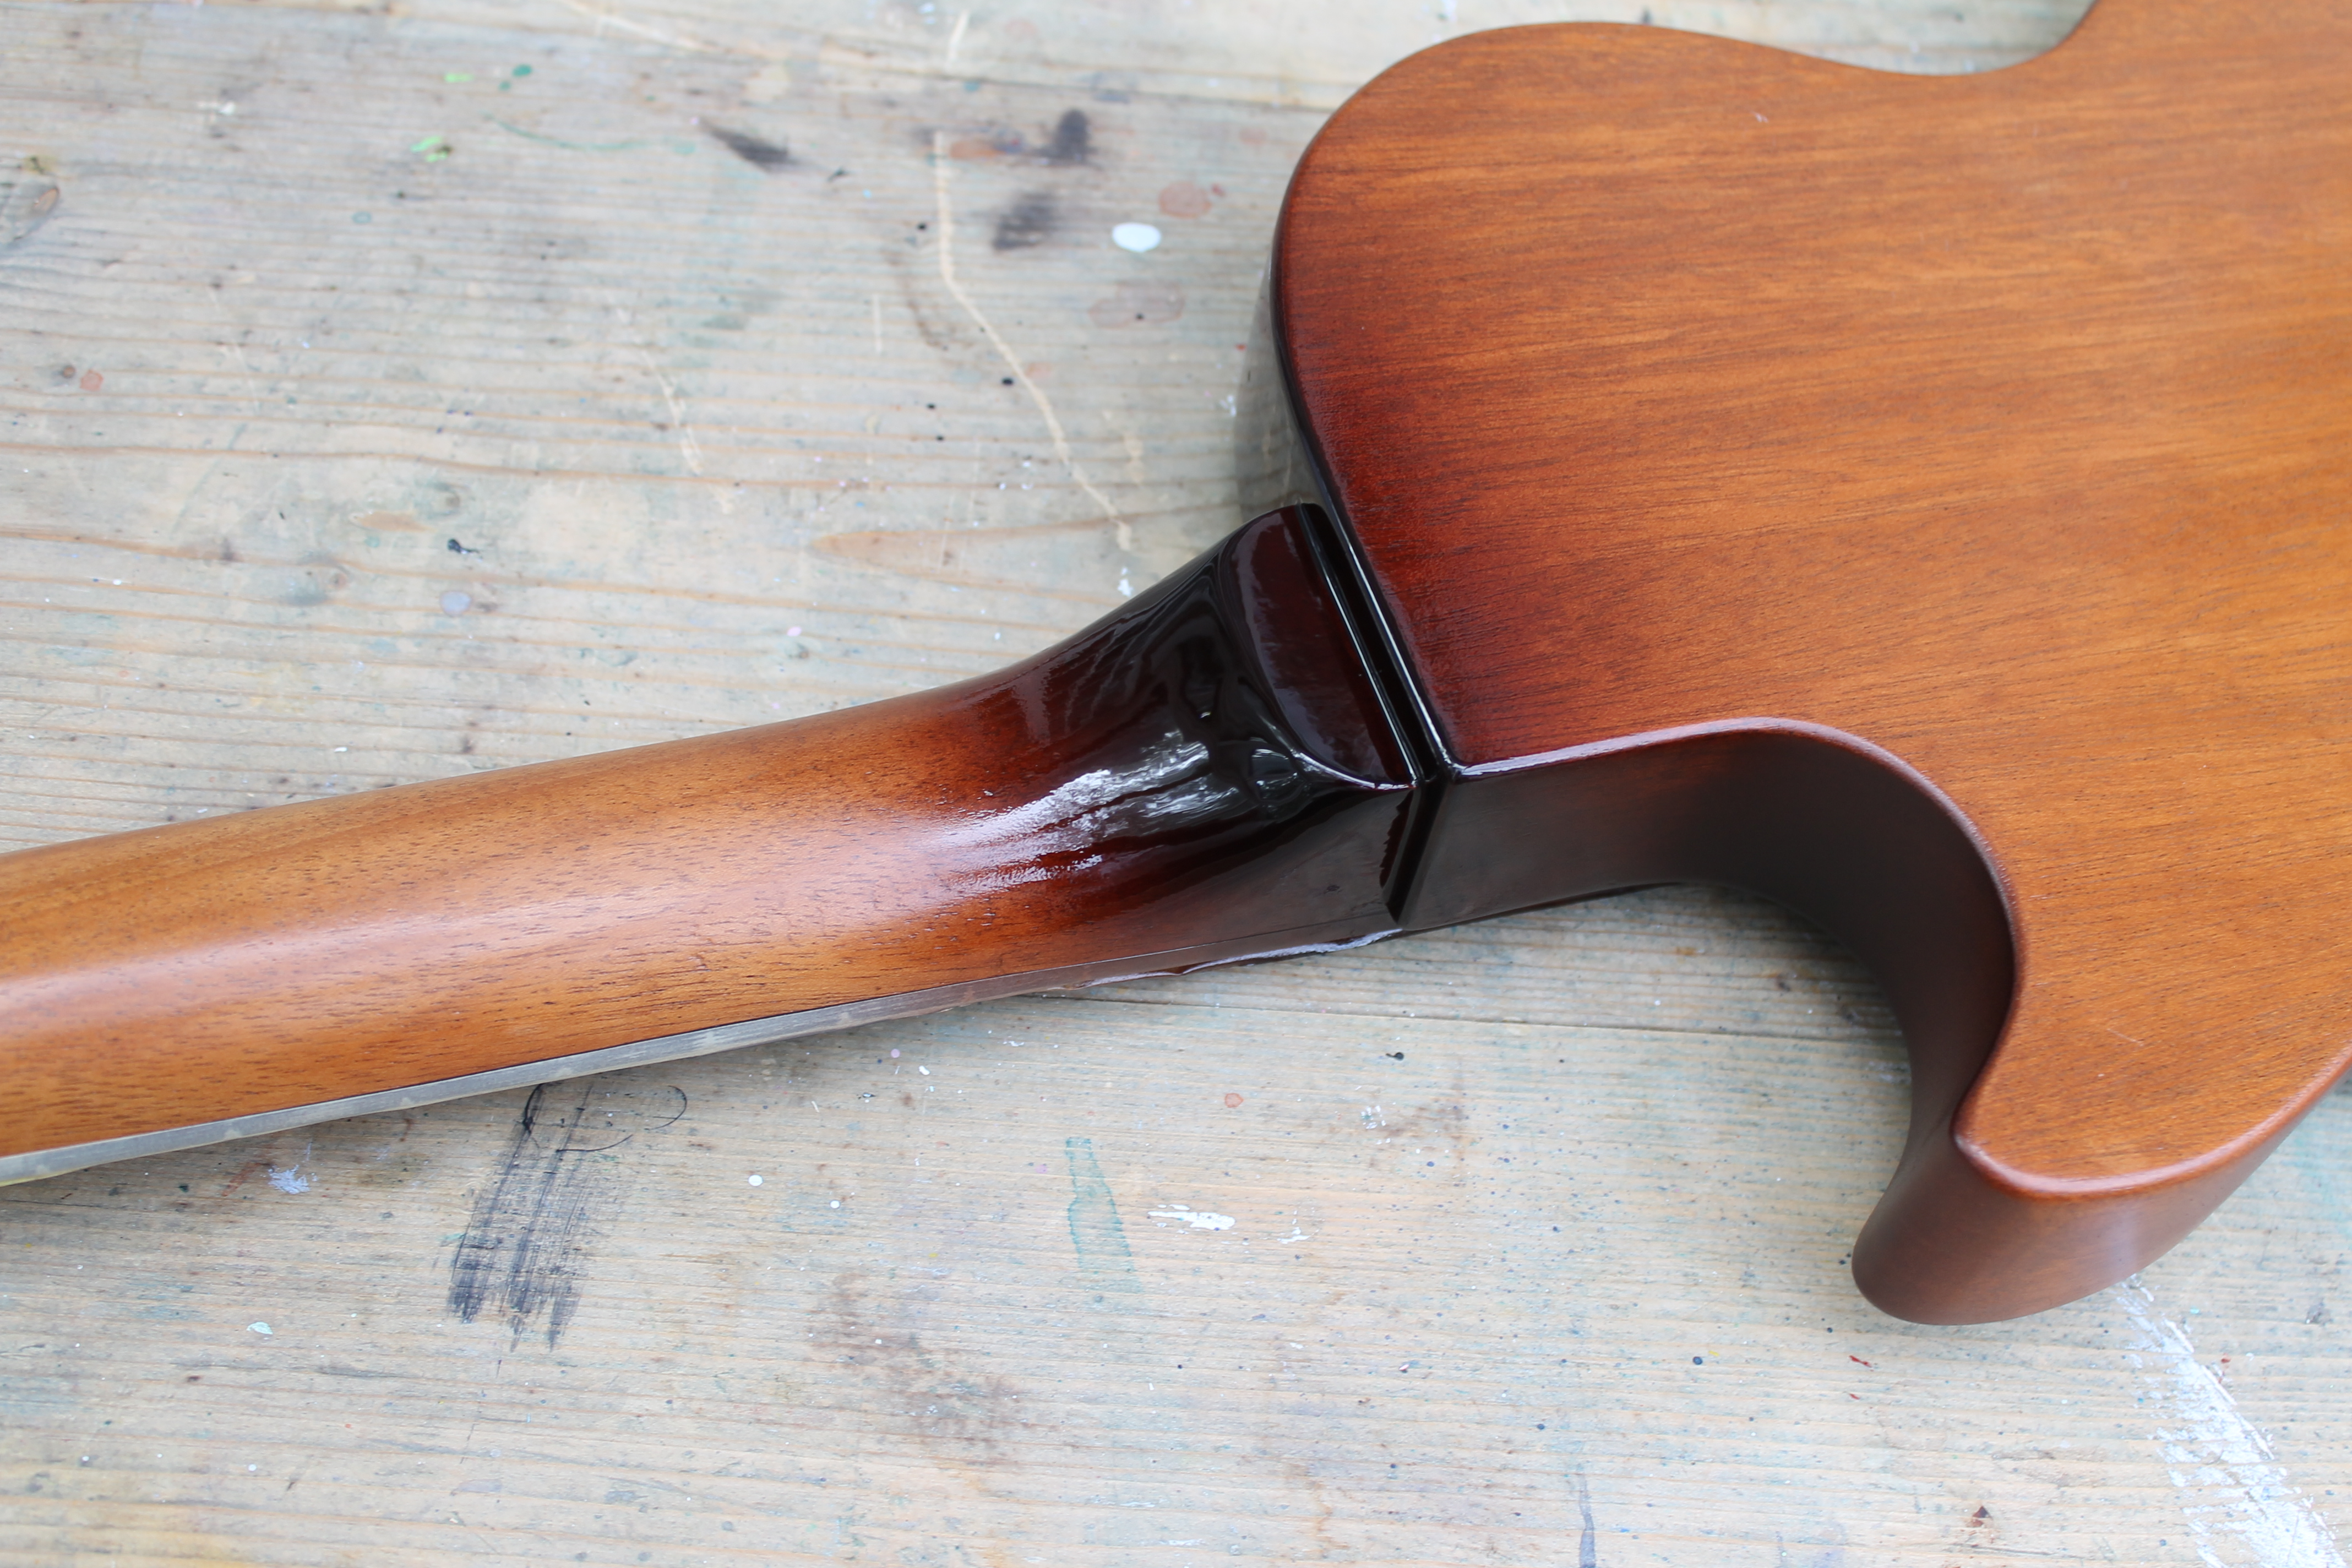
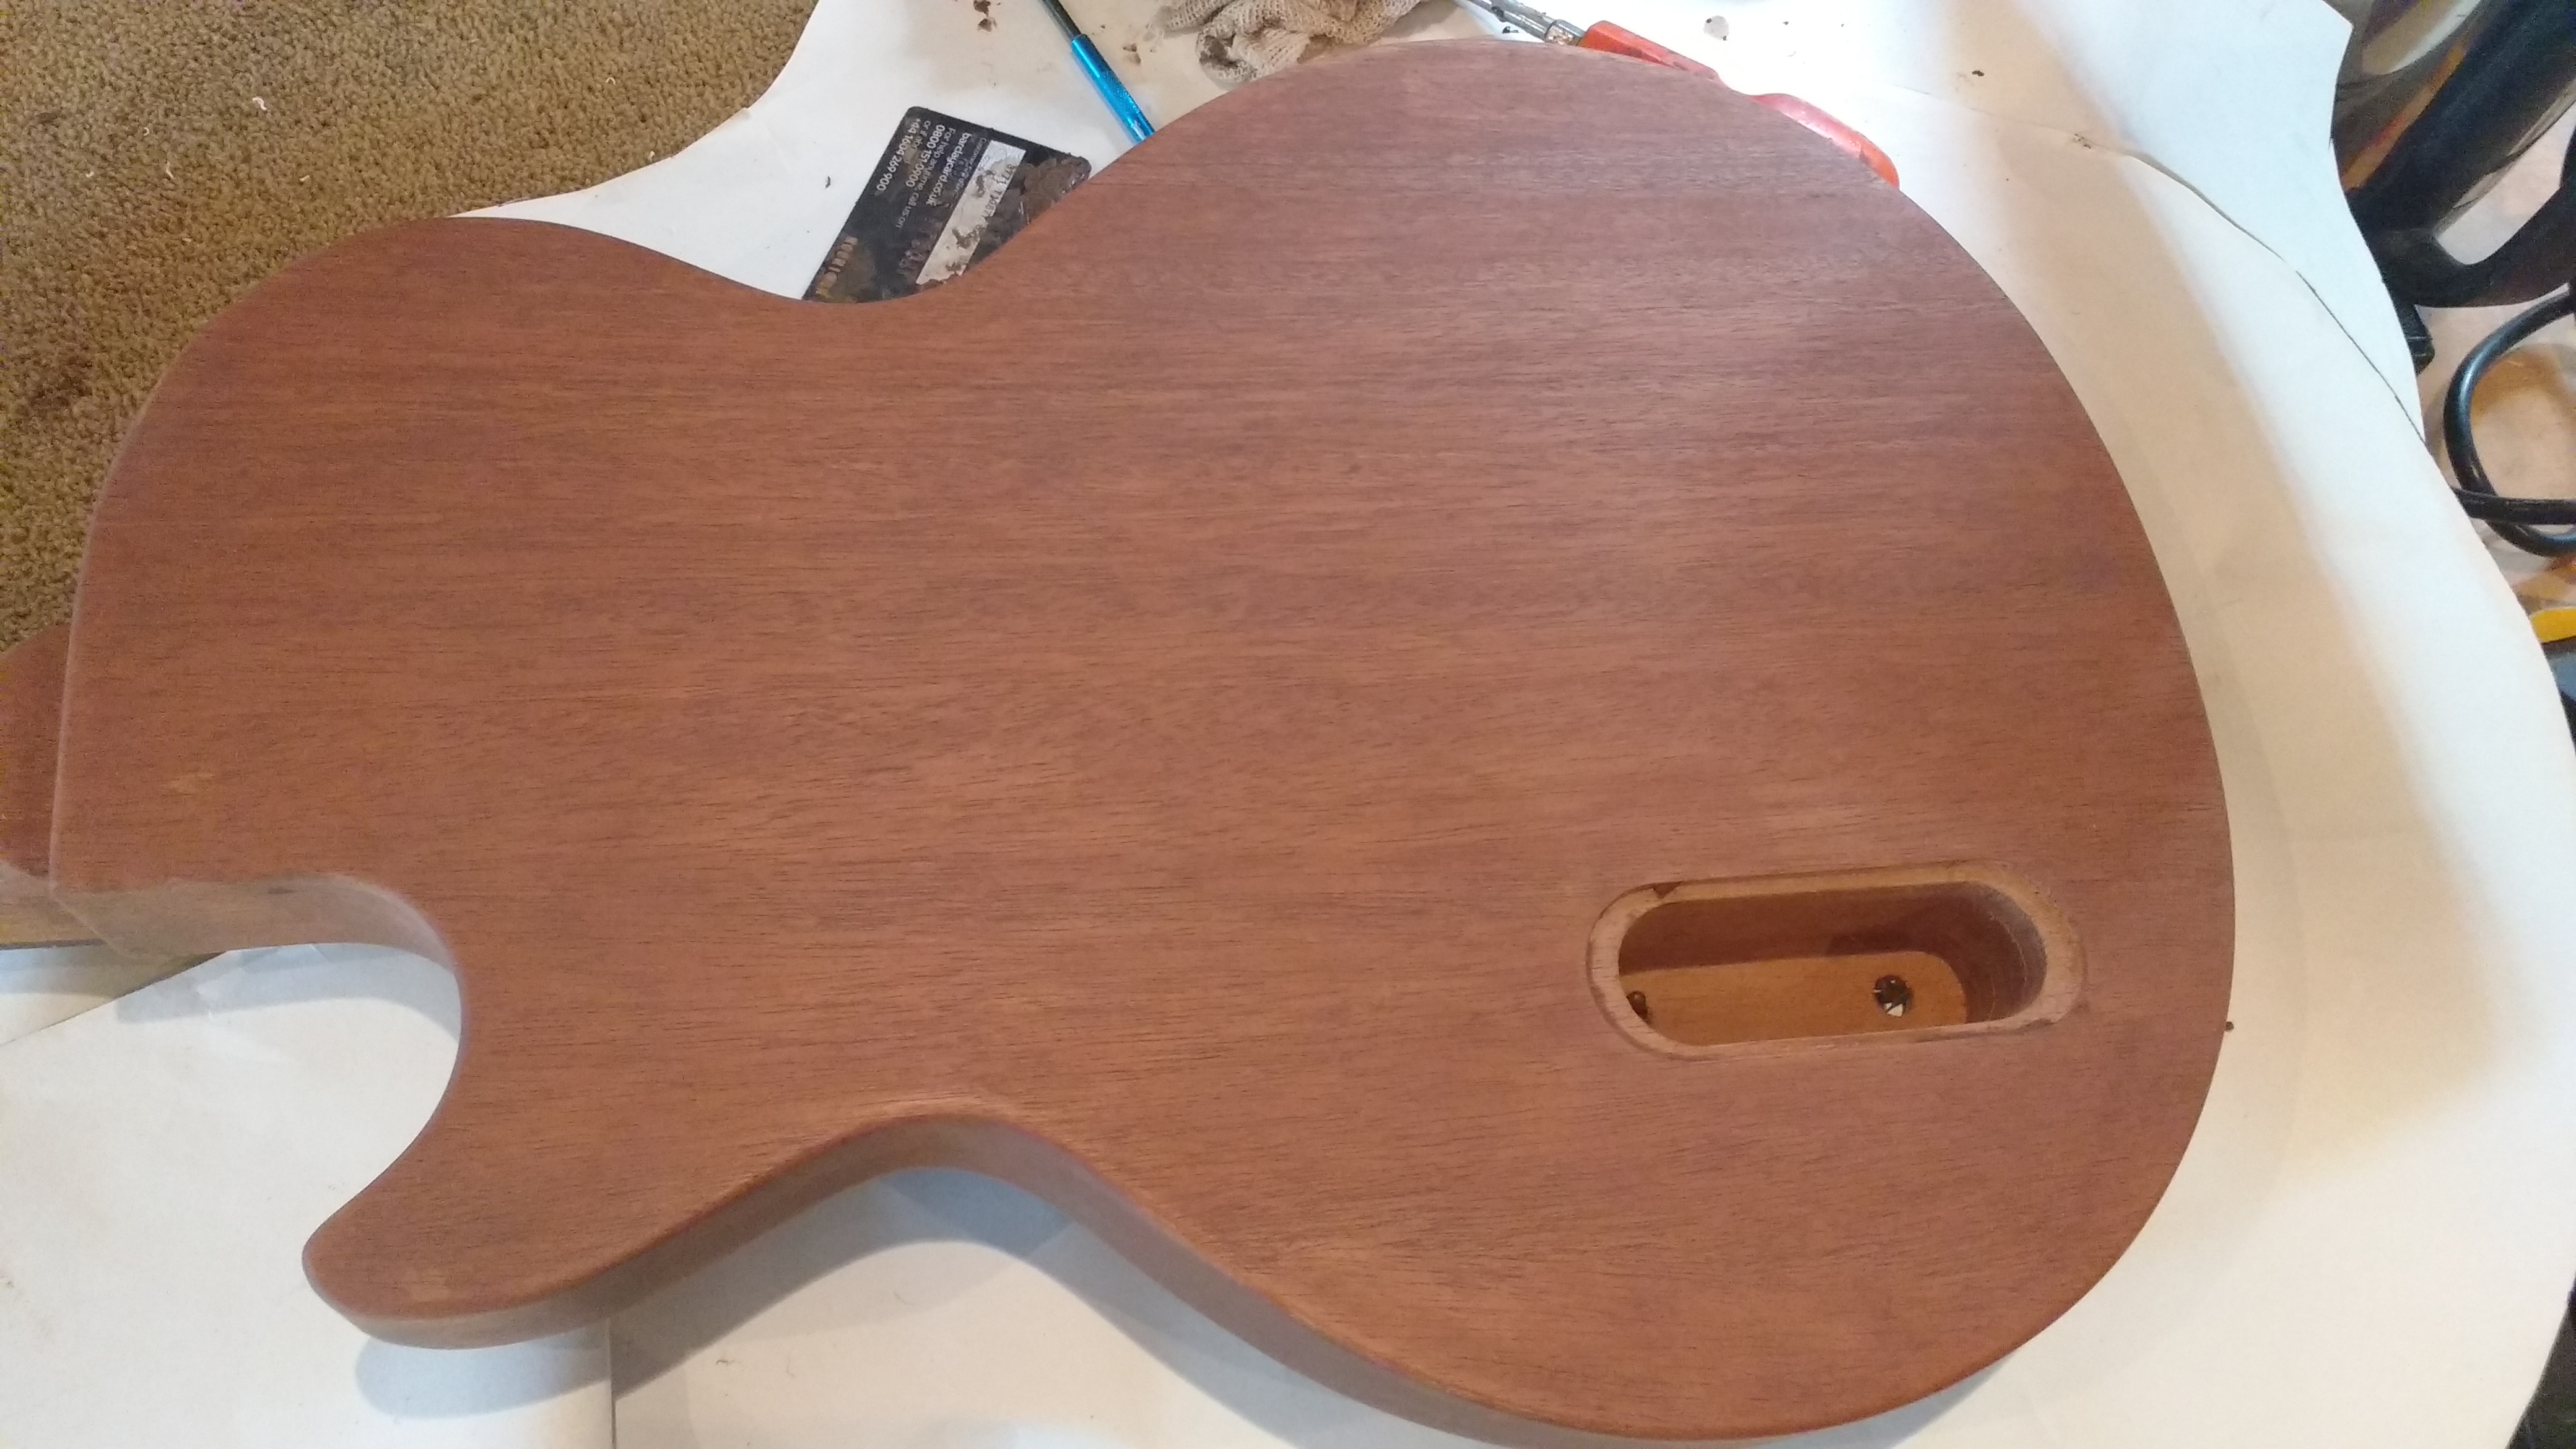
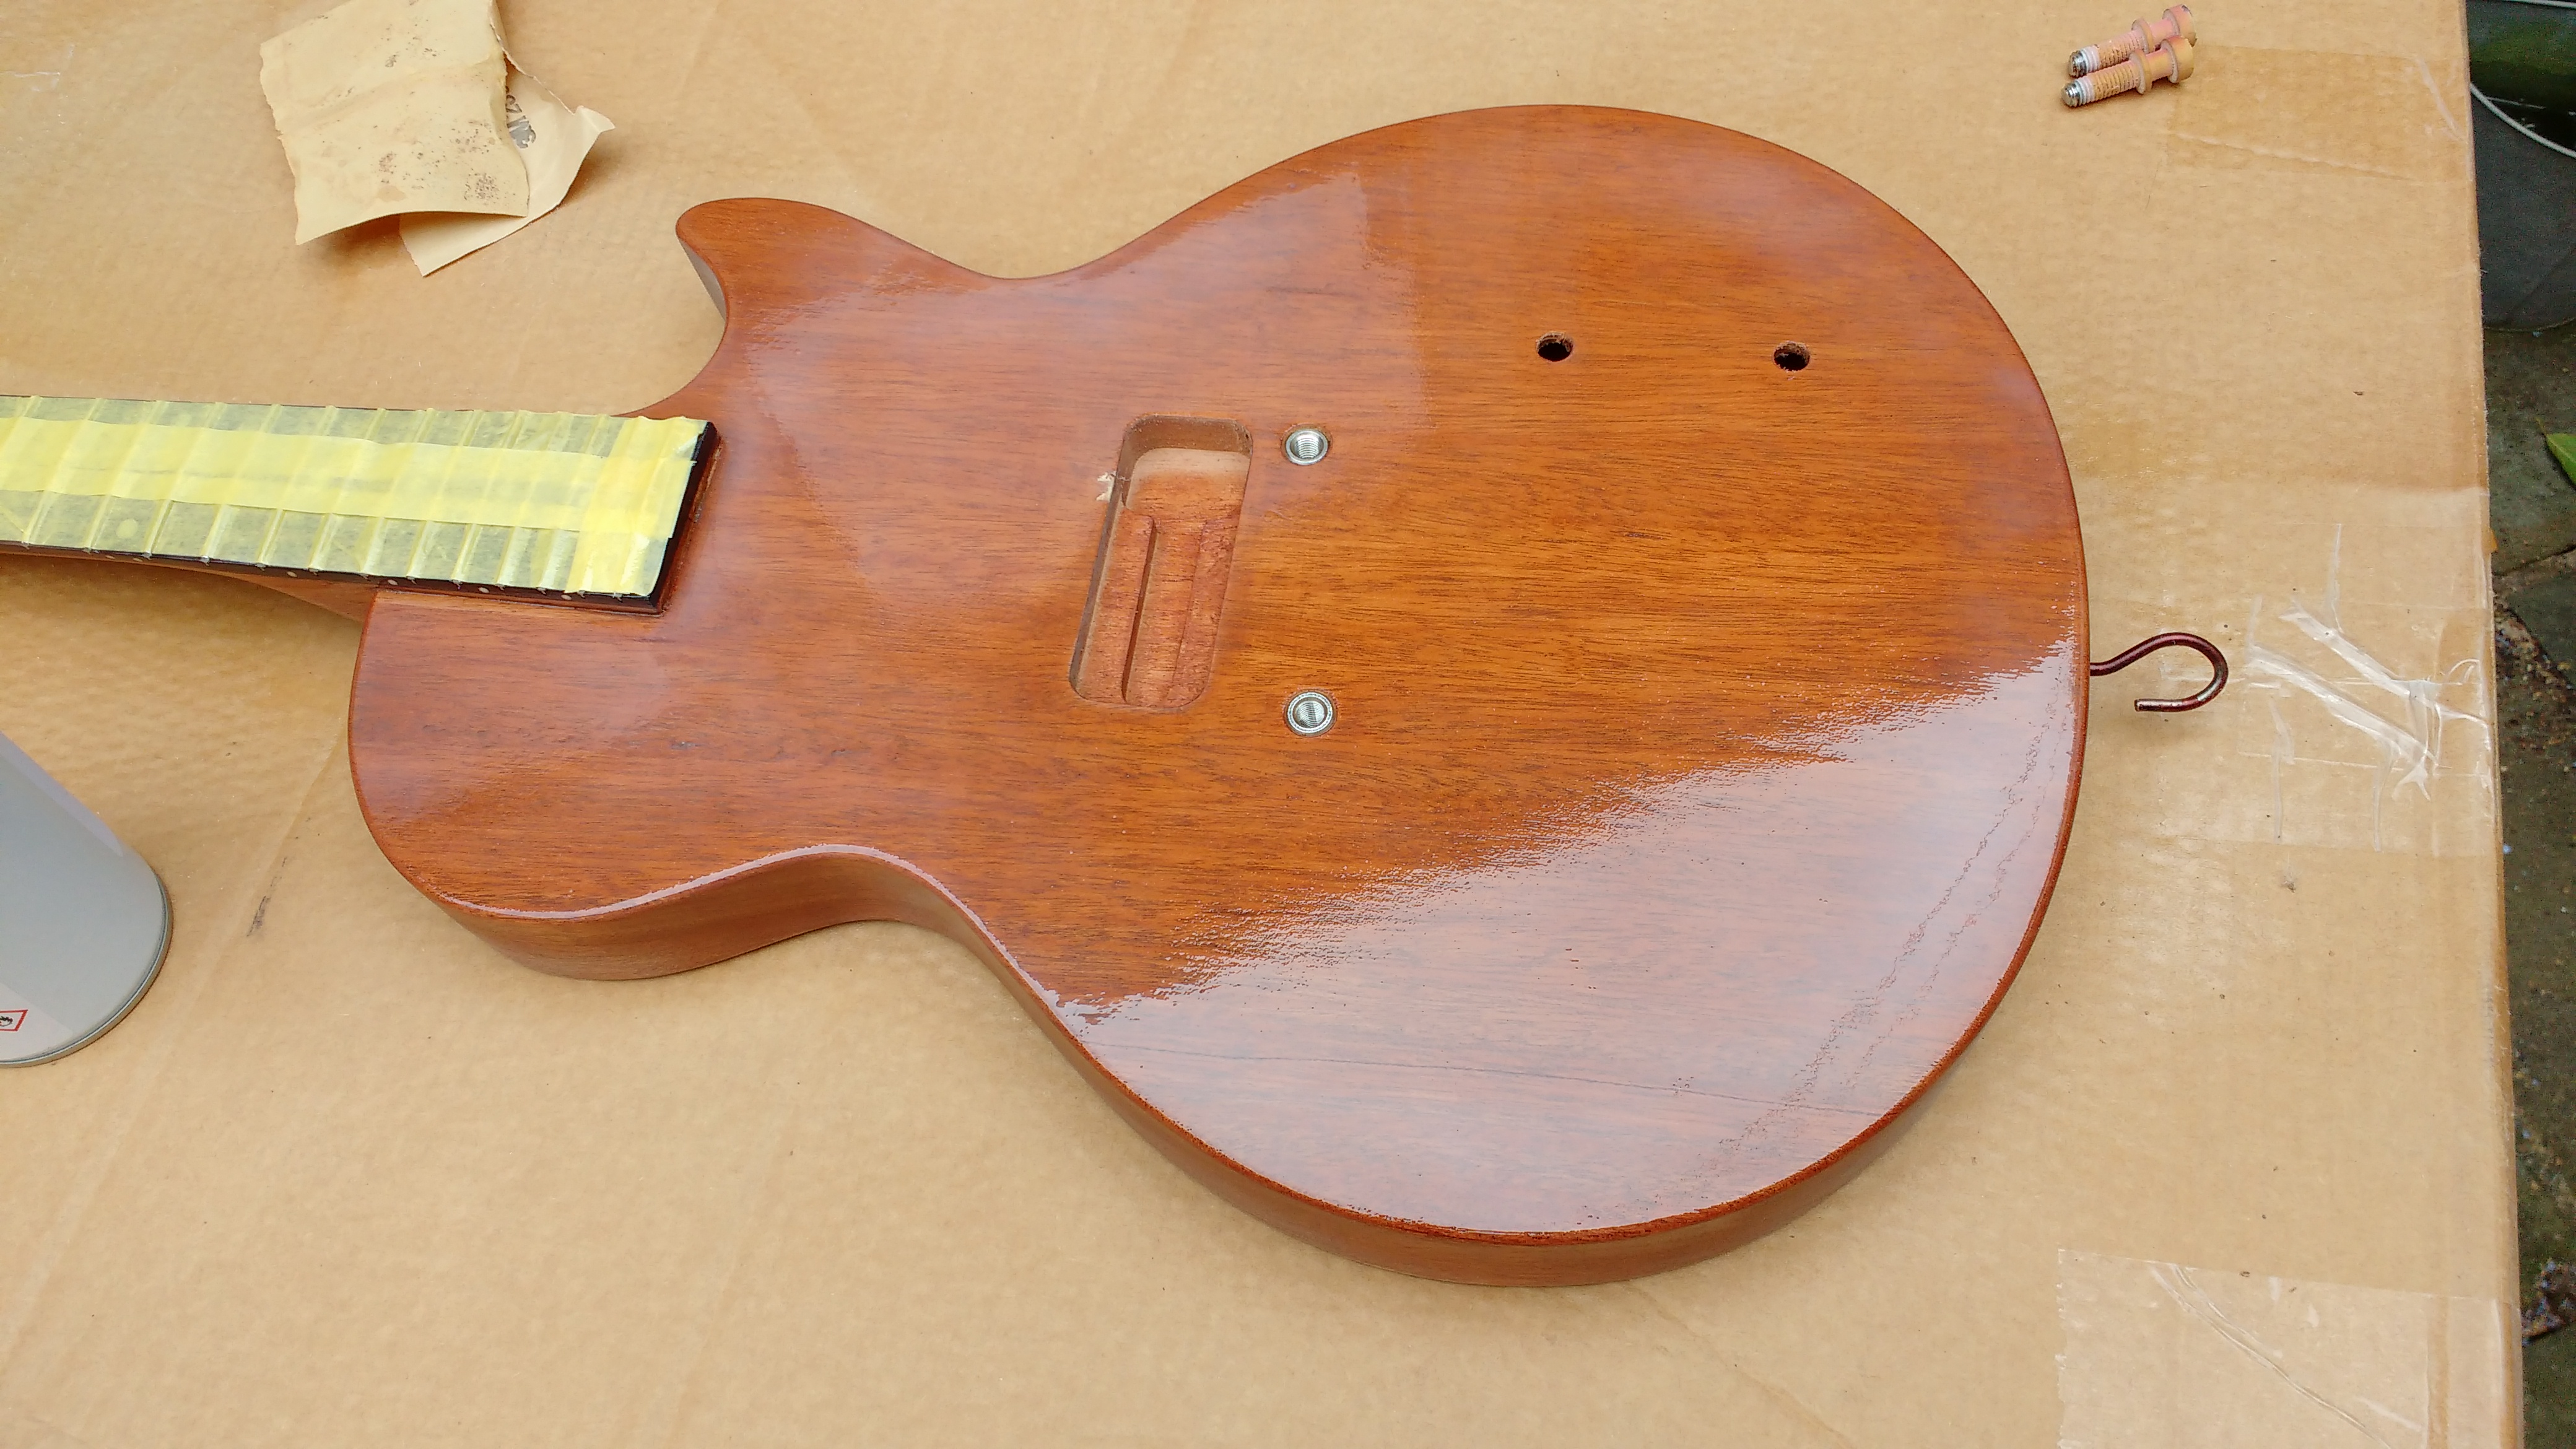
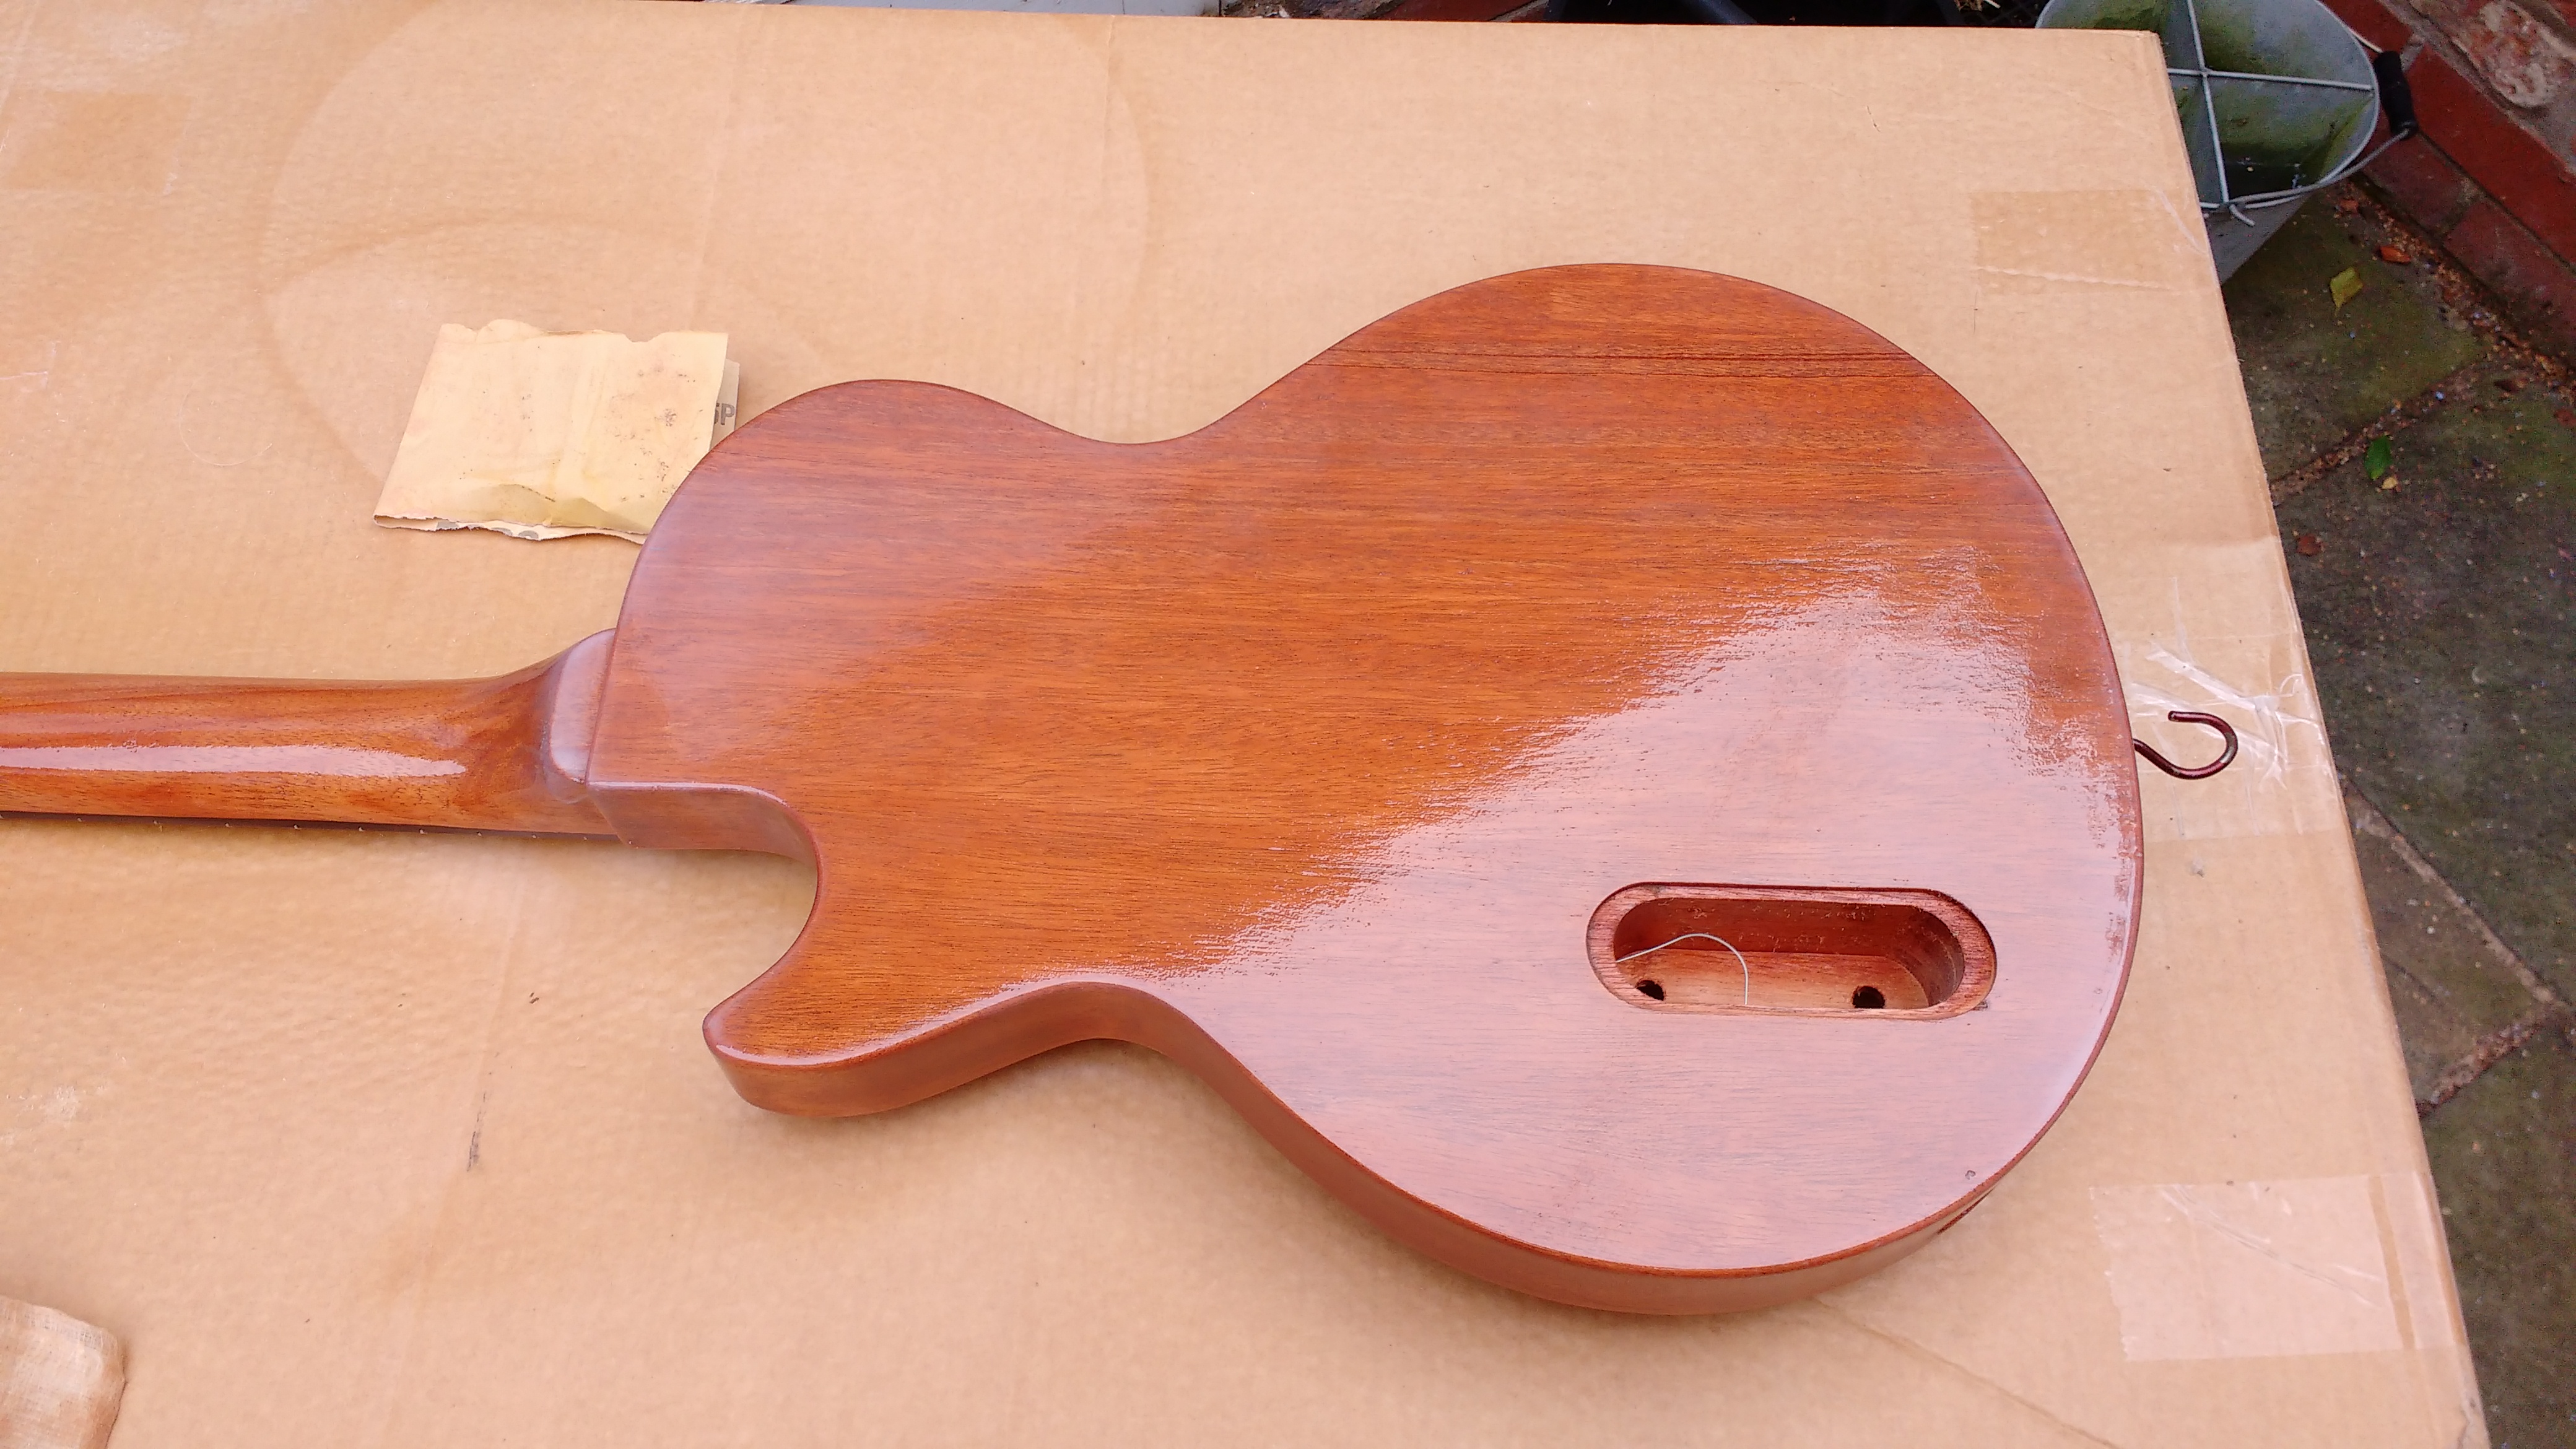
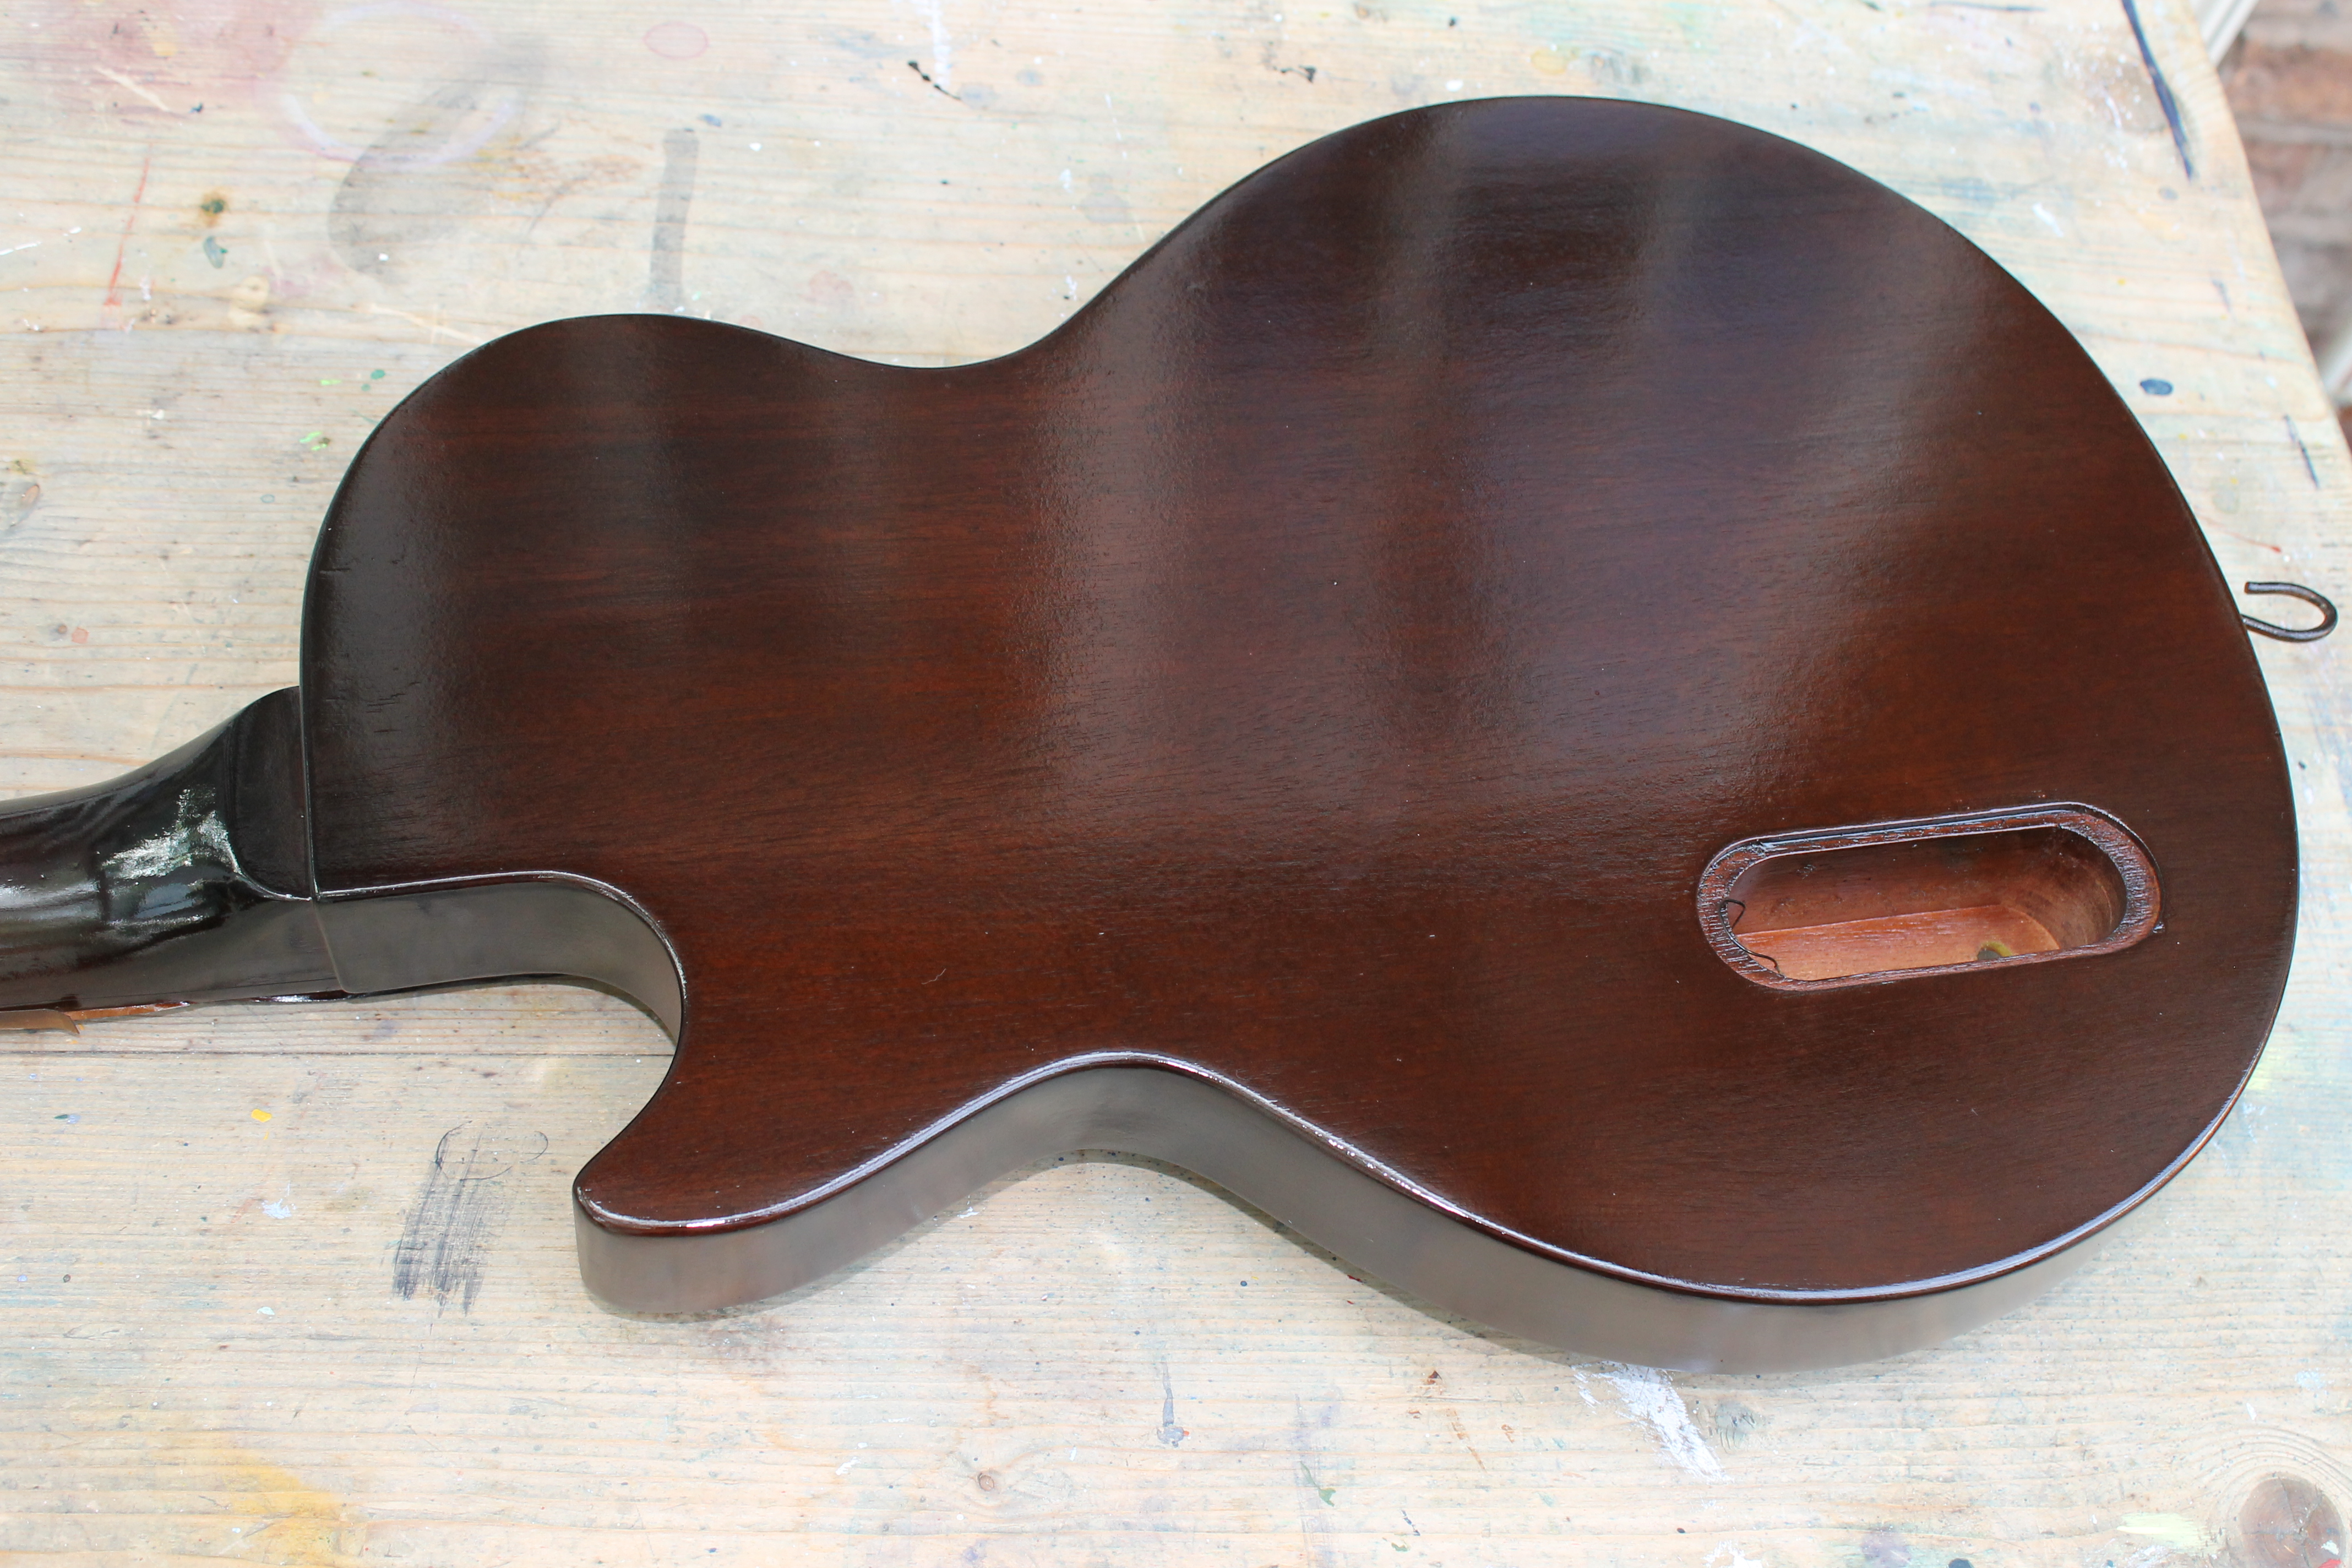
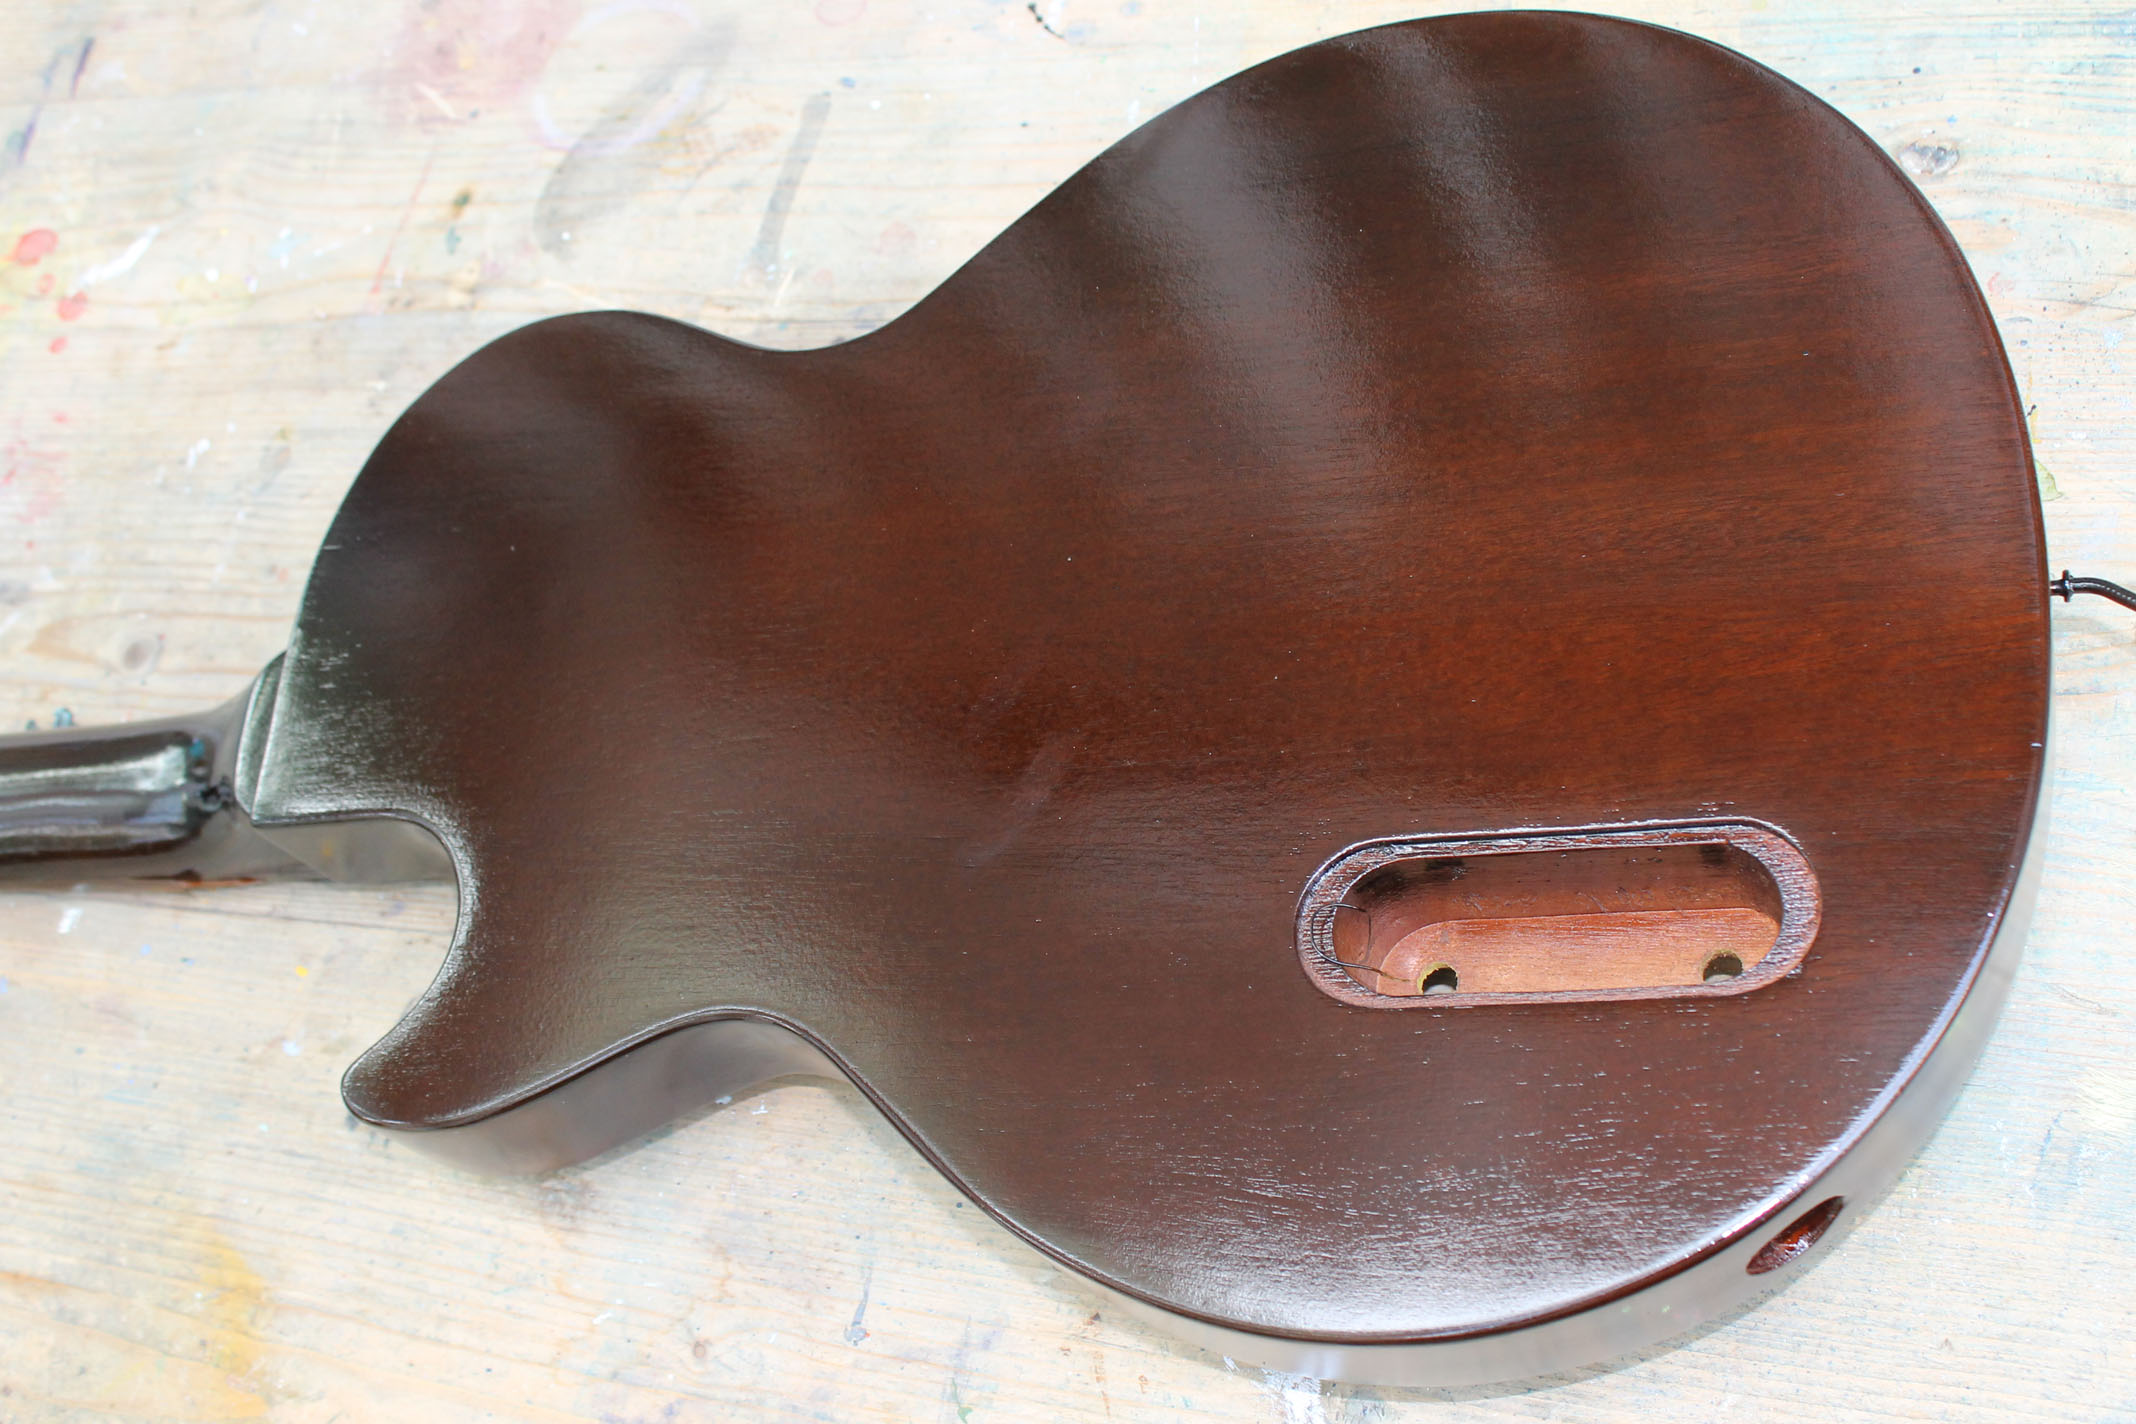
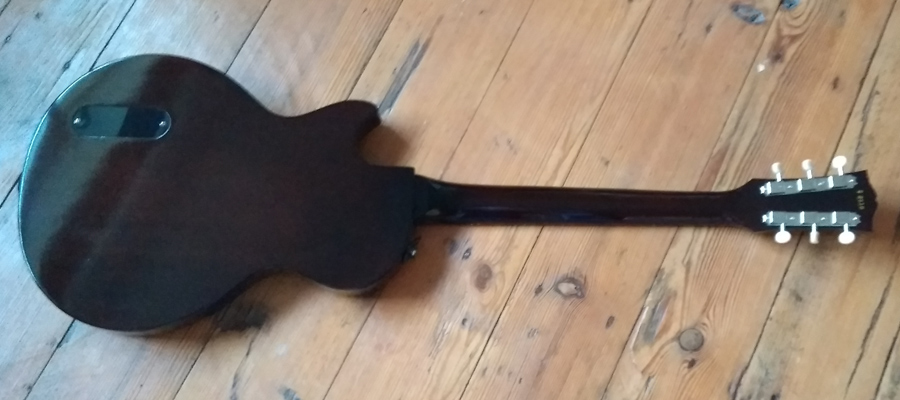
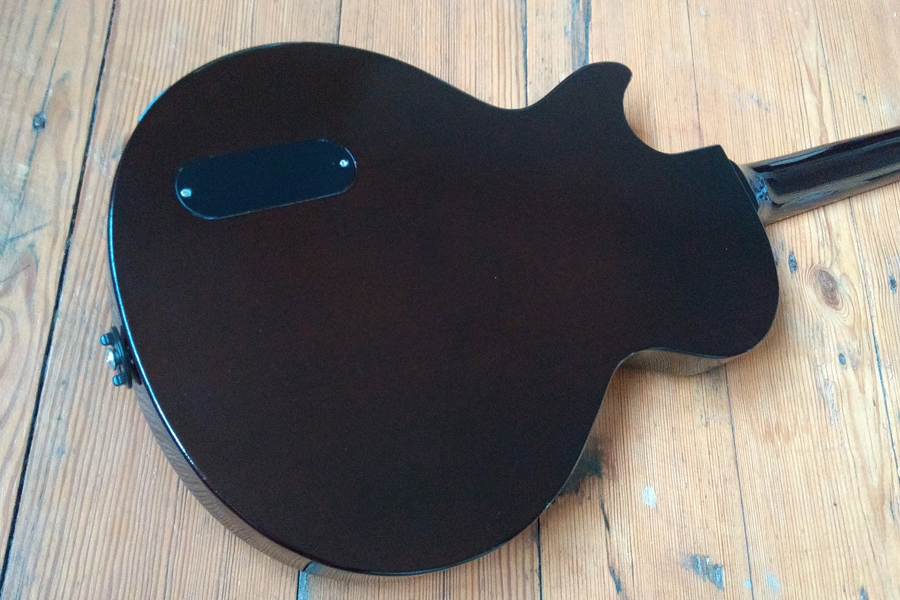
The back and sides of the body and the back of the neck are sprayed in a transparent brown. My Walnut Brown has been mixed to give a good match to the back of fifties Gibson guitars.
![]()
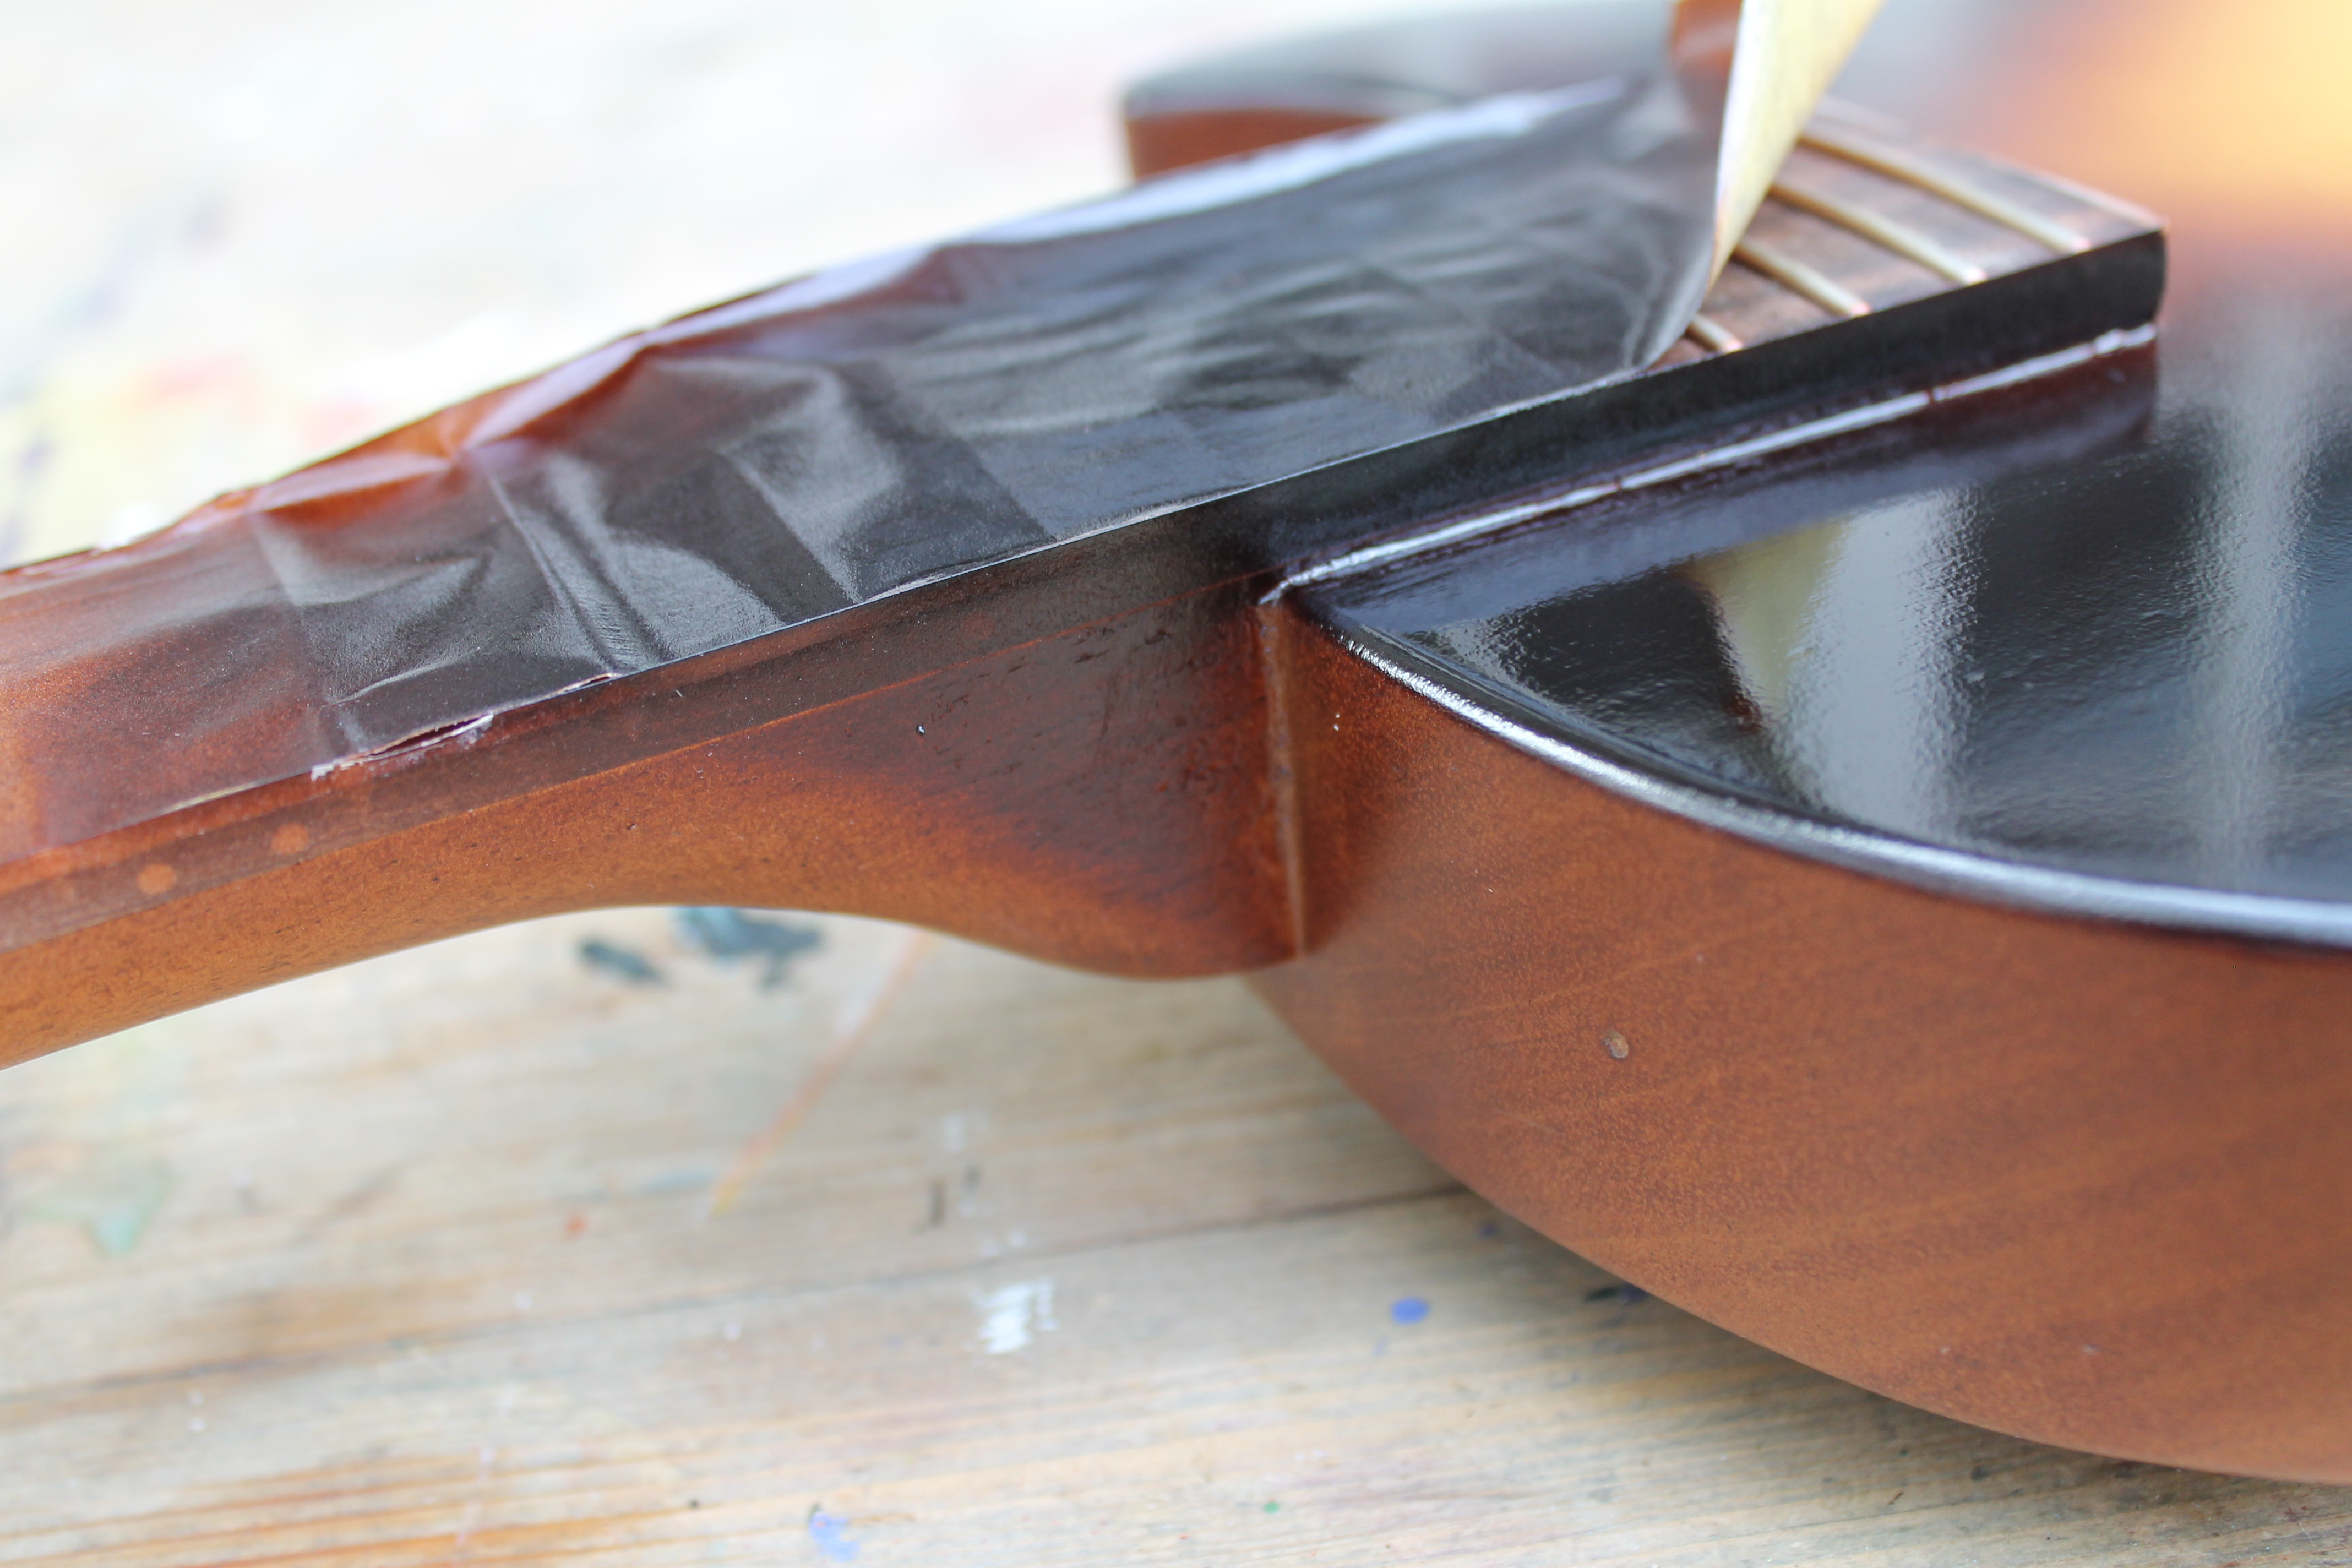
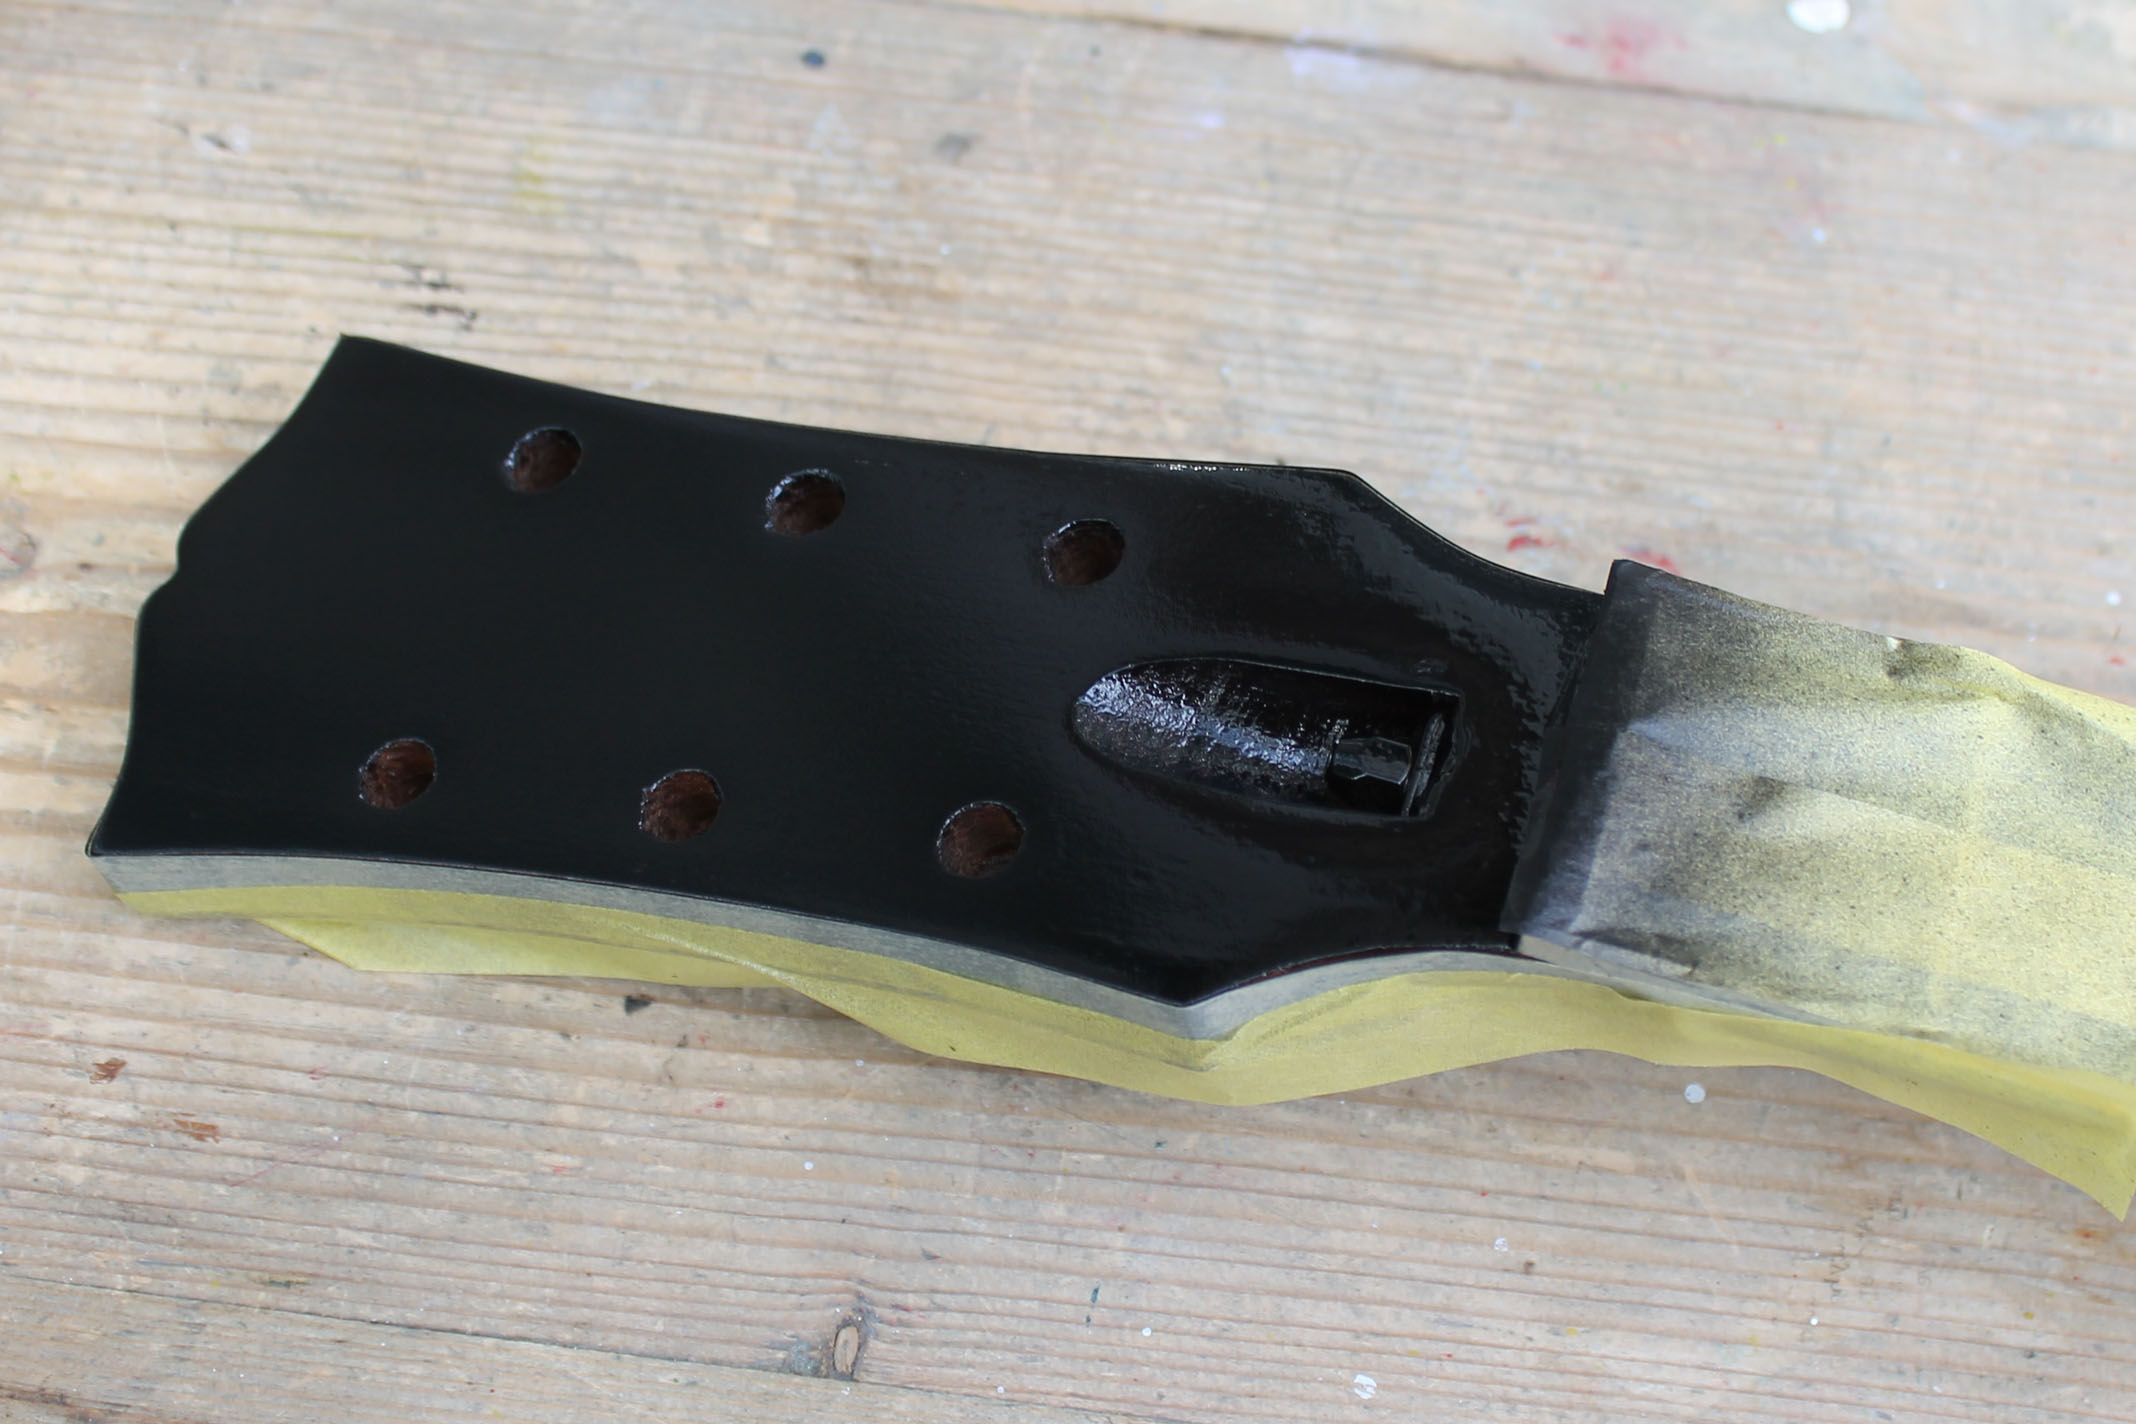
The next step is to blacken the peghead face. I close masked the edges of the headstock and sprayed a few heavy coats of black. Where the masking tape peeled away slightly I scraped the edge to a nice clean line.
The final step is clear coating. I’m using a Vintage Amber Tinted lacquer to replicate years of aging.
Still undecided whether to distress it or not.
How do I get your products in the USA.
What are the prices on dollars?
Do you have a US site.
Sorry but I can’t export lacquer.
https://manchesterguitartech.co.uk/nitrocellulose-lacquer/lacquer-faqs/#non-UK
What grit of Sandpaper are You Using in each Step? 00 steel wool? Do you wet down the wood between sandings to make the grain stand up? I’m going to use your filler. I’m going to try to Make it as Smooth as Silk before painting. I’m using a combo of cans and airbrush for the Brust. My Brust is 100% Black. It would Appear the entire guitar was finished in a nice Mahogany finish before the the burst. My head stock is black on both sides and faded into the neck. Thanks for your page. Your Work is Outstanding!
Thank you, you’re welcome. I sand to P320 grit before painting then dont sand at all until after the clear coats are on.
If your headstock is black on the back then I think it highly likely it’s suffered a break in the past which has been disguised with the black.
If have one all Screwed up. At Least I’m a Painter for the Last 35 years at Beechcraft. Thanks for this Post. Ima gonna follow along. You’ve solved all my Problems. THANK YOU!!!!!
I do not see the [img] on my mobile. Does it have to be done a computer?
Perhaps it does, I haven’t tried it on a phone
I do not see the editor on either.
You don’t see this?

Just wanted to thank you again for this tutorial. It helped me tremendously!
Here is a link to my post on Facebook about my Jr. finishing job. It’s not quite finished.
https://www.facebook.com/groups/951802571544715/permalink/3155510087840608/
Can I post a pic on here?
Yes please do, use the [img] button in the comment editor to insert a picture
Thank you so much for this! I think this is the only tutorial on net for this finish. Could you please tell me where you got the body and neck from?
Again thanks for sharing!
Cheers from the USA.
P.S. How the sunbursting video coming along?
.
The woodwork was done buy a guy in the UK who has since retired.
The sunbursting video is live here.
Hi Steve
Thanks for the link , that is exactly what I am looking for for my Gary Moore Melody Maker build and looks very much like the 60s photos I sent ,all out of rattle cans. Nice job ! After stripping ,sanding , grain filling ( I used Liberon Mahogany ) and sanding , the neck has turned out a paler colour than the mahogany body and quite patchy , which I suspect maybe korina that Gibson often used . The grain is pretty similar . I think I may try using some burnt umber with maybe a tiny bit of crimson water colour tint in the filler and redo the neck as I intend to sand the final lacquer down to a 300-400 finish to get rid of the sticky feel and want more grain showing through . Another problem is preserving the original Gibson logo on the headstock . I have no idea of the paint used on this reissue and it doesn’t smell like nitrocellulose when rubbing down . I’ll bet a pound to a pinch of salt laying a tinted lacquer over it , it’s going to pickle like crazy !
So it’s your bright yellow and ‘nut brown’ special !?
Cheers
Hi Steve,
Thanks for a great site. I want to replicate an early 60s sunburst on my Strat. They have the grain visible in the light area of the burst so which of your colours would you recommend for both parts of the burst?
Also, dark paint continues around the sides and fades to light again on the back. I’m thinking I’d hang the body to spray the initial light coat. Would this work for the dark fade coat too?
Thanks. The recipe is here in my Lacquer FAQs.
The yellow seems to be a very bright straight yellow and then once the brown is on it seems to have gone a more amber yellow color. How did you get the yellow to go amber like that? Or is it an illusion
It also has a fairly heavy coat of Light Tint lacquer over the top to replicate an aged and yellowed finish.
I would be really interested to hear more about your spraying technique. Are starting barely overlapping and far back to get a more subtle transition, with extra coats closer up to make the edges opaque? I’ve seen a lot of aerosol videos and the bursts just seem so abrupt and ‘banded’. I’m looking at bursting a dark tobacco over transparent amber, but was thinking a broader cherry burst endernesth would be a nice transition. Now I’m thinking this brown is maybe a simpler approach. Does the brown layer to fully opaque?
Yes the brown is opaque when sprayed thickly enough.
The sunburst is made with just a few close, fast passes of the aerosol. I use an MDF dummy body to practice the curves first!
It looks great, is that just 2 colours? The reddish fade is down to the thinner coats of the brown at the transitions?
I am trying to bring my first ever electric back to life and would like to try to recreate the original sunburst as best I can, is this something a patient and dedicated idiot could manage?
Yes just two colours. The brown has two components though which is why it looks red at the transition.
It’s not difficult if you take time and have patience but suggest you practice the sunburst on a piece of MDF or plywood first.
Hey there, could you explain a general step by step of your manual technique to spray that burst freehand using rattle cans? Did you use and masking at all?
I used no masking, I find it leaves a hard edge. I practice going round the curves on an MDF template first then spray the body freehand, up close.
When the weather’s better I’ll video a sunbursting demo on a guitar body I have here.
Here’s a sunbursting demo with video https://www.manchesterguitartech.co.uk/2019/07/19/spraying-a-sunburst-stratocaster-body/
Hi Steve
Did you manage that fantastic finish with just aerosols?
Thanks, pretty much yes. I did spray the final clear coats using a compressor and spray gun because it’s faster but the burst on the front is 100% aerosols.
Could you possibly give me the name of the paints you used for the yellow part of the sunburst and the outside of the sunburst. Thanks as I’m making one myself
The centre is Bright Yellow and the edge is my Nut Brown.
thank you sooo much its great to find a place with everything straight away. i will be buying the paint in the next few months as im buying the gears for music jr guitar kit. im trying to replicate billie joe armstrong from green days guitar. i was wondering if you knew and had the colour for the back of the jr. its kind of dark reddish but its also a little light. thanks
Yes of course. The back, sides and neck is finished in my Clear Medium Brown lacquer. You can spray as light or dark as you wish, the colour gets darker the more coats you add.