
Manchester Guitar Tech
Building a SAGA TC-10 Part 7 – Final assembly

Fit the string guide
String the guitar. Place the string guide over the b and e strings and find a suitable place for its placement on the headstock. Drill a small pilot hole and then screw the string guide down.

Cut the nut slots
You should lower the nut slots until there is just a small gap between each string and the first fret when it is fretted at the third fret. I am using special nut files here. It is possible to use needle files but it is a much harder job and I recommend you borrow a set of files.

Adjust the truss rod
Check the neck relief. With the strings tuned and at normal tension here should be a slight curve in the neck so that if you hold the g string down at the 1st and 15th frets there should be a slight gap between the string and the 7th fret. If there is no gap then the neck is either straight or back-bowed and you should reduce the tension on the truss rod. If there is a gap larger than 0.5mm you should tighten the truss rod slightly. Be careful as it is possible to overtighten and snap a truss rod. If it seems unduly stiff, stop adjusting. Adjust by only 1/4 to 1/2 a turn at a time before allowing the neck to settle.
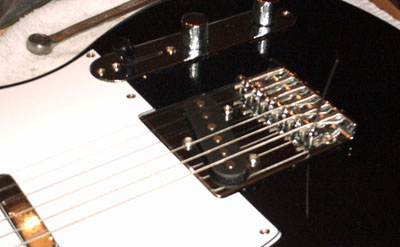
Adjust the string height
Adjust the string height by raising or lowering the saddle pieces using an allen key. Get the strings as low as possible without “buzzing”.
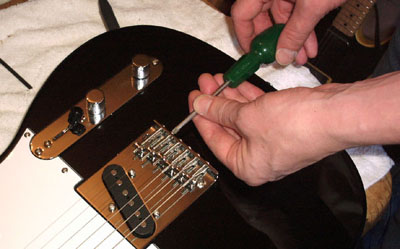
Set the intonation
Adjust the intonation by moving the bridge saddles back or forwards until the pitch of each string at the 12th fret is the same as the harmonic at the 12th fret. If the fretted note is higher than the harmonic, you need to move the saddle backwards (away from the neck) and if the fretted note is lower than the harmonic, screw the saddle towards the neck.
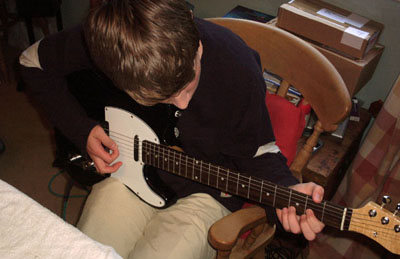
Recheck and PLAY!
Finally, retune your guitar, recheck the action and intonation, then enjoy!.
Thanks Steve. I just got a Saga P Bass kit without instructions. Found your site instead of instructions when searching and your information was more than adequate! No need to solder or drill pilot holes on this kit ( other than pickup mounting). Also found that a bass string worked perfectly well routing out the debris in the bridge ground wire channel. And if I ever get around to painting it I know where to come back for great info! Cheers from the US — van.
Hi Steve, I love the blog, very informative. I really would like to build my own design guitars but feel the costs could really spiral out of control! The finishing seems like the main barrier to my enthusiasm, I can get bodies and necks made, I’ve assembled many a pickguard and chnaged pickups etc etc However getting a finish on the guitar body looking ‘pro’, like one I would wish to buy myself, I’m totally not sure I could do that! Around the house my wife always complains about my decorating skills :)
Hi Mark! Just like when decorating, where you need to fill cracks and sand the woodwork, success with guitar finishing is mostly down to preparation. I’m featuring a series of how-tos on the blog, starting with grain-filling, which should take you through the process of finishing a butterscotch Telecaster.